how to keep house pdf
Category : PDF
Housekeeping is the art of maintaining a clean, organized, and comfortable living space.
It involves creating a routine with daily, weekly, and monthly tasks, using checklists and planners to stay organized.
A well-kept home enhances health, productivity, and overall well-being.
- Daily tasks include quick pick-ups and surface cleaning.
- Weekly tasks focus on deeper cleaning of kitchens, bathrooms, and floors.
- Monthly tasks involve thorough cleaning of appliances and storage areas.
Housekeeping also promotes safety and efficiency, ensuring a stress-free environment for everyone.
Why Housekeeping is Important
Housekeeping is essential for maintaining a clean, safe, and comfortable living environment.
Regular cleaning prevents the buildup of dirt, dust, and germs, reducing health risks and creating a hygienic space for everyone.
It also improves mental clarity and reduces stress by eliminating clutter and chaos.
A well-organized home promotes productivity and efficiency, making daily tasks easier to manage.
Additionally, good housekeeping practices prevent pests, extends the life of belongings, and maintains property value;
By establishing a routine, individuals can ensure their home remains a welcoming and functional space.
Ultimately, housekeeping contributes to overall well-being and quality of life.
Benefits of a Clean Home
A clean home offers numerous benefits, enhancing overall quality of life.
It reduces stress and anxiety by creating a calm and organized environment.
A tidy space promotes better health by minimizing dust, allergens, and germs.
Regular cleaning helps prevent pests and unpleasant odors, ensuring a fresh atmosphere.
It also improves productivity, as clutter-free spaces allow for better focus and efficiency.
A well-maintained home fosters self-esteem and pride, making it a welcoming place for family and guests.

Additionally, a clean home saves time in the long run by reducing the need for deep cleaning.
Overall, a clean home contributes to physical, mental, and emotional well-being.
Getting Started with Housekeeping
Starting a housekeeping routine begins with setting clear goals and priorities.
Assess your space to identify high-traffic areas needing frequent attention.
Create a realistic schedule, breaking tasks into daily, weekly, and monthly chores.
Gather essential cleaning tools and eco-friendly products to ensure efficiency.
Decluttering is the first step, as it simplifies cleaning and reduces stress.
Begin with small tasks to build momentum and confidence in your routine.
Using checklists or planners can help track progress and stay organized.
Remember, consistency is key to maintaining a clean and comfortable home.

Daily Cleaning Tasks
Daily cleaning involves quick pick-ups and essential chores to maintain a tidy home.
Focus on wiping surfaces, sweeping floors, and sanitizing high-touch areas.
Morning and evening routines ensure messes are managed before they build up.
Morning Routine: Quick Pick-Up
A morning quick pick-up is essential for maintaining a tidy home throughout the day.
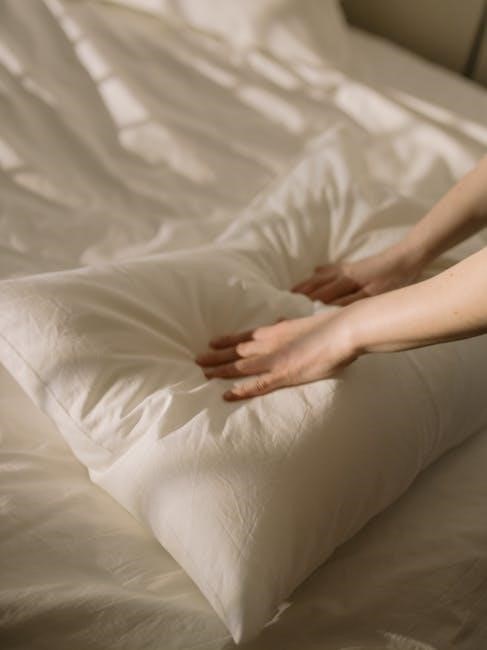
Start by making beds immediately after waking up to create a sense of order.
Put away any clutter, such as clothes or toys, and wipe down kitchen counters.
Take a few minutes to sweep or vacuum high-traffic areas to prevent dust and dirt buildup.
Sanitize frequently touched surfaces, like doorknobs and light switches, to keep your home hygienic.
Consistency is key; a quick morning routine prevents messes from piling up and sets a positive tone for the day.
Evening Routine: Winding Down
An evening routine helps maintain order and sets a calm tone for the next day.
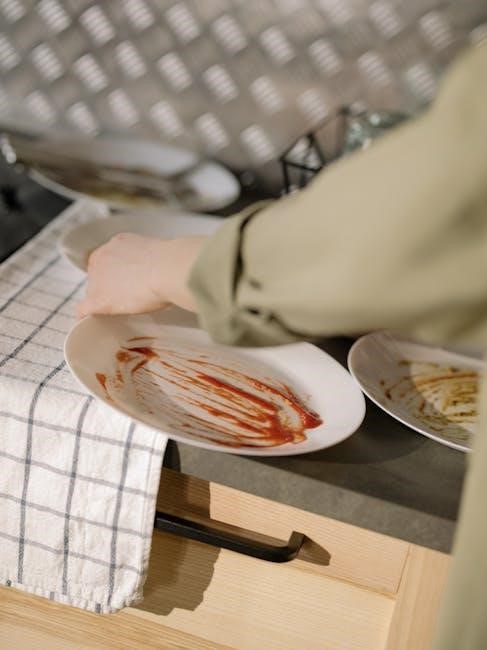
Start by cleaning up after dinner—wash dishes, wipe down surfaces, and store leftovers.
Take a few minutes to tidy up living areas, putting away items that are out of place.
Quickly vacuum or sweep high-traffic zones to keep floors clean.
Sanitize frequently touched surfaces, like sinks and faucets, to maintain hygiene.
Prepare for tomorrow by laying out clothes or packing bags.
End with a relaxing moment, such as dimming lights or playing soothing music, to unwind.
A consistent evening routine ensures a peaceful and organized home.
Kitchen Daily Cleaning Tips
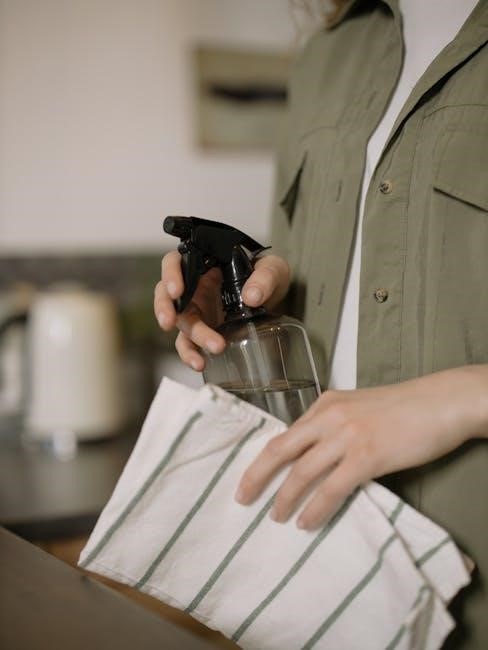
Daily kitchen cleaning is essential for maintaining hygiene and efficiency.
Start by wiping down all countertops, the stove, and sink after meals.
Sanitize faucet handles and clean any spills immediately to prevent stains.
Throw away expired or spoiled food and store leftovers properly.
Wipe down kitchen appliances, such as the refrigerator and microwave, to remove fingerprints and splatters.
Empty the trash and recycling bins daily to keep odors at bay.
Quickly mop the floor to remove crumbs and spills, and clean dishcloths regularly.
Keeping the kitchen tidy each day prevents clutter and makes cooking easier.
Bathroom Daily Maintenance
Daily bathroom maintenance is crucial for hygiene and comfort.
Start by wiping down the sink, faucet, and mirror after use.
Quickly clean the toilet seat, handle, and lid with a disinfectant wipe.
Ensure the shower and bathtub are free of soap scum and water spots.
Wipe bathroom trash cans and replace liners if needed.
Check and restock toilet paper and soap supplies.
Open windows or use an exhaust fan to reduce moisture and prevent mold growth.
A daily routine keeps the bathroom fresh and prevents the buildup of grime.
Living Room and Common Areas
Maintaining the living room and common areas ensures a welcoming and comfortable environment for everyone.
Start with a daily tidy by picking up clutter, straightening cushions, and organizing remote controls.
Dust surfaces like coffee tables, shelves, and electronics with a microfiber cloth.
Vacuum or sweep high-traffic areas to keep floors clean and free of debris.
Wipe down surfaces with a damp cloth, especially after meals or gatherings.
Open curtains or blinds to let natural light in and refresh the space.
Spot clean stains on furniture or carpets immediately to prevent them from setting in.
Encourage family members to put away items after use to maintain order.
A consistent routine keeps these areas looking their best and fosters a relaxing atmosphere.
Weekly Cleaning Schedule
A weekly cleaning schedule helps maintain a clean home by organizing tasks like vacuuming, mopping, dusting, and changing linens.
- Vacuum and mop all floors.
- Dust furniture and surfaces.
- Change and wash bed linens.
- Deep clean bathrooms and kitchens.
Weekly Kitchen Cleaning Checklist
A weekly kitchen cleaning checklist ensures the space remains hygienic and functional.
- Throw away expired or spoiled food from the fridge and pantry.
- Wipe down countertops, stove, and hood to remove grease and splatters.
- Scrub the sink and faucet until they shine.
- Wipe all small and large appliances, including the refrigerator and dishwasher.
- Clean the microwave and oven, removing food residue.
- Vacuum and mop the floor to eliminate crumbs and spills.
- Declutter and organize kitchen cabinets and drawers.
- Wash dishcloths and replace them with clean ones.
- Check and clean the garbage and recycling bins.
Consistency is key to maintaining a clean and efficient kitchen environment.
Bathroom Deep Clean
A bathroom deep clean involves thorough sanitization and organization to maintain hygiene and comfort.
- Scrub the shower, bathtub, and tiles with a strong cleaner to remove soap scum and mildew.
- Use a grout brush to clean between tiles and reseal if necessary.
- Wipe down mirrors and windows until streak-free.
- Deep clean the toilet, including the seat, handle, and inside the bowl.
- Sanitize the sink, countertops, and faucet.
- Organize bathroom cabinets and drawers, discarding expired products.
- Clean or replace the shower curtain and bath mat.
- Disinfect door handles and light switches.
- Check and clean the bathroom trash can.
Regular deep cleaning ensures a fresh, hygienic bathroom environment.
Vacuuming and Mopping Floors
Vacuuming and mopping are essential for maintaining clean and hygienic floors.
- Vacuum high-traffic areas daily to prevent dirt buildup.
- Use the correct vacuum setting for different floor types, such as carpets, rugs, or hardwood.
- Mop hard floors weekly with a gentle cleaner to avoid scratches.
- Dry floors immediately after mopping to prevent slipping and water spots.
- Deep clean grout lines monthly for a fresh look.
- Regularly clean or replace vacuum filters for better performance.
- Spot clean spills immediately to prevent stains.
- Use microfiber mops for effective dirt and dust removal.
Consistent vacuuming and mopping keep floors clean and extend their lifespan.
Dusting and Polishing Surfaces
Dusting and polishing are crucial for maintaining a clean and shiny home.
- Dust surfaces with a microfiber cloth to trap dust effectively.
- Focus on furniture, shelves, and electronics weekly.
- Use eco-friendly polishes for wood, metal, and glass surfaces.
- Polish mirrors and windows for a streak-free finish.
- Dust ceiling fans and light fixtures monthly.
- Test polishing products on a small area first.
- Use clean, lint-free cloths to avoid streaks.
- Dust from top to bottom to prevent dust from resettling.
Regular dusting and polishing keep surfaces clean and extend their lifespan.
Changing Bed Linens
Changing bed linens is a simple yet essential task for maintaining hygiene and comfort.
- Replace sheets, pillowcases, and comforter covers weekly or every 10 days.
- Use fresh, clean linens stored in a dry place.
- Wash bedding in hot water to kill germs and dust mites.
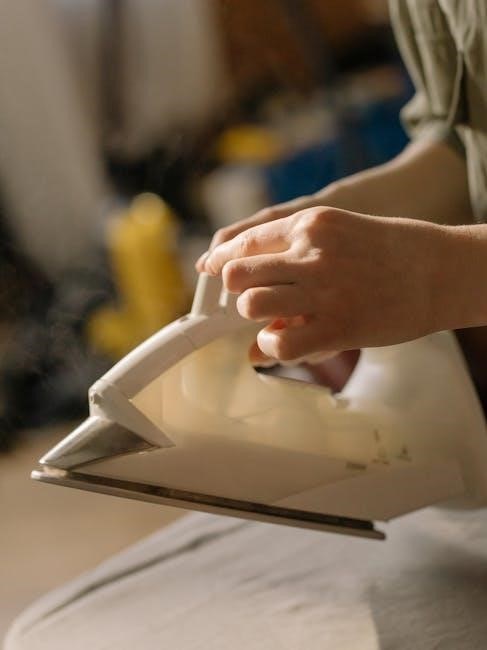
- Iron linens for a crisp, clean look.
- Rotate mattresses and flip pillow tops monthly.
- Consider seasonal fabrics for comfort.
- Keep spare sets handy for quick changes.
Regular linen changes promote better sleep and a cleaner home environment.
Monthly Cleaning Tasks
Monthly cleaning involves deeper tasks like cleaning the refrigerator, oven, and windows.
- Clean refrigerator shelves and throw away expired food.
- Deep clean the oven and stove.
- Wipe window panes and sills.
- Organize cabinets and drawers.
- Clean carpets and upholstered furniture.
- Inspect and clean outdoor areas.
These tasks ensure a thorough and maintained living environment.
Refrigerator and Oven Cleaning
Monthly deep cleaning of the refrigerator and oven is essential for maintaining hygiene and efficiency.
Remove all contents from the refrigerator, discard expired items, and wipe shelves and walls with a mixture of soap and water.
Check expiration dates and reorganize food storage to prevent clutter.
For the oven, remove racks and soak them in hot soapy water.
Scrape off food residue using a scraper or brush, then wipe down surfaces with eco-friendly cleaners.
Clean the oven door and window for better visibility.
Regular cleaning prevents grime buildup and ensures appliances function optimally.
Don’t forget to clean drip pans and exhaust fans for a thorough maintenance routine.
Window Cleaning Tips
Sparkling windows enhance your home’s appearance and natural light.
Use a microfiber cloth and a mixture of water and vinegar for streak-free cleaning.
Avoid paper towels, as they leave lint and streaks.
Clean window tracks and sills to prevent dust buildup.
Use a squeegee for large windows to remove excess water effectively.
Clean windows on a cloudy day to avoid streaks from drying too quickly.
For high windows, use a ladder or extension pole with a cleaning attachment.
Regular cleaning prevents grime and maintains clarity.
Don’t forget to clean window frames and blinds for a polished look.
Cleaning Out Cabinets and Drawers
Cleaning cabinets and drawers is essential for maintaining organization and reducing clutter.
Start by removing all items, then wipe surfaces with a damp cloth and eco-friendly cleaner.
Sort items into categories: keep, donate, or discard.
Return only what is necessary, using dividers or baskets for better organization.
Prevent future clutter by scheduling regular clean-outs and using storage solutions.
Label contents for easy access and ensure everything has a designated place.
Regular maintenance keeps spaces functional and stress-free.
Carpet and Upholstery Maintenance
Regular maintenance of carpets and upholstery is crucial for extending their lifespan and keeping them clean.
Vacuum carpets weekly, focusing on high-traffic areas, and treat stains immediately to prevent deep penetration.
For upholstery, spot clean spills with eco-friendly cleaners and avoid over-saturating fabrics.
Consider deep cleaning carpets and upholstered furniture annually using professional services or rental equipment.
Use fabric protectants to repel stains and make future cleaning easier.
Rotate furniture and rugs to ensure even wear and prevent permanent indentations.
These practices help maintain a fresh, clean, and comfortable home environment.
Outdoor and Garage Cleaning
Outdoor and garage areas require regular attention to maintain cleanliness and functionality.
Start by decluttering the garage, organizing tools, and storing items in labeled containers.
Sweep the floor, remove cobwebs, and hose down surfaces to keep the area tidy.
For outdoor spaces, clean patio furniture, rinse cushions, and remove leaves or debris from walkways.
Pressure-wash driveways and sidewalks annually to remove stains and dirt buildup.
Seasonal tasks include preparing gardens, cleaning grills, and storing winter equipment properly.
Use eco-friendly cleaning products to protect the environment while maintaining your outdoor spaces.
Regular maintenance ensures a safe, organized, and enjoyable outdoor and garage environment.

Seasonal Cleaning
Seasonal cleaning involves tailored tasks for each time of year, focusing on decluttering, deep cleaning, and organizing to maintain a fresh and orderly home.
Spring Cleaning Checklist
Spring cleaning is a great opportunity to refresh your home after winter.
- Declutter and organize closets, donating unused items.
- Deep clean carpets, upholstery, and windows.
- Dusting and polishing all surfaces, including furniture and fixtures.
- Clear out and clean storage areas like attics and basements.
- Power wash decks, patios, and siding.
- Check and clean gutters and downspouts.
- Organize garages and sheds, ensuring everything has a place.
- Inspect and clean HVAC systems for better airflow.
- Bring in natural light by cleaning window treatments.
Spring cleaning helps create a fresh, welcoming environment for the new season.
Summer Cleaning Tips
Summer is the perfect time to refresh and maintain your home.
- Focus on cooling systems: clean AC filters and vents for better airflow.
- Organize outdoor spaces: clean patios, decks, and outdoor furniture.
- Wash window treatments: blinds, curtains, and screens to let in natural light.
- Inspect gutters and downspouts to ensure proper water flow.
- Use eco-friendly cleaning products to maintain a healthy environment.
- Sanitize high-touch areas like door handles and light switches.
- Maintain your grill and outdoor kitchen for summer gatherings.
- Keep pests under control with regular cleaning and sealing entry points.
Summer cleaning helps create a cool, inviting, and pest-free home.
Fall Cleaning Tasks
Fall is a great time to prepare your home for the colder months ahead.
- Clean gutters and downspouts to ensure proper water flow during rainy seasons.
- Inspect and repair roofs, checking for damaged or missing shingles.
- Rake leaves and maintain yard cleanliness to prevent mold and pests.
- Prepare gardens by trimming plants and storing summer furniture.
- Clean fireplaces and chimneys to ensure safety for winter use.
- Deep clean carpets and upholstery to remove dust and allergens.
- Organize closets and donate unused summer clothes.
- Store seasonal items like pool equipment and outdoor toys.
Fall cleaning helps create a cozy and safe home for the upcoming winter.
Winter Cleaning and Maintenance
Winter cleaning focuses on preparing your home for colder months and maintaining warmth and safety.
- Inspect gutters for ice dams and ensure proper drainage.
- Seal drafts and insulate windows to reduce heat loss.
- Maintain heating systems by changing filters and scheduling professional inspections.
- Clean fireplaces and chimneys before heavy use.
- Shovel snow promptly and use eco-friendly ice melt to protect walkways.
- Organize winter gear like coats, boots, and gloves in accessible storage.
Regular winter maintenance ensures a cozy, safe, and energy-efficient home during the cold season.
Deep Cleaning Projects
Deep cleaning involves tackling large areas like basements, attics, and garages.
- Organize and declutter spaces to enhance functionality.
- Deep clean garages and storage areas for better accessibility.
- Maintain yards and patios for year-round appeal.
These projects ensure a thorough and lasting clean, improving your home’s overall condition.
Basement and Attic Organization
Organizing your basement and attic is essential for maximizing space and reducing clutter.
Start by sorting items into categories: keep, donate, sell, or discard.
Use sturdy storage containers and labels for easy access and visibility.
- Install shelving or racks to store seasonal items and tools.
- Ensure proper ventilation to prevent moisture buildup.
- Check for pests or damage and address issues promptly.
Regularly review stored items to maintain order and functionality.
Schedule annual clean-outs to keep these areas tidy and organized.
Garage and Storage Areas
A clean and organized garage and storage areas enhance functionality and safety.
Start by sorting items into categories: tools, seasonal items, and miscellaneous goods.
Use shelves, bins, and hooks to maximize vertical space and keep items off the floor.
- Label all containers for easy access and visibility.
- Install a pegboard for tools and accessories.
- Consider a slatwall for hanging bicycles or equipment.
Regularly inspect for pests or damage and address promptly.
Schedule seasonal clean-outs to maintain order and ensure everything remains accessible.
Yard and Patio Maintenance
Maintaining your yard and patio is essential for curb appeal and outdoor enjoyment.
Regularly mow, trim, and water grass to keep it healthy and neat.
Seasonal clean-ups, including leaf removal and pruning, ensure a well-manicured look.
- Sweep patios and decks to remove dirt and debris.
- Organize outdoor furniture and storage containers.
- Inspect and clean grills, fire pits, and other outdoor features.
Use eco-friendly products for plant care and pest control.
Regular inspections can prevent damage from pests or weather conditions.
A maintained yard and patio create a welcoming space for relaxation and entertaining.

Safety and Efficiency in Housekeeping
Safety and efficiency are key to effective housekeeping.
Use eco-friendly cleaning products and ensure proper ventilation.
Organize tasks to avoid accidents and save time.
Follow safety guidelines to prevent injuries and maintain order.
Housekeeping Safety Tips
Housekeeping safety is crucial to prevent accidents and ensure a secure environment.
Always wear gloves when handling harsh chemicals or sharp objects.
Keep cleaning products out of children’s reach and store them properly.
Avoid overreaching or standing on unstable surfaces while cleaning.
Ensure good ventilation to prevent inhaling strong fumes.
Use non-slip mats in bathrooms and kitchens to reduce fall risks.
Keep emergency contact numbers nearby and have a first aid kit accessible.
Prevent electrical hazards by avoiding water near plugged-in devices.
Regularly inspect cleaning tools for damage to maintain safety.
By following these tips, you can create a safer and more efficient cleaning routine.
Using Eco-Friendly Cleaning Products
Eco-friendly cleaning products are essential for a safer and more sustainable home environment.
- Opt for biodegradable cleaners to reduce environmental impact.
- Choose products with natural ingredients to avoid harsh chemicals.
- Look for certifications like EPA Safer Choice for trusted options.
- Consider homemade solutions using vinegar and baking soda.
These choices promote health and reduce ecological footprint.
Time Management for Cleaning
Effective time management is key to maintaining a clean home without feeling overwhelmed.
- Create a schedule with daily, weekly, and monthly tasks to stay organized.
- Prioritize high-traffic areas and focus on visible spaces first.
- Break tasks into shorter sessions for better efficiency and less stress.
- Use checklists to track progress and ensure no task is missed.
- Allocate specific times for deep cleaning projects to avoid last-minute rushes.
By managing time wisely, cleaning becomes a manageable and sustainable routine.

Housekeeping Checklists and Planners
Housekeeping checklists and planners are essential tools for organizing cleaning tasks and maintaining a tidy home.
- They cover daily, weekly, and deep cleaning schedules.
- Printable PDFs and downloadable planners are widely available online.
- These tools help track progress and ensure no task is overlooked.
- Customizable options suit various lifestyles and preferences.
Using checklists and planners makes housekeeping more efficient and sustainable.
Creating a Cleaning Schedule
Creating a cleaning schedule is the first step to a well-organized home.
Start by listing tasks and assigning them to specific days or weeks.
Break tasks into categories: daily, weekly, and monthly chores.
Set realistic goals to avoid feeling overwhelmed.
- Daily tasks might include tidying up and wiping surfaces.
- Weekly tasks could involve vacuuming, mopping, and cleaning bathrooms.
- Monthly tasks may include deep cleaning appliances and organizing closets.
Use printable checklists or apps to track progress and stay consistent.
Adjust the schedule as needed to fit your lifestyle and preferences.
A well-planned schedule ensures your home remains clean and stress-free.
Printable Cleaning Checklists
Printable cleaning checklists are essential tools for maintaining a tidy and organized home.
They help break down tasks into manageable steps, ensuring no area is overlooked.
Available as PDFs, these checklists can be customized to suit your cleaning needs.
- Daily checklists might include tasks like wiping surfaces and tidying up.
- Weekly checklists could cover vacuuming, mopping, and bathroom cleaning.
- Monthly checklists often include deep cleaning tasks like oven cleaning and organizing closets.
Printable checklists are perfect for families or individuals looking to stay on track with their cleaning routine.
They can be laminated for reuse or downloaded for easy access on mobile devices.
Using these checklists ensures consistency and helps maintain a clean, stress-free home.
Downloadable Housekeeping Planners
Downloadable housekeeping planners are versatile tools designed to help you organize and manage your cleaning routines effectively.
These planners often include customizable calendars, task lists, and budgeting sections for cleaning supplies.
Available in PDF or digital formats, they can be easily accessed on mobile devices or printed for physical use.
- They allow you to schedule daily, weekly, and monthly tasks with reminders and checklists.
- Many planners also include sections for meal planning and grocery lists to streamline household management.
- Using a housekeeping planner helps reduce stress and ensures a consistent cleaning routine.
Whether you prefer a minimalist or detailed approach, these planners adapt to your lifestyle and preferences;

Additional Resources
Explore recommended cleaning tools, apps, and guides to enhance your housekeeping routine.
- Discover top-rated cleaning products for efficiency.
- Utilize apps for task management and organization;
- Find comprehensive guides for specialized cleaning tasks.
These resources help you maintain a clean and organized home effortlessly.
Recommended Cleaning Tools
Having the right cleaning tools is essential for effective housekeeping. Microfiber cloths are versatile for dusting and wiping surfaces, while vacuum cleaners with multiple attachments handle floors thoroughly. Mops with interchangeable heads are ideal for different floor types. Scrub brushes and sponges tackle tough stains in kitchens and bathrooms. Eco-friendly cleaning sprays and reusable scrubbers promote sustainability. Invest in a sturdy bucket, a reliable broom, and dustpan for daily sweeps. Multi-purpose cleaning products reduce clutter and simplify routines. A well-stocked cleaning caddy keeps essentials organized and portable. Quality tools make cleaning efficient and stress-free, ensuring your home stays spotless with minimal effort. Always choose durable and eco-conscious options for long-term benefits.
Housekeeping Apps and Software
Housekeeping apps and software are invaluable tools for maintaining a clean and organized home. Popular apps like Tody and ChoreMonster help create and manage cleaning schedules, set reminders, and track progress. These tools allow users to assign tasks, set deadlines, and monitor completion, making it easier to stay on top of daily and weekly routines. Many apps also offer customizable checklists, budgeting features for cleaning supplies, and tips for eco-friendly practices. By leveraging technology, housekeeping becomes more efficient and less overwhelming. These digital solutions are perfect for busy households, ensuring a cleaner, more organized living space with minimal effort and stress. They truly simplify modern housekeeping challenges.
Books and Guides on Housekeeping
Books and guides on housekeeping provide expert advice and practical tips for maintaining a clean and organized home. Titles like “The Life-Changing Magic of Tidying Up” by Marie Kondo and “Clean My Space” by Melissa Maker offer step-by-step strategies for decluttering, organizing, and deep cleaning. These guides often cover topics like creating routines, managing storage, and using eco-friendly products. Many books also include checklists, templates, and inspiration for tailored cleaning plans. Whether you’re a beginner or looking to refine your skills, housekeeping books are invaluable resources. They help readers develop habits that lead to a more efficient and enjoyable cleaning process, ensuring a welcoming and comfortable living environment.