vivosun heat mat instructions
Category : Instructions
Vivosun Heat Mat Overview

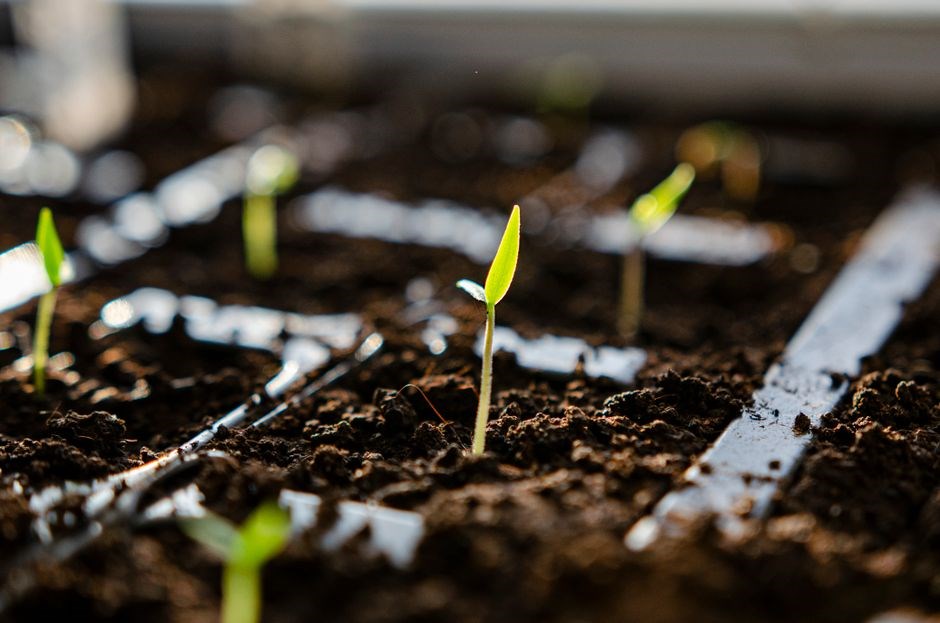
The Vivosun Heat Mat provides steady low‑level warmth to seedbeds, boosting germination and root development․ Its flexible, nonconductive surface fits any tray and works with the VIVOSUN Smart Grow System via the app for remote control․
Product Features and Design
The Vivosun Heat Mat delivers consistent, low‑level warmth to seedbeds, enhancing germination and root development․ Its flexible silicone‑based heating layer is backed by a durable, non‑conductive material that ensures even heat distribution across seed tray or grow bed․ The 2‑inch thickness provides optimal insulation while the 120 W power rating keeps seedlings warm without excessive energy use․ Built‑in temperature sensors communicate with the VIVOSUN Smart Grow System, allowing real‑time monitoring and adjustment via the mobile app․ With a 120 V AC input and a 15‑amp fuse, the mat meets standard electrical safety codes․ Water‑resistant and easy to clean, it’s ideal for high‑humidity grow tents․ Integrated cable management keeps cords tidy, and edge sealing prevents heat loss․ Designed for beginners and seasoned growers, it supports seedling trays up to 24 inches wide and fits under grow lights without obstruction․ Quick‑connect plugs and a low‑profile design make installation hassle‑free․ Overall, the Vivosun Heat Mat offers reliable, consistent warmth, boosting crop yields while integrating seamlessly into a smart grow ecosystem․ Its compact design saves space and fits grow setup․daily now today
Compatibility with Vivosun Smart Grow System
The Vivosun Heat Mat seamlessly integrates with the VIVOSUN Smart Grow System, enabling remote temperature control through the dedicated app․ By connecting the mat’s built‑in sensor to the system’s central hub, growers can set precise temperature thresholds, schedule heating cycles, and receive real‑time alerts directly on their smartphone․ The mat’s 120 W power rating is fully supported by the system’s 15‑amp fuse, ensuring safe operation within the recommended electrical limits․ Compatibility extends to all VIVOSUN smart devices, including lights, fans, and sensors, allowing the heat mat to work in concert with automated ventilation and humidity controls․ The system’s intuitive interface displays current mat temperature, historical trends, and allows for quick adjustments via touch or voice commands․ Additionally, the VIVOSUN Smart Grow System’s cloud sync feature logs heating data for long‑term analysis, helping growers optimize seedling performance․ The mat’s flexible design also fits under grow tents and LED rigs without interfering with other smart devices, ensuring a compact, efficient setup for both hobbyists and commercial growers alike!
Safety Precautions
Always keep the mat away from water, use only the supplied adapter, and monitor temperature to avoid overheating․ Never place pets or children near the heated surface, and unplug during maintenance․ Keep dry․ !
Electrical Safety Guidelines
Use only the supplied power adapter rated for the mat’s voltage and wattage․
Ensure the outlet is grounded and protected by a GFCI or AFCI circuit․
Inspect the cord and plug for fraying or damage before each use; replace if necessary․
Keep the mat and its wiring dry; never expose it to moisture or liquids․
Do not cover the mat with plastic, fabric, or other insulating materials that could trap heat․
Avoid placing heavy objects on the mat that may compress the heating element․
Disconnect the mat during cleaning or when not in use to prevent accidental short circuits․
Monitor the mat’s temperature with the VIVOSUN app or a separate thermometer; do not exceed the manufacturer’s recommended limit․
Keep pets and children away from the heated area; use a protective barrier if necessary․
Follow all local electrical codes and regulations; consult a licensed electrician for installations involving high‑current circuits․
Adhering to these guidelines ensures safe, efficient operation and protects your plants, equipment, and household from electrical hazards․ Follow the manual for wiring diagrams and seek now!
Temperature Limits and Overheat Protection
Vivosun heat mats are designed to deliver a steady, low‑temperature surface that promotes seed germination and root growth․ The manufacturer recommends a maximum surface temperature of 70 °F (21 °C)․ An internal thermostat monitors the heating element and automatically cuts power when the set threshold is reached, providing overheat protection․ When integrated with the VIVOSUN Smart Grow System, the app allows users to set a custom limit between 60 °F (15 °C) and 70 °F (21 °C) and receive notifications if the mat approaches the threshold․ For safety, place a heat‑resistant mat or a layer of non‑conductive insulation between the heating pad and the grow tray to ensure even heat distribution and reduce localized hotspots․ Periodically check the surface temperature with a digital thermometer; if it consistently reads above 70 °F, inspect the thermostat, wiring, and power supply for faults․ In case of a malfunction, disconnect the mat immediately and contact VIVOSUN support․ Regular maintenance and adherence to the recommended limits will keep seedlings healthy and prevent equipment damage․ Its design sits under trays, pots, or the grow bed, and its construction prevents heat buildup under grow lights․
Child and Pet Safety
To protect children and pets, keep the heat mat out of reach by placing it beneath the grow tray or inside a grow tent․ Use a non‑slip mat or rubber pad on the floor to prevent accidental stepping on hot spots․ Install a child‑proof outlet cover and ensure all cords are secured and out of play areas․ The VIVOSUN heat mat’s thermostat cuts power at 70 °F, but always double‑check with a thermometer; if the surface feels warm to the touch, keep pets away․ Avoid placing the mat on soft bedding or plush rugs that can trap heat․ Use a timer or the VIVOSUN app to schedule heating only during the day, reducing overnight risk․ If the mat is left on for extended periods, the surface can reach dangerous temperatures; therefore, set a maximum runtime of 8 hours․ Keep the area well‑ventilated to dissipate heat and prevent overheating․ Regularly inspect the mat for wear or exposed wiring, and replace any damaged components immediately․ By following these precautions, you can safely enjoy the benefits of the VIVOSUN heat mat while keeping children and pets safe․ Always check the mat’s temperature with a thermometer and keep the surrounding area clear of debris to maintain a safe, efficient growing environment for everyone and pets and children!
Installation Instructions
Place the Vivosun heat mat on a surface․ Connect the power cord to outlet, ensuring the plug is secure․ Use a timer or the VIVOSUN app to set heating period․ Verify the mat is level and free before use!
Required Tools and Materials
Before starting, gather these items: a Vivosun heat mat, a 12‑W or 24‑W power adapter, a 120‑V AC outlet, a non‑metallic extension cord (if needed), a pair of insulated gloves, a level or spirit level, a measuring tape, a heat‑resistant mat or rug to place under the heating surface, a timer or the VIVOSUN Smart Grow System app for scheduling, a safety switch․ Ensure the outlet is grounded and the circuit can handle the mat’s load․ If you plan to integrate the mat into a grow tent, have a mounting bracket or Velcro straps ready․ For safety, keep a fire extinguisher rated for electrical fires within reach․ All tools should be in good condition, and the mat should be inspected for damage before use․ Additionally, a small flashlight can help inspect the mat in low light conditions; A ruler or tape measure ensures precise spacing between the mat and other equipment․ A small waterproof bag can protect the mat during cleaning․ Once you have these supplies, you can proceed with the installation steps, keeping in mind the mat’s recommended placement and temperature settings to avoid overheating․
Step-by-Step Setup Procedure
Unbox the Vivosun heat mat and verify all components are present․ 2․ Place a heat‑resistant rug beneath the mat to protect the surface․ 3․ Position the mat on a flat, level area of the grow tray or tent floor․ 4․ Connect the supplied power adapter to the mat’s input port․ 5․ Plug the adapter into a grounded 120‑V outlet․ 6․ If using a timer, set the desired on/off schedule; otherwise, use the VIVOSUN app to program temperature and duration․ 7․ Ensure the mat’s temperature sensor (if included) is correctly positioned near the seedbed․ 8․ Activate the mat via the app or manual switch․ 9․ Monitor the first 30 minutes for any abnormal heat spikes; adjust settings if necessary․ 10․ Once stable, secure the mat with Velcro straps or brackets to prevent movement․ 11․ Test the system by placing a seed tray and observing germination over 48 hours․ 12․ Maintain a safe distance from the mat and keep pets and children away until the mat cools․ 13․ Store the mat flat in a dry place when not in use․ Ensure the mat is positioned away from direct light and that the grow tent’s ventilation is adequate to prevent overheating․ Check for surface discoloration weekly and replace if needed after use․․
Integration with Grow Tent and Lighting
To incorporate the Vivosun heat mat into a grow tent, first ensure the floor is dry․ Place the mat on the tent’s base, aligning it with the seed tray or pot area․ Secure it with Velcro straps or non‑slip pads to prevent shifting․ Connect the mat’s power cable to the tent’s power panel or a dedicated outlet, ensuring the cable does not interfere with ventilation holes․ Position the mat beneath the grow lights but above the seed tray; this allows heat to rise naturally while lights provide the required photoperiod․ Use the VIVOSUN app to set a temperature target that complements the lighting cycle—typically 70–80°F during the dark period and 60–70°F during the light period․ If the tent includes a fan, place it on the opposite side of the mat to circulate warm air evenly․ Verify that the fan’s airflow does not create drafts directly over the mat, which could reduce heat efficiency․ Finally, monitor the tent’s internal temperature with a separate probe to confirm that the mat’s heat output and the lights’ intensity are balanced, preventing overheating while maintaining adequate humidity․ All connections should be checked for contact daily․ Adjust fan speed or mat temperature settings as needed based on real‑time readings․
Operation and Maintenance
Use the VIVOSUN app to set temperature cycles, monitor real‑time data, and plan maintenance․ Clean the mat week with mild soap, dry thoroughly, and inspect for wear․ Replace if damaged to ensure safety․
Using the Vivosun App for Remote Control
The VIVOSUN app offers intuitive remote management of the heat mat, allowing growers to set precise temperature profiles, schedule on/off times, and receive real‑time alerts․ By connecting the mat to the VIVOSUN Smart Grow System, users can synchronize lighting, ventilation, and humidity controls, creating a fully automated environment․ The app’s dashboard displays current temperature, battery status, and usage history, enabling quick adjustments․ Push notifications inform growers of any deviations or power issues, ensuring plants remain within optimal ranges․ To add the heat mat, simply scan the QR code on the device, follow the on‑screen pairing steps, and assign it to the desired grow zone․ Once paired, the mat can be toggled on or off, and temperature settings can be modified from anywhere with internet access․ Regular firmware updates keep the system secure and add new features, so keep the app up to date․ For troubleshooting, the app provides diagnostic logs and a help center with FAQs and video tutorials․ This seamless integration empowers growers to maintain consistent conditions, reduce manual labor, and maximize yields․ interface is intuitive and
Cleaning and Sanitation Practices
After each use, disconnect the mat and let it cool․ Wipe the surface with a damp cloth and mild soap, avoiding harsh chemicals that could degrade the silicone․ Do not submerge the mat in water; instead, spot‑clean with a gentle solution and a soft brush for any stubborn residue․ Rinse with a clean, damp cloth and dry thoroughly before re‑connecting․ Inspect the mat for cracks or fraying; any damage should prompt replacement to prevent electrical hazards․ Store the mat flat in a dry, ventilated area to maintain its flexibility․ For deep cleaning, use a 10% vinegar solution applied with a spray bottle, then wipe off with a microfiber cloth․ Ensure the mat is fully dry before plugging back in, as moisture can cause short circuits․ Regular sanitation helps prevent mold and bacterial buildup, keeping the growing environment healthy and safe․ Avoid using abrasive pads that could damage the silicone surface; a soft microfiber cloth is ideal․ If the mat develops a visible stain, rinse the area with warm water and a mild detergent, then dry with towel․ After cleaning, inspect the mat for any loose strands or discoloration; replace immediately if any issues arise․ Store the mat in a clean, dry place away from direct sunlight to prevent premature aging of the silicone․ Keep dry․
Troubleshooting Common Issues
When the Vivosun heat mat fails to heat, first verify the power connection․ Ensure the plug is fully inserted and the outlet is functioning by testing another device․ Check the built‑in temperature sensor; a misread can cause the controller to shut down․ If the mat stays warm but the temperature is too low, adjust the setpoint in the VIVOSUN app or use the manual dial if available․ A common cause of uneven heating is a damaged silicone strip; inspect for cracks or frayed edges and replace if necessary․ Over‑current protection may trip if the mat is overloaded; make sure the circuit breaker is rated for the mat’s wattage․ If the mat displays a fault code, consult the quick‑reference guide for code meanings․ For persistent issues, disconnect the mat, let it cool, then reset the controller by holding the reset button for 10 seconds․ If the mat still does not respond, contact VIVOSUN support with the serial number and a description of the symptoms․ Finally, ensure the mat is not placed on a heat‑absorbing surface, as this can mask temperature readings and lead to misdiagnosis․ Proper placement on a non‑conductive mat or tray will give accurate feedback and reliable operation․ Follow safety guidelines․ Always․
Warranty and Support
Vivosun offers a 2‑year limited warranty covering manufacturing defects․ Claims must be submitted within 60 days of purchase via the VIVOSUN website․ For support, email support@vivosun․com or call 1‑800‑VIVOSUN․ All service is free․ Thanks
Warranty Coverage Details
Vivosun’s 2‑year limited warranty covers defects in materials and workmanship for the heat mat under normal indoor grow conditions․ Coverage starts on the purchase date and lasts 24 months․ The warranty includes replacement or repair at no cost, provided the mat is used with compatible trays, a stable power supply, and the VIVOSUN Smart Grow System․ Claims must be submitted within 60 days of first notice of a defect, with proof of purchase․ The warranty does not cover damage from misuse, accidental drops, moisture, or improper installation․ Vivosun reserves the right to inspect the product before approving a claim․ If confirmed, a replacement unit or refund will be issued, excluding shipping and handling․ The warranty is non‑transferable and applies only to the original buyer․ For questions, contact VIVOSUN support via the app or email at support@vivosun․com․ All claims are subject to VIVOSUN’s standard terms conditions, which can be found on the company website under the “Warranty” section․ By using the product, the buyer accepts these terms․This coverage adds consumer protection laws that may apply
Contacting Vivosun Customer Service

For assistance with the Vivosun Heat Mat, customers can reach Vivosun Customer Service through multiple channels․ The primary contact method is the dedicated support email at support@vivosun․com, which accepts inquiries 24/7․ When emailing, include the order number, a brief description of the issue, and any relevant photos․ For real‑time support, the VIVOSUN mobile app offers a live chat feature that connects you directly to a service representative․ Additionally, the company maintains a comprehensive FAQ and troubleshooting guide on its official website, accessible via the “Help” section․ Phone support is available during business hours (Mon‑Fri, 9:00‑18:00 GMT) by calling +1‑800‑VIVOSUN (800‑846‑7656)․ For international customers, local time zones are listed on the contact page․ All support requests are tracked in a ticketing system, and customers receive a confirmation number for follow‑up․ Vivosun also provides a community forum where users share tips and solutions; moderators monitor posts for accuracy․ For warranty claims, submit the required documentation through the online claim portal, and a representative will guide you through the process․ Finally, social media channels (Twitter @Vivosun,