jacuzzi j 365 owners manual
Category : Manuals
Jacuzzi J-365 Owners Manual: A Comprehensive Guide
This manual provides detailed instructions for Jacuzzi J-365, J-355, and J-375 owners, covering operation, maintenance, and troubleshooting, sourced from manualmachine․com and manualsdir․com․
Welcome to the world of relaxation and rejuvenation with your new Jacuzzi J-365 spa! This comprehensive guide is designed to familiarize you with all aspects of your spa, ensuring years of enjoyable use․ The J-365 model, along with its counterparts the J-355 and J-375, represents Jacuzzi’s commitment to innovative hydrotherapy and luxurious design․
This manual, drawing information from resources like manualmachine․com and manualsdir․com, will walk you through everything from initial setup and daily operation to routine maintenance and troubleshooting․ Understanding your spa’s features, control panel, and safety precautions is crucial for maximizing your experience․ We’ll cover water care, jet functionality, and even winterizing procedures to keep your Jacuzzi in pristine condition․
Before your first soak, please take the time to thoroughly read this manual․ It’s your key to unlocking the full potential of your Jacuzzi J-365 and enjoying countless moments of blissful relaxation․
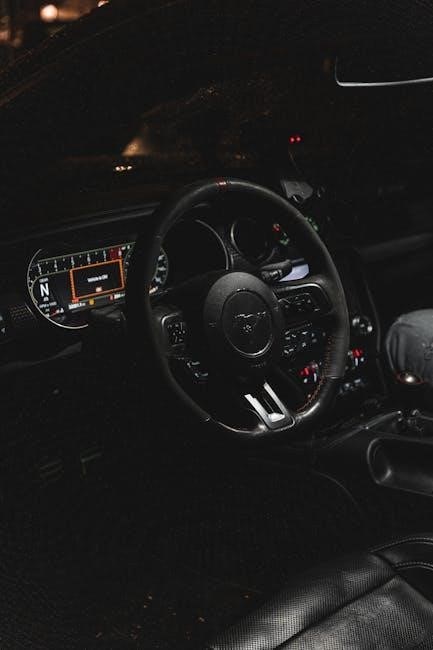
Understanding the Control Panel
The Jacuzzi J-365 control panel is your command center for customizing your spa experience․ It allows you to manage temperature, jet intensity, lighting, and other key features․ Familiarizing yourself with its functions is essential for optimal operation․ The panel typically features intuitive buttons and a clear display screen, providing easy access to all settings․
You’ll find controls for adjusting water temperature, often displayed in Fahrenheit or Celsius․ Jet controls allow you to activate and adjust the speed of various jet clusters, tailoring the hydrotherapy to your preference․ Lighting controls manage the spa’s ambient lighting, creating a relaxing atmosphere․
Referencing your owner’s manual (sourced from resources like manualmachine․com and manualsdir․com) is crucial for understanding specific button functions and navigating the panel’s menu options․ Understanding lock modes, also detailed in available manuals, ensures safe and secure operation․
Jets and Water Features
The Jacuzzi J-365 boasts a thoughtfully designed jet system, offering a diverse range of hydrotherapy experiences․ These jets are strategically placed to target specific muscle groups, providing soothing massage and relief․ Different jet types deliver varying levels of intensity, from gentle pulsations to focused streams․
Water features enhance the spa experience, creating a visually appealing and relaxing environment․ These may include waterfalls, illuminated fountains, or cascading streams․ The control panel allows you to adjust the flow and intensity of these features, customizing the ambiance to your liking․
Consult your J-365 owner’s manual (available via manualmachine․com and manualsdir․com) for detailed information on each jet’s function and optimal usage․ Proper understanding of jet adjustment contributes to maximizing the therapeutic benefits and enjoyment of your spa․
Therapy System Overview
The Jacuzzi J-365’s therapy system is engineered to deliver a comprehensive wellness experience․ It integrates multiple components – jets, water temperature, and optional features like lighting and sound – to promote relaxation, pain relief, and overall well-being․ The system’s effectiveness relies on the precise coordination of these elements․

Hydrotherapy, the core of the therapy system, utilizes the power of water to massage muscles, increase circulation, and reduce stress․ Different jet configurations target various areas of the body, offering customized therapy sessions․ Water temperature plays a crucial role, with warmer temperatures promoting muscle relaxation and cooler temperatures reducing inflammation․
Refer to your J-365 owner’s manual (sourced from manualmachine․com and manualsdir․com) for a complete understanding of the therapy system’s capabilities and how to optimize its benefits for your individual needs․
Water Care and Maintenance
Maintaining pristine water quality is paramount for a safe and enjoyable Jacuzzi J-365 experience․ Regular water care prevents bacterial growth, algae formation, and scaling, extending the lifespan of your spa’s components․ This involves consistent chemical balancing, filtration, and cleaning procedures, as detailed in your owner’s manual (sourced from manualmachine․com and manualsdir․com)․
Essential aspects include monitoring pH, alkalinity, and sanitizer levels (chlorine or bromine)․ Shocking the water periodically eliminates contaminants built up from bather use․ The filter requires routine cleaning – rinsing or backwashing – to remove debris and maintain optimal flow․

Periodic draining and refilling, alongside cabinet and cover cleaning, contribute to long-term spa health․ Adhering to the recommended maintenance schedule ensures a consistently clean and therapeutic environment․
Water Chemistry Basics
Understanding water chemistry is crucial for Jacuzzi J-365 ownership․ Maintaining proper balance protects both the spa’s equipment and bather comfort․ Key parameters include pH, total alkalinity, and sanitizer levels․ Ideal pH should be between 7․2 and 7․8, ensuring effective sanitizer performance and preventing corrosion or scaling․
Total alkalinity, typically between 80-120 ppm, stabilizes pH․ Sanitizers, like chlorine or bromine, eliminate bacteria and algae․ Chlorine levels should be 1-3 ppm, while bromine should be 3-5 ppm․ Consistent testing with a reliable test kit is essential․
Regularly adjusting these levels, guided by your owner’s manual (manualmachine․com, manualsdir․com), prevents cloudy water, skin irritation, and equipment damage․ Proper water chemistry extends the life of your Jacuzzi and ensures a pleasurable soaking experience․
Filter Cleaning and Replacement
Maintaining a clean filter is vital for optimal Jacuzzi J-365 performance․ The filter removes debris, ensuring clear and sanitary water․ Regularly cleaning the filter – typically every 2-4 weeks with standard use – prevents reduced water flow and strain on the pump․
Cleaning involves removing the filter cartridge and rinsing thoroughly with a garden hose, using a filter cleaning solution periodically to remove oils and buildup․ Replacement is necessary when the filter becomes damaged or cleaning no longer restores adequate flow․
Generally, filters should be replaced every 12-18 months, depending on usage and water quality․ Refer to your Jacuzzi J-365 owner’s manual (sourced from manualmachine․com and manualsdir․com) for specific filter model recommendations and replacement instructions․ A clean filter contributes to efficient operation and water clarity․

Startup and Shutdown Procedures

Proper startup and shutdown procedures are crucial for the longevity of your Jacuzzi J-365․ To start, ensure the power is connected and the breaker is on․ The control panel will initiate a system check․ Allow the water temperature to reach your desired setting before use․
For shutdown, it’s recommended to lower the temperature setting before turning off the power․ This prevents potential freezing in colder climates․ If extended periods of non-use are anticipated, completely draining and winterizing the spa is advised, as detailed in dedicated sections of the owner’s manual (referenced on manualmachine․com and manualsdir․com)․
Following these steps safeguards the pump, heater, and plumbing, ensuring years of reliable enjoyment․ Always consult the full manual for detailed instructions specific to your model․
Troubleshooting Common Issues
Encountering issues with your Jacuzzi J-365 is sometimes unavoidable․ Common problems include error codes displayed on the control panel, low water flow, and heater malfunctions․ Refer to the comprehensive error code section within the owner’s manual (available via manualmachine․com and manualsdir․com) for specific diagnoses and solutions․
Low flow can often be resolved by checking and cleaning the filter, as a clogged filter restricts water circulation․ If problems persist, inspect the jets for blockages․ For heater issues, verify the power supply and temperature settings․
Always prioritize safety; if you’re uncomfortable troubleshooting electrical components, consult a qualified technician․ The manual provides detailed guidance, but professional assistance is recommended for complex repairs․
Error Codes and Their Meanings
The Jacuzzi J-365 utilizes a sophisticated error code system to diagnose potential problems․ These codes, displayed on the control panel, provide valuable insights into the issue at hand․ The owner’s manual, accessible through resources like manualmachine․com, contains a detailed table outlining each code and its corresponding meaning․
Common error codes relate to water temperature sensors, heater malfunctions, pump issues, and flow restrictions․ Understanding these codes empowers owners to perform basic troubleshooting steps before contacting a service technician․ For example, a specific code might indicate a faulty sensor requiring replacement, while another could signal a clogged filter․
Always consult the manual for the precise interpretation of each code and recommended actions․ Ignoring error codes can lead to more significant damage․
Low Flow Troubleshooting
Reduced water flow in your Jacuzzi J-365 can significantly impact jet performance and overall spa experience․ Troubleshooting low flow begins with inspecting the filter – a clogged filter is the most frequent culprit․ Regularly cleaning or replacing the filter, as detailed in the owner’s manual (found on sites like manualmachine․com), is crucial preventative maintenance․
Next, check the unions and valves for any obstructions or closures․ Ensure all valves are fully open․ Inspect the suction lines for kinks or blockages․ If the problem persists, the circulation pump may be experiencing issues, potentially requiring professional attention․
Low flow can also indicate a plumbing restriction․ Refer to the plumbing diagrams in your manual to identify potential problem areas․ Addressing low flow promptly prevents strain on the pump and maintains optimal spa function․
Safety Precautions
Prioritizing safety is paramount when operating your Jacuzzi J-365․ Always supervise children closely while the spa is in use, and never allow unsupervised access․ Individuals with medical conditions, such as heart disease or pregnancy, should consult a physician before use․ Maintain water temperature below 104°F (40°C) to prevent overheating․
Avoid using the spa while under the influence of alcohol or drugs․ Ensure proper electrical grounding and never operate the spa with damaged cords or components․ Regularly inspect the spa for any potential hazards․
Be cautious when entering and exiting the spa, utilizing handrails for support․ Familiarize yourself with emergency procedures, including power shut-off locations․ Refer to your owner’s manual (available via manualmachine․com) for comprehensive safety guidelines․
Electrical Requirements
The Jacuzzi J-365 requires a dedicated electrical circuit, typically 240V, and adherence to local electrical codes is crucial․ Proper grounding is essential for safety, preventing electrical shock hazards․ Consult a qualified electrician for installation and to verify compatibility with your home’s electrical system․
Ensure the circuit breaker is appropriately sized for the spa’s power demands, preventing overloads․ Avoid using extension cords, as they can pose a safety risk․ The electrical compartment should remain accessible for maintenance and emergency shut-off․
Refer to the owner’s manual (sourced from resources like manualmachine․com) for specific voltage and amperage requirements for your J-365 model․ Incorrect electrical connections can void the warranty and create dangerous conditions․
Cabinet Care and Cleaning
Maintaining the Jacuzzi J-365’s cabinet involves regular cleaning to prevent damage from the elements and preserve its appearance․ Use a mild soap and water solution, applying with a soft cloth․ Avoid abrasive cleaners, solvents, or harsh chemicals, as these can discolor or damage the cabinet material․
Rinse thoroughly with clean water after cleaning, and dry with a soft towel․ Inspect the cabinet periodically for any signs of cracking, warping, or damage․ Promptly address any issues to prevent further deterioration․
Protect the cabinet from prolonged exposure to direct sunlight, which can cause fading․ Refer to your owner’s manual (information available on manualmachine․com) for specific cabinet material care instructions․
Cover Maintenance
Proper Jacuzzi J-365 cover maintenance is crucial for longevity and effective insulation․ Regularly clean the cover with a mild soap and water solution, using a soft cloth or sponge․ Avoid abrasive cleaners, as they can damage the vinyl surface․
Apply a vinyl protectant specifically designed for spa covers to shield against UV rays and prevent cracking․ Inspect the cover frequently for tears, punctures, or waterlogging․ Address any damage promptly to maintain its insulating properties․
During winter months, or periods of non-use, ensure the cover is securely fastened to prevent wind damage․ Refer to your owner’s manual (resources found on manualmachine․com) for detailed cover care guidelines and warranty information․
Warranty Information
Your Jacuzzi J-365 spa is covered by a limited warranty, protecting against defects in materials and workmanship․ The specific terms and duration vary depending on the component․ The shell typically has a longer warranty period than pumps, heaters, and other equipment․
Registration of your spa is essential to activate the warranty․ Keep your original purchase receipt and warranty documentation in a safe place․ The warranty does not cover damage caused by misuse, improper maintenance, or acts of nature․
For detailed warranty information, including claim procedures and exclusions, consult the official Jacuzzi warranty document included with your spa or available online through resources like manualmachine․com․ Contact Jacuzzi customer support for assistance with any warranty-related inquiries․
Jets ⎯ Adjustment and Maintenance
The Jacuzzi J-365 features adjustable jets designed to provide a customized hydrotherapy experience․ Most jets can be rotated to direct the flow of water, increasing or decreasing the massage intensity․ Experiment with different jet settings to find your preferred configuration․
Regular maintenance of your jets is crucial for optimal performance․ Periodically inspect the jet nozzles for any blockages caused by debris or mineral buildup․ Remove any obstructions using a soft brush or a jet cleaning tool․
Avoid using harsh chemicals or abrasive cleaners, as these can damage the jet components․ Refer to the water care section of this manual for recommended cleaning solutions․ Proper jet maintenance ensures a consistently invigorating spa experience․
Light System Operation
The Jacuzzi J-365 is equipped with a multi-color LED lighting system designed to enhance your spa experience․ The light settings are controlled through the control panel, allowing you to select from a range of solid colors, cycling patterns, and brightness levels․
To activate the light system, navigate to the “Lights” option on the control panel․ Pressing the button will cycle through the available color options․ Some models may offer customizable light sequences or the ability to synchronize the lights with music․
If the lights are not functioning correctly, check the control panel settings and ensure the power supply to the spa is stable․ Refer to the troubleshooting section for further assistance․
Sound System Details
The Jacuzzi J-365 boasts an integrated sound system designed to deliver immersive audio while you relax․ This system typically includes strategically placed speakers within the spa cabinet, providing balanced sound distribution․ The sound system is controlled via the spa’s control panel, allowing for volume adjustment and source selection․

Many J-365 models feature Bluetooth connectivity, enabling wireless streaming of music from smartphones, tablets, or other compatible devices․ To connect, activate Bluetooth on your device and select the Jacuzzi spa from the available list․ Ensure your device remains within range for uninterrupted audio․
If experiencing sound issues, verify Bluetooth connection, volume levels, and speaker functionality․ Consult the troubleshooting guide for further support․
Bluetooth Connectivity Guide
Establishing a Bluetooth connection on your Jacuzzi J-365 allows for wireless audio streaming from compatible devices like smartphones and tablets․ Begin by ensuring your spa’s sound system is powered on․ Then, navigate to the Bluetooth settings on your external device and initiate a search for available connections․
The Jacuzzi J-365 should appear in the list of discovered devices – typically identified as “Jacuzzi Spa” or a similar designation․ Select this option to initiate the pairing process․ You may be prompted to enter a pairing code; if so, try “0000” or consult the owner’s manual for the correct code․
Once paired, your device will automatically connect to the spa’s sound system whenever both are within range․ Enjoy seamless audio streaming!
Draining and Refilling the Spa
Draining your Jacuzzi J-365 is necessary for thorough cleaning and maintenance․ Begin by turning off power to the spa at the breaker․ Locate the drain valve, typically near the equipment compartment, and attach a garden hose․ Direct the hose to a suitable drainage area, ensuring compliance with local regulations․
Open the drain valve and allow the spa to empty completely․ Once drained, clean the spa shell using a mild, non-abrasive cleaner․ Flush the plumbing lines with a spa flush product to remove biofilm buildup․
Refilling involves re-connecting the water supply and adding appropriate chemicals to balance the water chemistry․ Follow the water care guidelines in the manual to achieve optimal water quality․ Remember to prime the pump before restoring power․
Winterizing Your Jacuzzi J-365
Proper winterization protects your Jacuzzi J-365 from freeze damage during cold months․ Begin by draining the spa completely, including all plumbing lines․ Utilize a wet vac to remove any remaining water from jets and pipes․ Add a winterizing chemical specifically designed for spas to protect the plumbing․
Disconnect and drain all pumps, heaters, and filters․ Insulate exposed plumbing lines with foam pipe wrap․ Place a winterizing pillow inside the spa shell to absorb any residual water and prevent cracking․ Secure the spa cover tightly to protect against the elements․
Regularly check the spa throughout the winter to ensure proper protection․ Before reopening in spring, thoroughly clean and refill the spa, balancing the water chemistry․
Lock Mode Functionality
The Lock Mode feature on your Jacuzzi J-365 is designed to prevent accidental activation of jets, heaters, or other functions, especially important when children are present or during periods of non-use․ Accessing Lock Mode typically involves pressing and holding specific buttons on the control panel for a designated duration, as outlined in the full owner’s manual․
When activated, the control panel will display a lock icon, indicating that the functions are secured․ To deactivate Lock Mode, repeat the button combination․ This prevents unintended operation and conserves energy․
Refer to the manual for precise instructions, as the specific button sequence may vary․ Understanding Lock Mode ensures safe and responsible spa operation․
Remote Control Operation
The Jacuzzi J-365 may be equipped with a remote control for convenient operation from a distance․ This allows you to adjust temperature, activate jets, and control the light system without leaving the comfort of your seat․ Initial setup typically involves pairing the remote with the spa’s control system, a process detailed in the owner’s manual․
The remote usually features intuitive buttons for common functions․ Ensure the remote has fresh batteries for optimal performance․ Keep the remote dry and avoid exposing it to extreme temperatures․
Refer to the manual for specific button layouts and troubleshooting tips․ Proper remote control operation enhances your spa experience․
Accessing the Equipment Compartment
The equipment compartment of your Jacuzzi J-365 houses vital components like the pump, heater, and control system․ Access is typically gained through a removable panel, often secured with latches or screws․ Always disconnect power to the spa at the breaker before opening the compartment to prevent electrical shock․
Inside, you’ll find organized components․ Familiarize yourself with their locations for maintenance purposes․ The owner’s manual provides a detailed diagram․ Be cautious of hot surfaces, especially after the spa has been in use․
Ensure the panel is securely reattached after any inspection or maintenance to protect the equipment and maintain the spa’s aesthetic appearance․

Understanding the Jacuzzi J-365 Plumbing

The Jacuzzi J-365 utilizes a complex plumbing system to circulate and filter water, deliver jets’ therapeutic benefits, and maintain water chemistry․ This system includes pipes, valves, unions, and the pump, all working in harmony․ Understanding its layout is crucial for troubleshooting and maintenance․
Water enters the spa through a filter, then is pumped through jets for hydrotherapy․ After circulation, water returns to the filter for cleaning․ Valves control water flow to different zones and features․ Regular inspection of connections for leaks is vital․
Refer to the detailed plumbing diagram in your owner’s manual for specific component locations and connections․ Never attempt plumbing repairs without disconnecting power․
Optional Accessories
Enhance your Jacuzzi J-365 experience with a range of optional accessories designed for comfort, convenience, and improved spa care․ These additions can personalize your spa and optimize its functionality․
Available Upgrades include advanced filtration systems for superior water clarity, aromatherapy diffusers for a relaxing sensory experience, and upgraded jet options for customized hydrotherapy․ Consider a premium spa cover for enhanced insulation and protection․
Recommended Cleaning Supplies encompass specialized spa cleaners, filter cleaning solutions, and surface protectants․ Utilizing Jacuzzi-approved products ensures compatibility and prevents damage․ Explore options like headrests, lighting packages, and Bluetooth audio systems to elevate your spa enjoyment․
Available Upgrades
Transform your Jacuzzi J-365 into a personalized wellness sanctuary with a selection of available upgrades․ These enhancements cater to diverse preferences, boosting both functionality and relaxation․
Consider upgrading to a more robust filtration system, such as a circulator pump or enhanced filter cartridge, for exceptionally clean and clear water․ For a heightened sensory experience, explore aromatherapy diffusers that infuse essential oils into the spa environment․ Jet upgrades offer targeted hydrotherapy, with options like pulsating massage jets or directional flow controls․
Further enhancements include premium headrests, advanced lighting packages, and integrated Bluetooth audio systems․ A high-quality spa cover provides superior insulation and protection, extending the life of your Jacuzzi J-365․
Recommended Cleaning Supplies
Maintaining your Jacuzzi J-365’s pristine condition requires the right cleaning supplies․ Always prioritize non-abrasive cleaners to protect the acrylic surface and avoid scratching․ A pH-balanced spa surface cleaner is essential for removing oils, lotions, and debris without damaging the finish․
For filter cleaning, utilize a dedicated filter cleaning solution to dissolve calcium buildup and restore optimal flow rate․ A soft-bristled brush is ideal for scrubbing the spa shell and around jets, while microfiber cloths prevent streaks and lint․
Specifically formulated spa shock treatments are crucial for water sanitation, and algaecide prevents algae growth․ Avoid household cleaners, bleach, or harsh chemicals, as these can damage the equipment and void your warranty․ Always follow product instructions carefully․