• 0

do manual transmissions have torque converters

Category : Manuals

Do Manual Transmissions Have Torque Converters? ― Article Plan (12/16/2025 05:05:21)

This article explores the relationship between manual transmissions and torque converters‚ clarifying why manuals generally don’t utilize them‚ while acknowledging exceptions like automated manual systems.

Do manual transmissions employ torque converters? This fundamental question sparks debate‚ as traditional manuals prioritize direct mechanical connection‚ differing from the fluid coupling of automatic systems.

Defining Manual Transmissions

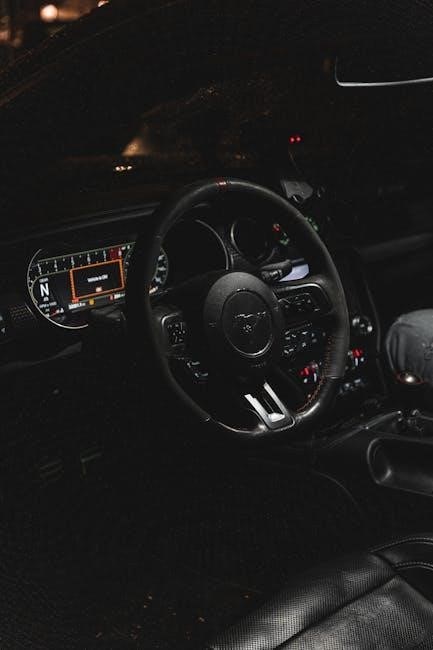
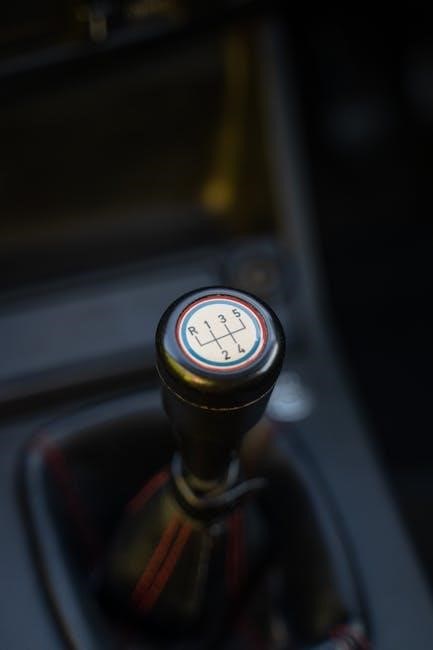
Manual transmissions‚ also known as stick shifts‚ rely on a driver-operated clutch pedal and a gear stick to change gears. This system establishes a direct mechanical connection between the engine and the wheels. The driver selects the appropriate gear ratio by physically engaging different gears within the transmission.

This direct link allows for precise control over engine RPM and power delivery. Unlike automatic transmissions‚ manual transmissions don’t automatically shift gears; the driver is fully responsible. Historically‚ manuals were the dominant transmission type‚ valued for their simplicity‚ efficiency‚ and driver engagement. They require more skill to operate smoothly‚ but offer a more connected driving experience. The core function is to transfer engine power through a series of gears‚ enabling the vehicle to operate efficiently at varying speeds.

Defining Torque Converters

Torque converters are a type of fluid coupling used in automatic transmissions. They transmit engine power to the transmission without a direct mechanical link‚ utilizing fluid dynamics instead. Essentially‚ they act as an intermediary‚ allowing the engine to continue running even when the wheels are stopped.

This is achieved through a complex system of impellers‚ turbines‚ and a stator‚ all submerged in transmission fluid. Torque converters enable smooth gear changes and prevent engine stalling. They also offer a degree of torque multiplication‚ particularly at lower speeds. While efficient‚ they aren’t as directly efficient as a mechanical connection. They are a key component in traditional automatic transmissions‚ facilitating a seamless driving experience.

The Initial Answer: Generally No

Generally‚ manual transmissions do not have torque converters. Manual transmissions rely on a direct mechanical connection between the engine and the wheels‚ facilitated by a clutch pedal operated by the driver. This direct link provides a more efficient power transfer compared to the fluid coupling of a torque converter.

The core function of a manual transmission is driver control over gear selection‚ achieved through this direct engagement. Introducing a torque converter would negate this fundamental aspect. While some modern systems blur the lines – like automated manuals – a traditional manual gearbox operates entirely without the need for‚ or benefit of‚ a torque converter’s fluid dynamics.

Understanding Automatic Transmissions & Torque Converters

Automatic transmissions commonly employ torque converters to transfer engine power‚ utilizing fluid dynamics for smooth gear changes and torque multiplication capabilities;

How Torque Converters Work: A Basic Overview

Torque converters function as a fluid coupling‚ transmitting engine power to the transmission without a direct mechanical link. This system utilizes a fluid‚ typically automatic transmission fluid‚ to transfer rotational energy. The engine spins an impeller‚ which acts like a fan‚ flinging fluid at a turbine connected to the transmission input shaft.

As the fluid strikes the turbine‚ it causes it to rotate‚ thus transferring power. Importantly‚ this isn’t a direct connection; slippage occurs‚ allowing the engine to continue running even when the vehicle is stopped. This slippage is crucial for smooth starts and preventing engine stalling; The internal design‚ featuring components like the stator‚ enhances efficiency and provides torque multiplication‚ especially during acceleration. It’s a complex‚ yet elegant‚ system for power delivery in automatic vehicles.

Components of a Torque Converter: Impeller‚ Turbine‚ Stator

A torque converter’s functionality relies on three key components: the impeller‚ turbine‚ and stator. The impeller‚ directly connected to the engine’s crankshaft‚ spins and pumps transmission fluid. This fluid then impacts the turbine‚ which is connected to the transmission’s input shaft‚ causing it to rotate and transfer power.

However‚ fluid returning from the turbine isn’t aligned to efficiently re-enter the impeller. This is where the stator comes in. Positioned between the turbine and impeller‚ the stator redirects the fluid‚ improving efficiency and enabling torque multiplication. The stator’s one-way clutch allows it to lock‚ changing the fluid flow direction. These components work in harmony‚ creating a fluid drive system that smoothly transfers engine power to the wheels.

Torque Multiplication Explained

Torque converters don’t just transfer power; they can multiply it‚ particularly at lower engine speeds. This happens due to the interaction between the impeller‚ turbine‚ and stator. When the engine spins the impeller faster than the turbine‚ the stator redirects fluid in a way that increases the force applied to the turbine.

Essentially‚ the stator ‘amplifies’ the torque. As the turbine speed approaches the impeller speed‚ torque multiplication decreases‚ eventually reaching a 1:1 ratio. This feature is crucial for initial acceleration‚ providing more force when starting from a standstill. However‚ this multiplication isn’t free; it comes with some efficiency loss due to fluid friction and slippage within the converter.

Why Manual Transmissions Don’t Typically Use Torque Converters

Manual transmissions prioritize a direct mechanical link between the engine and wheels‚ a function incompatible with the fluid coupling nature of torque converters.

Direct Mechanical Connection in Manuals

Unlike automatic transmissions relying on fluid dynamics‚ manual transmissions achieve power transfer through a solid‚ direct mechanical connection. This system utilizes gears and a clutch to physically link the engine’s output to the drivetrain. When the clutch is engaged‚ it firmly connects the engine to the transmission input shaft‚ ensuring nearly 100% of the engine’s power reaches the wheels.

This direct linkage is fundamental to the manual transmission’s operation and efficiency. It eliminates the inherent slippage found in torque converters‚ which‚ while offering smoothness‚ inevitably results in some power loss. The driver controls this connection via the clutch pedal‚ dictating when power is transferred and allowing for gear changes. This directness contributes to the feeling of control and responsiveness often associated with manual transmissions.

Clutch Functionality vs. Torque Converter Functionality

The clutch in a manual transmission serves as a direct engagement/disengagement mechanism‚ physically disconnecting the engine from the transmission when the pedal is depressed. This allows for smooth gear changes without damaging the drivetrain. Conversely‚ a torque converter utilizes fluid coupling – impeller‚ turbine‚ and stator – to transmit power.

While a torque converter allows the engine to continue running even when the wheels are stopped‚ it introduces inherent slippage. The clutch provides a solid connection when engaged‚ maximizing power transfer. Torque converters prioritize smoothness and convenience‚ while clutches emphasize driver control and efficiency. Essentially‚ the clutch is a ‘hard’ connection‚ and the torque converter a ‘soft’ one‚ each suited to different transmission philosophies.

Efficiency Considerations: Manuals and Direct Power Transfer

Manual transmissions excel in efficiency due to their direct mechanical link between the engine and wheels when the clutch is engaged. This minimizes power loss‚ as energy isn’t dissipated through fluid dynamics like in a torque converter. The inherent slippage within a torque converter‚ while providing smoothness‚ inevitably reduces overall drivetrain efficiency.

Because manuals offer a more direct power transfer‚ they generally yield slightly better fuel economy compared to traditional automatic transmissions utilizing torque converters. This direct connection translates to less wasted energy and a more responsive driving experience. However‚ advancements in automatic transmission technology‚ including lock-up torque converters‚ are narrowing this efficiency gap.

Exceptions and Hybrid Systems

Modern advancements introduce exceptions‚ like automated manual transmissions (AMTs) and dual-clutch transmissions (DCTs)‚ sometimes integrating torque converters for enhanced performance and smoothness.

Automated Manual Transmissions (AMTs) ― A Closer Look

Automated Manual Transmissions (AMTs) represent a fascinating bridge between traditional manual gearboxes and the convenience of automatics. Essentially‚ an AMT is a standard manual transmission that utilizes electronic actuators and sensors to perform gear changes and clutch operation – tasks normally handled by the driver.

Unlike traditional automatics‚ AMTs do not inherently require a torque converter. They maintain the direct mechanical connection characteristic of manual transmissions‚ contributing to efficiency. However‚ some AMT designs may incorporate a launch control system that mimics the feel of a torque converter for smoother starts. This isn’t a full torque converter‚ but a system designed to improve low-speed drivability. The core principle remains a mechanically linked gearbox controlled by automation‚ offering a unique driving experience.

Dual-Clutch Transmissions (DCTs): A Different Automatic Approach

Dual-Clutch Transmissions (DCTs) offer a distinctly different automatic experience compared to traditional torque converter automatics. DCTs essentially feature two separate manual transmissions within one housing‚ each with its own clutch. One clutch handles odd-numbered gears‚ while the other manages even-numbered gears.

This clever design allows for incredibly fast and seamless gear changes‚ as the next gear is pre-selected and ready to engage. Most DCTs do not utilize a torque converter‚ prioritizing direct power transfer and responsiveness. However‚ a small number of DCT designs‚ particularly those focused on maximizing low-speed smoothness‚ may integrate a small torque converter. This is a relatively rare configuration‚ and the core functionality remains rooted in the dual-clutch mechanism.

Torque Converter Integration in Some DCT Designs (Rare Cases)

While most Dual-Clutch Transmissions (DCTs) eschew torque converters for direct mechanical connection‚ a limited number incorporate them‚ primarily to enhance low-speed drivability and smoothness. This integration isn’t about replicating a traditional automatic’s feel‚ but rather mitigating the sometimes jerky nature of DCTs during initial acceleration or maneuvering at low speeds.

The torque converter in these DCTs is typically smaller and designed for limited torque multiplication. It primarily functions as a viscous coupling‚ smoothing out power delivery. This is a departure from the full torque multiplication seen in conventional automatics. Manufacturers employ this approach to balance the performance benefits of a DCT with improved refinement‚ catering to drivers who prioritize comfort alongside responsiveness. It remains a niche application within the broader DCT landscape.

The Rise of Automatic Transmissions

Automatics gained popularity due to convenience and ease of use‚ slowly replacing manuals as the preferred choice for many drivers‚ fueled by technological advancements.

Historical Shift from Manual to Automatic

The transition from manual to automatic transmissions is a fascinating story of automotive evolution. Early automobiles universally employed manual gearboxes‚ demanding significant driver skill and effort. However‚ as the 20th century progressed‚ the desire for simpler driving experiences grew. The introduction of the first automatic transmissions‚ utilizing torque converters‚ marked a turning point.

Initially‚ automatics were often seen as less efficient and engaging than manuals. Yet‚ continuous improvements in automatic transmission technology‚ including more sophisticated control systems and increased gear ratios‚ began to close the performance gap. By the latter half of the century‚ automatics started gaining significant market share‚ particularly in North America. This shift was driven by factors like increasing traffic congestion and a broader demographic of drivers prioritizing convenience over driver involvement. Today‚ automatics dominate the new car market‚ though manuals retain a dedicated following among enthusiasts.

Convenience and Ease of Use as Driving Factors

The rise of automatic transmissions is inextricably linked to the growing demand for convenience and ease of use in driving. Manual transmissions require the driver to coordinate clutch and gear lever operation‚ a skill that can be challenging for some and tiring in stop-and-go traffic. Automatics eliminate this complexity‚ allowing drivers to focus solely on steering and braking.

This simplification proved particularly appealing as urban areas became more congested. The constant shifting required by a manual gearbox in heavy traffic became a significant source of driver fatigue. Automatics offered a smoother‚ less demanding experience‚ attracting a wider range of drivers. Furthermore‚ the increasing accessibility of driving licenses to a broader population fueled the demand for easier-to-operate vehicles‚ solidifying the automatic transmission’s position in the automotive landscape.

Advancements in Automatic Transmission Technology

Modern automatic transmissions have undergone significant advancements‚ addressing earlier criticisms regarding efficiency and responsiveness. Early torque converter automatics were often criticized for “slippage‚” resulting in reduced fuel economy compared to manuals. However‚ technologies like lock-up torque converters minimize this slippage‚ creating a more direct mechanical connection at cruising speeds.

Furthermore‚ the introduction of more gears – six‚ eight‚ nine‚ and even ten-speed automatics – allows the engine to operate closer to its optimal efficiency range more frequently. The development of sophisticated computer control systems further optimizes shift points for both performance and fuel economy. These improvements‚ coupled with the emergence of Dual-Clutch Transmissions (DCTs)‚ have largely closed the performance gap with manual transmissions‚ while retaining the convenience of automatic operation.

Comparing Manual‚ Automatic (Torque Converter)‚ and DCT Transmissions

Each transmission type offers unique characteristics: manuals prioritize driver control‚ automatics offer convenience‚ and DCTs blend both with rapid shifts and efficiency.

Performance Characteristics: Acceleration and Responsiveness

Manual transmissions traditionally offer a direct connection‚ allowing for precise control over engine RPM and potentially quicker acceleration in skilled hands. This direct link minimizes power loss‚ contributing to a more responsive feel. However‚ automatic transmissions with torque converters‚ while historically slower‚ have significantly improved. Modern torque converter automatics utilize sophisticated programming and lock-up clutches to mitigate slippage and enhance responsiveness.

Dual-Clutch Transmissions (DCTs) generally outperform both in acceleration and responsiveness. Their dual-clutch design allows for pre-selection of the next gear‚ resulting in near-instantaneous shifts without interrupting power delivery. While a manual requires driver input for each shift‚ and a traditional automatic experiences some inherent delay‚ DCTs offer a seamless and incredibly fast driving experience. Ultimately‚ performance depends on the specific vehicle and transmission tuning‚ but DCTs currently hold an edge.

Fuel Efficiency Comparison

Historically‚ manual transmissions often boasted superior fuel economy due to their direct mechanical connection and lack of parasitic losses associated with torque converters. However‚ advancements in automatic transmission technology have narrowed this gap considerably. Modern automatics‚ particularly those with torque converter lock-up features‚ minimize slippage and improve efficiency.

Dual-Clutch Transmissions (DCTs) frequently demonstrate the best fuel economy among the three types. Their efficient shifting and minimal power loss contribute to optimized fuel consumption. While the difference between a well-designed automatic and a manual may be negligible in some cases‚ DCTs often maintain a slight advantage. Ultimately‚ driving style and vehicle weight play significant roles‚ but modern automatics are now very competitive with manuals in terms of fuel efficiency.

Driver Engagement and Control

Manual transmissions traditionally offer a heightened sense of driver engagement‚ requiring active participation in gear selection and clutch operation. This direct control appeals to enthusiasts who enjoy a more connected driving experience. Automatic transmissions‚ including those with torque converters‚ historically provided a more detached feel‚ prioritizing convenience over control.

However‚ modern automatic transmissions‚ especially DCTs‚ are bridging this gap. They offer quicker shifts and a more responsive feel‚ enhancing driver involvement. While a manual still provides the ultimate control‚ the latest automatics deliver a compelling alternative. The choice often comes down to personal preference – those seeking maximum control will likely prefer a manual‚ while others will appreciate the ease and convenience of an automatic.

The Future of Transmissions

Transmission technology is evolving rapidly‚ with CVTs and electric vehicle systems gaining prominence‚ alongside potential hybrid approaches blending manual and automatic elements.

Continuously Variable Transmissions (CVTs) ౼ An Alternative

Continuously Variable Transmissions (CVTs) represent a distinct departure from traditional stepped gear ratios‚ offering a seamless and theoretically infinite range of gear ratios. Unlike conventional automatics relying on torque converters‚ CVTs typically employ a belt or chain running between two variable-diameter pulleys. This design allows the engine to operate at its most efficient RPM‚ regardless of vehicle speed‚ potentially improving fuel economy.

CVTs don’t have fixed gears‚ leading to a unique driving experience often described as “rubber-banding.” While they offer efficiency benefits‚ some drivers find the lack of distinct shift points less engaging. They are becoming increasingly common‚ offering a different automatic experience than torque converter-based systems‚ and represent a viable alternative as the automotive landscape shifts.

Electric Vehicle Transmissions: A Simplified Approach

Electric Vehicles (EVs) often employ remarkably simple transmission systems‚ a direct consequence of the electric motor’s characteristics. Unlike internal combustion engines with narrow power bands‚ electric motors deliver near-instant torque across a wide RPM range. This eliminates the need for complex multi-gear transmissions‚ including those utilizing torque converters.

Many EVs utilize a single-speed reduction gear to efficiently transfer power from the motor to the wheels. This simplicity enhances efficiency and reduces weight. While some high-performance EVs are experimenting with multi-speed transmissions for increased top speed or efficiency at highway speeds‚ these are exceptions. The fundamental shift towards electric powertrains is simplifying transmission design‚ moving away from the complexities of traditional systems.

Potential for Hybrid Systems Combining Manual Elements with Automatic Technologies

The future may see innovative hybrid transmission systems blending the best aspects of manual and automatic technologies. These systems could potentially incorporate elements of both‚ offering drivers a unique driving experience. Automated Manual Transmissions (AMTs) already represent a step in this direction‚ providing manual-like control with automatic clutch operation.

Further development might involve integrating torque converter-like functionality into advanced AMTs or Dual-Clutch Transmissions (DCTs) to enhance smoothness and low-speed drivability. Such systems could offer selectable modes‚ allowing drivers to choose between fully automatic operation‚ manual control‚ or a hybrid mode optimizing for efficiency or performance. This convergence could address the drawbacks of both traditional systems.

Common Misconceptions

Many incorrectly assume all automatics utilize torque converters‚ overlooking DCTs and CVTs. Confusing AMTs with traditional automatics is also common‚ as is underestimating modern transmission computer control.

“All Automatics Have Torque Converters” ― Debunked

This is a widespread misunderstanding. While torque converters are a cornerstone of traditional automatic transmissions‚ they aren’t universally present in all automatic systems. Modern automotive technology has expanded the landscape of automatic gearboxes‚ introducing alternatives that don’t rely on this fluid coupling.

Dual-clutch transmissions (DCTs)‚ for example‚ utilize two separate clutches for gear changes‚ offering incredibly fast and direct shifts without the need for a torque converter. Continuously Variable Transmissions (CVTs) employ a belt-and-pulley system to provide a seamless range of gear ratios‚ again bypassing the torque converter.

Therefore‚ the statement that all automatics have torque converters is demonstrably false. The type of automatic transmission dictates whether a torque converter is employed‚ showcasing the diversity within automatic gearbox designs.

Confusing Automated Manuals with Traditional Automatics

A key source of confusion arises from automated manual transmissions (AMTs). These systems‚ while offering automatic operation‚ fundamentally retain the core mechanical structure of a manual gearbox – lacking a traditional torque converter. AMTs utilize actuators and computer control to automate clutch engagement and gear selection‚ mimicking a manual shift pattern without driver intervention.

This differs significantly from traditional automatics‚ which rely on a torque converter for fluid coupling and power transfer. Because AMTs feel automatic‚ some mistakenly categorize them alongside conventional automatics‚ overlooking their distinct internal workings.

Understanding this distinction is crucial; AMTs are essentially manually operated gearboxes controlled electronically‚ not torque-converter-based automatics. This leads to misinterpretations about the presence of torque converters in all “automatic” vehicles.

The Role of Computer Control in Modern Transmissions

Modern transmissions‚ regardless of type‚ heavily rely on computer control for optimized performance and efficiency. This is particularly evident in automated systems‚ blurring the lines between traditional classifications. Computer control manages shift points‚ clutch engagement (in AMTs and DCTs)‚ and even torque converter lockup in conventional automatics.

While a manual transmission’s core function remains mechanically driven‚ computer assistance can now modulate throttle input and even offer automated rev-matching. This sophisticated control extends to automatic transmissions‚ enabling features like adaptive learning and predictive shifting.

The increasing role of computer control doesn’t change the fundamental presence or absence of a torque converter‚ but it does enhance the overall driving experience and efficiency of all transmission types.


  • 0

inscription leveling guide wotlk

Category : Guide

Inscription, a new profession in Wrath of the Lich King, offers powerful glyphs, scrolls, and unique items.

This comprehensive guide details leveling from 1-450, maximizing profit, and understanding its role in WotLK Classic.

Prepare to master this lucrative and impactful profession throughout Northrend’s challenges!

What is Inscription?

Inscription is a brand-new profession introduced with the Wrath of the Lich King expansion in WotLK Classic. It allows players to scribe powerful glyphs, enhancing their spells and abilities.

Beyond glyphs, scribes create valuable scrolls for other players, vellums used by enchanters, unique Darkmoon cards, and even pre-raid quality epic off-hand items.

Furthermore, Inscription provides shoulder enchants, making it a versatile and profitable profession.

Why Level Inscription in WotLK?

Inscription offers substantial gold-making potential in WotLK Classic, driven by the constant demand for glyphs and scrolls. It’s an extremely powerful tool for farming gold.

Scribes can craft items enhancing personal power, like epic off-hands and shoulder enchants.

The profession’s versatility, combined with the ability to create sought-after consumables, makes leveling Inscription a rewarding investment for any player.

Leveling 1-75: The Basics

Begin your journey by locating an Inscription trainer and gathering early-level herbs.

Focus on crafting basic scrolls and glyphs to build skill and establish a foundation.

Finding Your First Inscription Trainer

Your initial trainer is crucial for unlocking recipes and starting your Inscription journey. For the Horde, head to the Valley of Trials in Orgrimmar and seek out Master Yi.

Alliance players should locate Master Kaelen in the Trade District of Stormwind City.

These trainers will provide the fundamental recipes needed to begin crafting scrolls and basic glyphs, setting you on the path to mastering the profession in WotLK Classic.

Gathering Materials: Herbs for Early Levels

Early Inscription relies heavily on readily available herbs. Focus on gathering Peacebloom, Silverleaf, Earthroot, and Stranglekelp in lower-level zones.

These herbs are essential for crafting Vellum, the base material for scrolls;

Efficient herb gathering is key to quickly leveling, and supplementing with Auction House purchases can accelerate progress. Prioritize these common herbs to maintain a steady supply for crafting!

Crafting Scrolls and Basic Glyphs

Initial leveling focuses on crafting Scrolls of various spell schools. These are consistently in demand and provide steady experience.

Alongside scrolls, begin crafting basic glyphs as recipes allow.

Prioritize glyphs for popular classes and specs. Remember, consistent crafting, even of lower-level items, builds skill and unlocks more advanced recipes. Efficiently utilize your gathered herbs for maximum experience gains!

Leveling 75-150: Expanding Your Knowledge

This phase introduces new recipes and herb requirements, demanding more efficient gathering. Focus on scroll production for consistent profit, and don’t skip daily quests!

New Recipes and Herb Requirements

As you progress from 75 to 150, Inscription unlocks more complex glyphs demanding higher-tier herbs. Expect increased reliance on herbs found throughout Northrend, like Adder’s Tongue and Lichbloom.

Careful planning is crucial; efficient herb gathering becomes paramount. New recipes often require combinations of herbs, increasing the challenge and potential profit.

Prioritize learning recipes that utilize readily available herbs to maintain a steady crafting flow and avoid excessive material costs.

Focus on Scroll Production for Profit

Between levels 75-150, scroll production emerges as a reliable gold source. Players consistently need scrolls for various professions, creating steady demand. Focus on crafting vellums and popular spell scrolls.

Efficiently gathering the required herbs—specifically Frozen Herb and Icecrown Herb—is key to maximizing profits.

Monitor the Auction House to identify scrolls with high demand and favorable pricing, adjusting your production accordingly for optimal returns.

The Importance of Daily Quests

Daily quests offered by Inscription trainers provide a consistent source of experience and valuable rewards. These quests often involve crafting specific items or delivering scrolls to key locations.

Completing these dailies not only accelerates your leveling process but also unlocks access to new recipes and materials.

Prioritize these quests alongside your regular crafting to maintain a steady progression and maximize your overall efficiency as a scribe.

Leveling 150-225: Northrend Exploration

Northrend introduces new herbs and glyphs, demanding exploration. Focus on gathering and crafting these to efficiently advance your Inscription skill.

Utilize your newfound abilities to empower your character and contribute to raid success!

Northrend Herb Gathering Locations

Borean Tundra and Howling Fjord offer initial Northrend herbs like Tundra Lotus and Frost Lotus, crucial for early glyphs.

Dragonblight and Grizzly Hills become prime locations as you level, yielding Icecrown Lotus and Lichbloom.

Sholazar Basin provides Frozen Herb, while Storm Peaks and Icecrown hold rarer, high-level herbs.

Remember to utilize tracking and consider herb-finding addons for efficiency!

Crafting Northrend Glyphs

Northrend Glyphs require newly available herbs and often demand higher Inscription skill. Prioritize glyphs for your own class to reduce costs initially.

Focus on crafting Major Glyphs, as they sell for significantly more gold than minor variations. Regularly check the Auction House to identify high-demand options.

Experiment with glyphs for popular classes and specs; demand fluctuates, so adaptability is key to maximizing profits throughout Northrend!

Utilizing Inscription for Personal Power

Inscription isn’t solely about gold; it empowers your character! Crafting Glyphs provides substantial performance boosts tailored to your class and specialization.

Utilize Darkmoon Cards to create powerful off-hand items, offering a pre-raid best-in-slot option. Shoulder enchants further enhance your capabilities.

Prioritize glyphs that complement your playstyle, maximizing your damage, healing, or survivability throughout Northrend’s challenging content!

Leveling 225-300: Mastering Northrend Glyphs

Northrend unlocks advanced Glyph recipes demanding rarer herbs. Focus on crafting these, alongside Darkmoon Cards, to refine your inscription skills.

Efficiency is key during this phase, optimizing your crafting process for maximum output!

Advanced Glyph Recipes and Materials

Reaching 225 skill unlocks potent Glyphs requiring Frost Lotus and Icecrown herbs, found primarily in Northrend. Expect increased material costs for these sought-after recipes.

Major and Greater Glyphs become prevalent, catering to endgame builds. Inscription knowledge is crucial for maximizing profits, as demand surges from raiders and PvP players.

Efficient gathering and smart market analysis are vital for success. Prioritize recipes with high resale value and consistent demand!

Darkmoon Cards, introduced at skill level 250, offer a unique path to profit and rare rewards. These cards require Ink of the Void and specific Northrend herbs.

Crafting involves combining cards to create more powerful ones, culminating in Seafoam Visions. Successful completion yields valuable prizes, including reputation and unique items.

Understanding card combinations and market trends is key to maximizing returns. It’s a complex but rewarding aspect of Inscription!

Optimizing Crafting Efficiency

Efficiency is crucial for maximizing Inscription profits. Utilize addons to track material costs and glyph demand. Batch crafting reduces downtime, and mastering keyboard shortcuts speeds up production.

Consider specializing in glyphs with high turnover rates. Stocking up on essential herbs during low-price periods minimizes expenses.

Regularly assess market trends to adapt your crafting focus, ensuring consistent profitability throughout WotLK Classic!

Leveling 300-350: Specialization and Profit

Focus on high-demand glyphs for maximum gold. Darkmoon Cards become viable, and efficient crafting is key to profitability in WotLK Classic.

Focusing on High-Demand Glyphs

Identifying profitable glyphs is crucial during this leveling stage. Prioritize those used by popular classes and specializations, like Affliction Warlocks and Frost Mages, as demand will consistently be high.

Monitor the Auction House to understand current market prices and adjust your crafting accordingly. Glyphs for raid-viable talents are always a safe bet, offering steady income. Consider specializing in glyphs that utilize readily available herbs to minimize material costs and maximize profit margins.

Darkmoon Card Strategies

Darkmoon Cards offer substantial gold-making potential, but require strategic crafting. Focus on completing sets, as completed sets fetch significantly higher prices on the Auction House. Utilize addons to track card drops and identify missing pieces.

Consider crafting cards during Darkmoon Faire for bonus reputation and potential material discounts. Be patient; completing sets takes time, but the rewards are worthwhile. Diversify your crafting to cater to different collector needs.

Inscription and Gold Making

Inscription excels at gold generation in WotLK Classic. Glyphs consistently sell well, especially those for popular raid specs like Affliction Warlock. Scrolls provide steady income, catering to leveling players and alts. Darkmoon Cards, when sets are completed, offer substantial profits.

Monitor Auction House prices and adjust crafting accordingly. Focus on high-demand items and capitalize on market fluctuations for maximum earnings.

Leveling 350-400: Rare Recipes and Competition

Reaching this range demands sourcing rare recipes and navigating increased competition from other scribes.

Material costs rise, requiring efficient gathering or smart Auction House purchases for profitability.

Sourcing Rare Inscription Recipes

Acquiring rare Inscription recipes is crucial between levels 350-400, often involving significant effort and gold investment. Many are obtained through reputation vendors, requiring dedicated daily quest completion with factions like the Kirin Tor. Others drop from rare mobs throughout Northrend, demanding persistent farming and luck.

The Auction House also presents opportunities, though prices can be inflated due to high demand. Diligence and patience are key to securing these valuable recipes, unlocking potent glyphs and maximizing your inscription profits.

Dealing with Material Costs

Inscription heavily relies on herbs, and material costs can fluctuate wildly, impacting profitability. Monitoring the Auction House is essential for identifying optimal buying times, often during off-peak hours. Consider farming herbs yourself, especially if you’re paired with Herbalism, to reduce expenses.

Strategic purchasing and efficient herb gathering are vital for maintaining margins, particularly when crafting high-demand, expensive glyphs. Bulk buying can sometimes secure discounts, but beware of market volatility.

Competition with Other Scribes

Inscription can be a competitive profession, especially on populated servers. Expect rivalry for rare recipes and high-demand glyphs. Undercutting prices is common, so understanding market trends and crafting costs is crucial.

Establishing a reputation for quality and reliability can attract consistent customers. Focusing on niche glyphs or offering bundled deals can differentiate you from competitors and secure a steady income stream.

Leveling 400-450: The Endgame

Reach the pinnacle of Inscription, crafting epic off-hand items and shoulder enchants. Maximize profits by dominating the glyph market and fulfilling player needs!

Epic Off-Hand Items

Inscription’s endgame highlight is crafting pre-raid quality, epic off-hand items. These are highly sought after by all classes, providing significant stat boosts before raiding.

Recipes are rare and expensive, requiring substantial gold and high-level herbs. Mastering these crafts offers substantial profit, but competition is fierce.

Focus on acquiring recipes for popular classes and consistently monitor auction house prices to maximize your earnings. These items represent a significant income stream!

Shoulder Enchanting

Inscription uniquely allows crafting shoulder enchantments, providing a consistent gold-making opportunity. These enchants offer valuable stat increases, making them desirable for players gearing up for raids and PvP.

While not as lucrative as epic off-hands, shoulder enchants offer steady demand and lower material costs.

Focus on enchants that complement popular class builds and maintain a consistent supply to capitalize on player needs throughout WotLK Classic.

Maximizing Inscription Profit in WotLK

Inscription’s profitability hinges on identifying high-demand glyphs and consistently supplying them to the auction house. Monitor raid compositions and popular PvP builds to anticipate needs.

Darkmoon Cards offer substantial profit, but require careful planning and material acquisition.

Efficient crafting, coupled with shrewd auction house management, is key to maximizing your gold earnings throughout WotLK Classic.

Best Classes for Inscription

Classes with gathering synergies, like Hunters and Druids, excel at herb collection for Inscription.

However, any class can succeed with dedication and efficient resource management in WotLK!

Synergies with Gathering Professions

Inscription heavily relies on herbs, making gathering professions invaluable. Herbalism is the most direct synergy, providing a consistent supply of materials, reducing costs, and boosting self-sufficiency.

Mining offers less direct benefit, but can fund your inscription through ore sales. Combining Inscription with Herbalism is optimal for leveling and profit, allowing control over material sourcing.

This pairing minimizes reliance on the Auction House, maximizing gold retention and crafting efficiency throughout your WotLK journey.

Paired Professions for Inscription

Herbalism and Alchemy create a powerful synergy, providing both materials and a means to process them for increased profit and efficiency.

Herbalism and Alchemy Combinations

Herbalism is the premier pairing for Inscription, providing a consistent source of the herbs needed for inks and glyphs. Gathering your own materials significantly reduces costs and boosts profits.

Combining this with Alchemy allows you to transmute herbs into valuable materials, further enhancing your gold-making potential.

Alchemy also provides potions for efficient herb gathering, creating a self-sufficient and lucrative loop for any aspiring scribe!

Racial Bonuses for Inscription

Humans receive a bonus to crafting skill, aiding early leveling. Dwarves and Gnomes benefit from increased skill with crafting professions, including Inscription.

These racial traits offer slight advantages, but aren’t essential for success!

Optimal Races for Scribes

Humans are a solid choice due to their crafting skill bonus, providing a small edge during the initial leveling stages of Inscription. However, the racial benefits aren’t overwhelmingly significant.

Dwarves and Gnomes also offer crafting bonuses, making them viable options, though the impact is minimal. Ultimately, race selection should prioritize personal preference and class synergy over inscription-specific advantages.

Focus on efficient herb gathering and recipe acquisition; racial bonuses are secondary!

WotLK vs. TBC Classic Inscription Differences

Inscription is entirely new in WotLK, unlike TBC. Recipes, materials (Northrend herbs), and crafted items—glyphs, scrolls, and Darkmoon cards—differ significantly.

Changes to Recipes and Materials

WotLK Classic introduces a complete overhaul of Inscription recipes compared to The Burning Crusade. Players will encounter entirely new glyphs tailored for Northrend’s classes and abilities, demanding a fresh learning curve.

Furthermore, the required materials shift dramatically. Gone are the reliance on Outland herbs; instead, Northrend herbs like Frost Lotus, Icethorn, and Lichbloom become essential for crafting.

Vellums also change, requiring specific Northrend materials, impacting both leveling and gold-making strategies.

Useful Addons for Inscription

Addons like RestedXP and GuideMMO significantly streamline Inscription leveling and gold-making. They offer efficient routes and profitable glyph identification.

Leveling and Gold-Making Addons

Several addons dramatically improve the Inscription experience, boosting both leveling speed and gold generation; RestedXP provides optimized leveling paths, guiding you through efficient herb gathering and crafting sequences.

GuideMMO offers detailed gold-making guides, pinpointing the most profitable glyphs to craft based on current market prices. Utilizing these tools minimizes wasted effort and maximizes your income, ensuring a swift and rewarding progression through the profession;

Inscription Trainers Locations

Key hubs for Inscription training include Dalaran, Stormwind, and Orgrimmar.

Finding these trainers is crucial for unlocking new recipes and progressing through the profession’s levels in WotLK!

Key Trainer Hubs in WotLK

Dalaran, the central hub in Northrend, houses Master Scribes offering training from levels 40 to 350. Reaching this location is essential for mid-level progression.

Stormwind and Orgrimmar provide initial training up to level 75, serving as convenient starting points for Alliance and Horde players, respectively.

Additionally, smaller training posts can be found in major cities like Undercity and Ironforge, offering localized access to early-level instruction. Remember to regularly check these hubs for updated recipes!

Gold Making with Inscription

Glyphs are your primary gold source! Identify high-demand options, especially raid and PvP glyphs.

Darkmoon Cards also offer substantial profits, requiring careful market analysis and strategic crafting.

Identifying Profitable Glyphs

Determining which glyphs to craft for maximum profit requires constant market observation. Focus on glyphs used by popular classes and specializations, particularly those excelling in raids and PvP content.

Monitor the Auction House frequently, noting price fluctuations and demand. Glyphs for Affliction Warlocks, due to their strong DPS, often sell well.

Consider glyphs with complex material requirements, as fewer scribes may craft them, leading to higher prices. Regularly assess and adapt your production based on current trends!


  • 0

short rosary meditations pdf

Category : PDF

Article Plan: Short Rosary Meditations PDF

This guide explores accessing and utilizing PDF resources for concise Rosary meditations, focusing on the benefits and practical application of this powerful prayer practice.

Rosary meditation is a deeply rooted spiritual practice within the Catholic tradition, offering a pathway to contemplation and a closer relationship with God. It’s a form of prayer centered around systematically meditating on the mysteries of Jesus’ life, interwoven with the recitation of the Hail Mary, Our Father, and Glory Be. However, the traditional length of a full Rosary can be daunting for beginners or those with limited time.

Short Rosary meditations address this challenge by breaking down the Rosary into smaller, more manageable segments – often focusing on just one decade or a single mystery. This allows individuals to experience the benefits of Rosary prayer even amidst busy schedules. The accessibility of PDF resources further simplifies this practice, providing structured meditations and guidance for focused prayer. These PDFs often contain the prayers, scripture passages, and reflective questions designed to deepen understanding and foster a personal connection with the divine.

Ultimately, short Rosary meditations offer a powerful tool for spiritual growth, inviting peace, and cultivating a mindful presence in daily life.

Understanding the Benefits of Short Rosary Meditations

Short Rosary meditations offer a wealth of benefits, particularly in today’s fast-paced world. Their concise nature makes consistent prayer achievable, even with limited time. Unlike a full Rosary, which can feel overwhelming, shorter sessions encourage regular practice, fostering a deeper spiritual habit. PDF resources amplify these benefits by providing readily available, structured meditations.

These focused prayers cultivate inner peace, reduce stress, and promote emotional well-being. By contemplating the mysteries of Christ’s life, individuals gain insights into their own faith journey and strengthen their connection with God. The repetitive nature of the prayers, combined with mindful reflection, can be incredibly grounding and centering.

Furthermore, utilizing PDF guides ensures a focused meditation, minimizing distractions and maximizing spiritual impact. They are accessible, portable, and cater to various prayer styles, making the Rosary more approachable for everyone.

The History of the Rosary and its Meditative Practice

The Rosary’s origins trace back to the 12th century, evolving from the practice of reciting the 150 Psalms. As literacy rates were low, the faithful substituted each Psalm with an “Our Father.” Over time, this developed into the recitation of “Hail Marys” alongside the “Our Fathers,” forming the basis of the Rosary we know today. Initially, beads were used to aid in counting prayers, fostering a meditative rhythm.

St. Dominic, in the 13th century, promoted the Rosary as a powerful tool against heresy, emphasizing its meditative aspect. The Rosary wasn’t merely rote repetition; it was a method of contemplating the life of Christ and Mary.

The development of formalized mysteries – Joyful, Sorrowful, and Glorious – further enhanced its meditative depth. Short Rosary meditations, facilitated by PDF resources, continue this tradition, offering accessible pathways to profound spiritual reflection rooted in centuries of devotion.

Different Types of Rosaries and Their Use in Meditation

Rosaries come in diverse materials – wood, plastic, metal, and even gemstone – each offering a tactile experience during meditation. Traditional five-decade rosaries remain the most common, perfectly suited for reciting a complete set of mysteries. However, shorter rosaries, like those with ten or fifteen beads, are ideal for short Rosary meditations, fitting easily into busy schedules.

Chaplets, featuring a single decade, provide a focused meditative experience. Finger rosaries, worn on the fingers, offer discreet prayer opportunities throughout the day. PDF guides often suggest specific rosary types for particular meditations.

Regardless of the type, the rosary serves as a physical anchor, guiding focus and preventing wandering thoughts. The rhythmic movement between beads facilitates a meditative state, allowing for deeper contemplation of the mysteries. Utilizing a PDF alongside your chosen rosary enhances the experience, providing structured reflections.

Preparing for a Short Rosary Meditation Session

Preparation is key for a fruitful short Rosary meditation. Begin by finding a quiet space, minimizing distractions. A comfortable posture – seated or kneeling – promotes relaxation. Having your chosen Rosary and a PDF guide readily available streamlines the process.

Before starting, take a few deep breaths to center yourself and quiet your mind. Briefly review the mystery you’ll be meditating on, perhaps reading the corresponding scripture passage within the PDF. Setting a specific intention – peace, guidance, gratitude – can deepen your focus.

Consider gentle background music or a dimly lit room to enhance the meditative atmosphere. A PDF often includes suggested preparatory prayers; Remember, even five or ten minutes of focused prayer is valuable. Embrace simplicity and allow yourself to be present with the mysteries.

The Four Sets of Mysteries: A Breakdown

The Rosary’s structure revolves around four sets of Mysteries – Joyful, Sorrowful, Glorious, and Luminous – each offering unique themes for meditation. PDF guides often categorize meditations by these sets, providing focused reflections for each decade.

Joyful Mysteries (Annunciation, Visitation, Nativity, Presentation, Finding in the Temple) contemplate Jesus’s birth and early life. Sorrowful Mysteries (Agony in the Garden, Scourging, Crowning with Thorns, Carrying of the Cross, Crucifixion) focus on His Passion.

Glorious Mysteries (Resurrection, Ascension, Descent of the Holy Spirit, Assumption, Coronation) celebrate Christ’s triumph and Mary’s glory. Luminous Mysteries (Baptism, Transfiguration, Proclamation of the Kingdom, Institution of the Eucharist, Mary’s Coronation) highlight key moments in Jesus’s public ministry.

PDF resources typically offer concise meditations for each mystery, aiding contemplation. Short sessions can focus on one decade per mystery, allowing for a complete Rosary in four sittings.

The Joyful Mysteries

The Joyful Mysteries, often a starting point for Rosary meditation, focus on the Incarnation and early life of Jesus. PDF guides dedicated to these mysteries frequently offer short reflections on the Annunciation, Visitation, Nativity, Presentation in the Temple, and finding Jesus in the Temple.

Meditations within these PDFs often emphasize Mary’s role and her “yes” to God, prompting contemplation on obedience and faith. Short sessions might focus on the humility of Mary during the Visitation or the joy experienced at the Nativity.

PDF resources can provide prompts to visualize the scenes, encouraging a deeper emotional connection. For example, imagining the angel Gabriel’s appearance or the shepherds’ adoration. These concise meditations are ideal for beginners or those with limited time, offering a peaceful entry into Rosary prayer.

The Sorrowful Mysteries

The Sorrowful Mysteries, presented in many “Short Rosary Meditations PDF” guides, invite contemplation on Jesus’ passion and suffering. These meditations center around the Agony in the Garden, Scourging at the Pillar, Crowning with Thorns, Carrying of the Cross, and Crucifixion.

PDF resources often provide brief, poignant reflections on Jesus’ sacrifice and Mary’s sorrow. Short sessions might focus on the weight of Jesus’ burden or the depth of His love. These guides frequently encourage empathy and a recognition of the pain endured for humanity’s salvation.

Utilizing a PDF can help structure these difficult meditations, offering specific points for reflection. Visualizing the scenes – the garden, the whip, the cross – can deepen the emotional impact. These concise meditations, while somber, offer a powerful opportunity for repentance and spiritual growth.

The Glorious Mysteries

“Short Rosary Meditations PDF” resources frequently dedicate sections to the Glorious Mysteries, celebrating the triumph of Christ and Mary. These mysteries encompass the Resurrection, Ascension, Descent of the Holy Spirit, Assumption of Mary, and Coronation of Mary as Queen of Heaven.

PDF guides often emphasize the hope and joy inherent in these events. Short meditations might focus on the power of resurrection, the promise of eternal life, or Mary’s exalted role in heaven. They encourage gratitude for Christ’s victory over death and Mary’s intercession.

These meditations, presented concisely in PDF format, can be particularly uplifting. Visualizing the scenes – the empty tomb, Jesus ascending, Mary crowned – fosters a sense of awe and wonder. They offer a powerful reminder of God’s ultimate triumph and the blessings awaiting the faithful.

The Luminous Mysteries

“Short Rosary Meditations PDF” materials increasingly include the Luminous Mysteries, added by Pope John Paul II. These focus on key moments in Christ’s public ministry – His Baptism in the Jordan, the Wedding at Cana, the Proclamation of the Kingdom of God, the Transfiguration, and the Institution of the Eucharist.

PDF guides often highlight the revelatory nature of these mysteries, emphasizing Christ’s divine identity and mission. Short meditations might center on the Holy Spirit descending at Baptism, the miracle at Cana demonstrating Jesus’ power, or the profound meaning of the Eucharist.

These concise reflections, readily available in PDF format, encourage contemplation of Christ’s teachings and actions. Visualizing these luminous events – the shining face of Jesus on the mountain, the overflowing wine – deepens understanding and faith. They offer a pathway to a more profound relationship with Christ.

Finding and Accessing “Short Rosary Meditations PDF” Resources

Locating “Short Rosary Meditations PDF” resources is surprisingly straightforward in today’s digital landscape. A simple online search using keywords like “Rosary meditation PDF,” “short Rosary guide,” or “Luminous Mysteries PDF” yields numerous results. Many Catholic websites, parishes, and religious organizations offer free downloadable PDFs.

Popular platforms like Google, Bing, and dedicated Catholic resource sites are excellent starting points. Websites specializing in Catholic devotionals frequently curate collections of these PDFs, categorized by mystery or prayer style. Social media groups dedicated to the Rosary often share links to helpful resources.

Ensure the source is reputable before downloading. Look for PDFs from established Catholic organizations or authors. Preview the content to ensure it aligns with your spiritual needs and preferences. Downloading and saving these PDFs to a dedicated folder allows for easy access during your prayer time.

Popular PDF Resources for Short Rosary Meditations

Several PDF resources consistently rank high in popularity for short Rosary meditations. Rosary Army offers a comprehensive collection, categorized by mystery, with concise meditations for each decade. Catholic Prayer Book provides downloadable PDFs featuring the Rosary alongside other traditional prayers.

The Dominican Sisters of Mary, Mother of God often share beautifully crafted Rosary guides in PDF format, emphasizing contemplative prayer. Many dioceses also publish their own Rosary pamphlets as downloadable PDFs on their websites. Websites like PrayMoreNovenas frequently offer free downloadable novenas that incorporate Rosary meditations.

For beginners, PDFs with clear explanations of each mystery and simple, accessible meditations are ideal. More experienced practitioners might prefer PDFs offering deeper theological reflections. Always preview the resource to ensure it suits your personal prayer style and spiritual needs before committing to it.

Utilizing PDF Guides for Focused Meditation

PDF guides enhance focused Rosary meditation by providing structured content, minimizing distractions. Select a quiet space and eliminate interruptions. Begin by reviewing the introduction to understand the guide’s approach and the specific mystery you’ll contemplate.

Follow the provided meditations decade by decade, allowing each reflection to sink in. Highlight key phrases or insights that resonate with you. Use the PDF as a springboard for personal reflection, connecting the mystery to your own life experiences.

Consider printing the PDF to avoid screen glare and potential digital distractions. Some guides include accompanying imagery; visualize these scenes to deepen your engagement. Regular use of a chosen PDF fosters familiarity, allowing for a more fluid and contemplative meditation experience. Consistency is key to reaping the spiritual benefits.

Adapting PDF Meditations to Personal Prayer Styles

PDF Rosary meditations offer a flexible foundation, easily adapted to individual preferences. Don’t feel constrained by the provided text; use it as a starting point for your own reflections and vocal prayers.

Incorporate personal petitions or intentions within each decade, connecting the mysteries to your specific needs and those of others. If you prefer, add contemplative silence after each Hail Mary, allowing the mystery to resonate deeply.

Experiment with different pacing – some prefer a slower, more deliberate rhythm, while others find a quicker pace more engaging. Feel free to supplement the PDF with devotional music or imagery that enhances your prayer experience. The goal is to create a personalized practice that draws you closer to God, utilizing the PDF as a helpful tool, not a rigid structure.

Common Challenges in Rosary Meditation and Solutions

Distractions are a frequent hurdle during Rosary meditation. Acknowledge them without judgment, gently redirecting your focus back to the mystery and prayers. Utilizing a quiet space and minimizing interruptions can significantly help.

Mind-wandering is also common, especially for beginners. Short PDF meditations can be beneficial here, offering manageable segments. Try focusing on the tactile sensation of the beads or visualizing the scenes described in the mystery.

Feeling rushed or overwhelmed can diminish the meditative quality. Remember, the Rosary isn’t about speed; it’s about presence. Break down the decades into smaller units if needed, and don’t hesitate to pause and reflect; PDF guides can offer structured pacing, but adapt it to your own rhythm. Consistency, even with short sessions, is key to overcoming these challenges.

Integrating Short Rosary Meditations into Daily Life

Seamlessly weaving short Rosary meditations into your routine enhances spiritual well-being. Utilize commute time – even a single decade can be impactful. Pair it with morning coffee or before bed for a calming ritual.

Leverage “Short Rosary Meditations PDF” resources for convenient access. Keep a digital copy on your phone or tablet for on-the-go prayer. These PDFs often offer focused meditations, perfect for busy schedules.

Link the Rosary to existing habits. For example, pray a decade after each meal or during a daily walk. Consistency is paramount; even five minutes daily yields significant benefits. Don’t strive for perfection, but for regular, mindful engagement. PDF guides can provide structure, but personalize the practice to fit your lifestyle and needs, fostering a deeper connection with your faith.

The Role of Visualizations in Rosary Meditation

Visualization profoundly deepens Rosary meditation, transforming it from rote recitation to a vivid, immersive experience. As you pray each Hail Mary, actively imagine the scene from the mystery – the Annunciation, Jesus’s crucifixion, or Mary’s Assumption.

“Short Rosary Meditations PDF” resources often include suggested visualizations, guiding your imagination. Don’t limit yourself to these; personalize the scenes, adding details and emotions.

Engage all your senses. What do you see, hear, smell, and feel within the scene? This active engagement fosters a stronger connection with the events and the figures involved. PDF guides can offer prompts, but allow your imagination to freely explore the mysteries. Regular practice enhances your ability to visualize, leading to a more profound and transformative prayer experience, enriching your spiritual life.

Advanced Techniques for Deeper Rosary Meditation

Beyond basic recitation, several techniques deepen Rosary meditation. Lectio Divina – slow, reflective reading of scripture related to each mystery – enhances understanding. “Short Rosary Meditations PDF” resources can suggest relevant passages.

Consider “praying in the spirit” – allowing the Holy Spirit to guide your thoughts and emotions during each Hail Mary. This moves beyond intellectual understanding to a heartfelt connection with God.

Apostolic Prolongation involves offering each decade for a specific intention or person. PDF guides may offer suggested intentions. Silent pauses between Hail Marys allow for contemplation. Journaling reflections after meditation solidifies insights. Consistent practice, utilizing these techniques alongside PDF resources, unlocks a richer, more transformative Rosary experience, fostering a deeper relationship with God.

Resources for Further Learning About Rosary Meditation

Numerous resources expand understanding of Rosary meditation. Websites like The Rosary Network and Catholic.org offer articles, audio guides, and online Rosary prayers. “Short Rosary Meditations PDF” collections are readily available through these platforms and parish websites.

Books by authors like Fr. Patrick Peyton provide in-depth teachings on the Rosary’s power. EWTN offers video series and downloadable resources. Local Catholic bookstores often carry Rosary guides and pamphlets.

Online forums and Facebook groups dedicated to the Rosary facilitate community and shared learning. Retreat centers frequently host workshops on contemplative prayer, including Rosary meditation. Utilizing PDF guides alongside these resources creates a comprehensive learning experience, deepening your practice and fostering a stronger spiritual life.


  • 0

backyard astronomer’s guide

Category : Guide

Backyard Astronomy: A Beginner’s Guide

Embark on a celestial journey! This guide empowers novice backyard astronomers to explore the cosmos, revealing planets, galaxies, and stunning night sky wonders.

Discover the joy of observing from your own space, utilizing simple tools and resources to unlock the universe’s secrets, starting today!

What is Backyard Astronomy?

Backyard astronomy represents the captivating hobby of observing celestial objects – planets, stars, galaxies, and more – from the convenience of your own home. It’s an accessible gateway into the vast universe, requiring minimal equipment to begin your exploration. Unlike professional astronomy, which relies on large, sophisticated telescopes and observatories, backyard astronomy emphasizes personal observation and discovery.

This pursuit encourages a deeper understanding of our place in the cosmos, fostering curiosity and a sense of wonder. It’s about learning to navigate the night sky, identifying constellations, and appreciating the beauty of deep-sky objects. Whether using just your eyes, binoculars, or a telescope, backyard astronomy offers a rewarding and enriching experience for all ages.

Why Observe From Your Backyard?

Observing from your backyard offers unparalleled convenience and flexibility. You can stargaze whenever the sky is clear, without the need for travel or adhering to observatory schedules. This accessibility allows for frequent observation, accelerating your learning and deepening your connection with the night sky. The familiarity of your surroundings also enhances the experience, creating a comfortable and personal observing environment.

Furthermore, backyard astronomy fosters a sense of wonder and discovery right outside your door; It’s a fantastic way to disconnect from daily stresses and reconnect with the natural world. You can share this passion with family and friends, inspiring a shared appreciation for the universe. It’s a truly rewarding hobby, accessible to anyone!

Best Times for Backyard Astronomy

The optimal times for backyard astronomy coincide with dark, clear skies, far from city lights. Winter months generally offer the most stable atmospheric conditions, with crisp, dry air enhancing visibility. New moon phases are ideal, as the lack of lunar brightness allows fainter objects to become visible. After midnight, as the Earth rotates, more of the celestial sphere becomes accessible.

However, any clear night can be rewarding! Check weather forecasts for cloud cover and atmospheric stability. Utilize astronomy apps to predict optimal viewing times for specific planets or events. Remember, patience is key – even brief glimpses through breaks in the clouds can be exciting!

Understanding Light Pollution

Light pollution significantly impacts backyard astronomy, washing out faint celestial objects. Excessive artificial light from cities and towns scatters in the atmosphere, creating a skyglow that obscures stars. This makes observing galaxies, nebulae, and even fainter stars incredibly difficult. Different types of light pollution exist, including glare, skyglow, and light trespass.

Minimizing your exposure involves finding darker locations, shielding outdoor lights, and advocating for responsible lighting practices in your community. Even small efforts can make a noticeable difference in your observing experience, revealing a more vibrant and detailed night sky.

Impact of Light Pollution on Viewing

Light pollution’s effect on backyard astronomy is profound. It drastically reduces the visibility of faint deep-sky objects like galaxies and nebulae, making them appear dim or completely invisible. Constellations become harder to discern, and the Milky Way may vanish entirely from view. Even planets can suffer from reduced contrast, hindering detailed observation.

The brighter the sky, the fewer stars you’ll see. This limits the scope of what’s observable and diminishes the overall observing experience. Seeking darker skies is crucial for maximizing your viewing potential and truly appreciating the beauty of the cosmos.

Essential Equipment for Beginner Astronomers

Starting your astronomical journey doesn’t require expensive gear! Essential equipment for beginner astronomers focuses on affordability and usability. A red-light flashlight preserves night vision, while star charts or apps aid navigation. Comfortable clothing is vital for extended observing sessions.

Binoculars offer an excellent entry point, revealing craters on the Moon and brighter deep-sky objects. Later, consider a telescope – reflector or refractor – based on your observing interests and budget. Remember, patience and practice are more important than having the most advanced equipment!

Binoculars: A Great Starting Point

Binoculars are an incredibly accessible and versatile tool for beginner astronomers. They’re significantly more affordable than telescopes, easy to use, and require minimal setup. A good pair reveals lunar craters, the Galilean moons of Jupiter, and brighter star clusters.

Look for binoculars with an aperture of 50mm or larger for better light gathering. Magnification between 7x and 10x is ideal for stable viewing. Binoculars provide a wide field of view, making it easier to locate objects and enjoy sweeping views of the Milky Way. They’re a fantastic first step!

Telescopes: Types and Considerations

Telescopes unlock deeper views of the cosmos, but choosing one requires consideration. Refractor telescopes use lenses, offering sharp images but can be pricier. Reflector telescopes utilize mirrors, providing larger apertures for light gathering at a lower cost. Catadioptric telescopes combine both, offering versatility.

Aperture is key – larger apertures reveal fainter objects. Mounts are crucial; equatorial mounts track celestial movement, while altazimuth mounts are simpler. Consider portability and storage. Beginner astronomers should start with a smaller, manageable telescope and gradually upgrade as their experience grows.

Navigating the Night Sky

Successfully navigating the night sky is fundamental for backyard astronomers. Start by familiarizing yourself with celestial coordinates – right ascension and declination – akin to longitude and latitude on Earth. However, for beginners, star charts and apps are invaluable tools. These resources visually map constellations and pinpoint object locations.

Learning to recognize constellations is a cornerstone skill. Begin with prominent patterns like the Big Dipper and Orion. Use them as landmarks to locate fainter stars and deep-sky objects. Patience and practice are key; the night sky reveals its secrets gradually.

Star Charts and Apps

Star charts and apps are essential navigational aids for backyard astronomers. Traditional paper charts offer a tactile experience, displaying constellations and stars as they appear from your location. However, modern astronomy apps provide dynamic, interactive star maps on smartphones or tablets.

These apps often utilize your device’s GPS and compass to accurately show you what’s overhead in real-time. Many include features like object identification, red-light modes to preserve night vision, and databases of planets, nebulae, and galaxies. Popular choices include Stellarium, SkyView, and Star Walk.

Constellations: Learning to Recognize Patterns

Constellations are patterns of stars that have been recognized for millennia, serving as fundamental landmarks in the night sky for backyard astronomers. Learning to identify these groupings simplifies navigation and object location. Start with prominent constellations like Ursa Major (the Big Dipper) and Orion, easily visible during specific seasons.

Utilize star charts or apps to connect the dots and visualize the shapes. Remember that constellations are based on human interpretation and vary across cultures. As you become familiar with a few key constellations, you can use them as stepping stones to find fainter stars and deep-sky objects nearby.

Observing the Moon

The Moon is arguably the most accessible and rewarding target for backyard astronomers. Its changing phases offer diverse viewing opportunities, from the crisp terminator line showcasing craters during crescent phases, to the dramatic shadows of full moons. Binoculars reveal mountains, valleys, and vast lunar maria (dark plains).

Even a small telescope unveils incredible detail. Focus on features like Tycho crater, the Sea of Tranquility, and the Apennine Mountains. Observing the Moon is a fantastic way to hone your skills and appreciate the beauty of our celestial neighbor, readily visible without specialized equipment.

Lunar Phases and Features

Lunar phases – New, Crescent, First Quarter, Gibbous, Full, and back – dramatically alter the Moon’s appearance and what features are visible. The terminator, the line between light and dark, is best for observing craters due to long shadows.

Key features include maria (dark, basaltic plains like the Sea of Tranquility), highlands (bright, heavily cratered areas), and impact craters (Tycho, Copernicus). Rilles are winding, valley-like formations. Observing these features reveals the Moon’s geological history and provides a captivating experience for backyard astronomers.

Best Times to Observe the Moon

The most rewarding lunar viewing occurs during the first and third quarter phases. These phases offer optimal shadowing, highlighting craters and mountains with dramatic relief. Avoid the Full Moon; its bright glare washes out subtle details.

Low lunar altitudes provide clearer views through less atmosphere. Early evening or late-night observations often yield steadier images. Check a lunar calendar for specific dates and times. Patience and clear skies are key for backyard astronomers seeking detailed lunar observations, enhancing their celestial experience.

Exploring the Planets

Visible planets like Venus, Mars, Jupiter, and Saturn offer captivating sights for backyard astronomers. Venus shines brilliantly as an “evening star” or “morning star,” while Mars displays subtle surface features during favorable oppositions. Jupiter’s cloud bands and Galilean moons are easily observed, and Saturn’s rings are a breathtaking spectacle.

Timing is crucial; consult astronomy resources for planetary visibility charts. Each planet presents unique observing opportunities, varying with its orbital position. Dedicated lessons focusing on each planet’s features and optimal viewing times will greatly enhance your planetary exploration;

Visible Planets and Their Characteristics

Venus, intensely bright, exhibits phases like the Moon. Mars, the “Red Planet,” reveals polar ice caps and dark surface markings. Jupiter, a gas giant, showcases prominent cloud bands and the Great Red Spot, alongside its four Galilean moons. Saturn is famed for its stunning ring system, visible even with modest telescopes.

Each planet’s appearance changes over time. Observing these variations—planetary phases, shifting cloud patterns, or changes in Martian surface features—provides a dynamic and rewarding experience for backyard astronomers. Detailed study reveals each planet’s unique atmospheric and geological characteristics.

When to View Each Planet

Venus is best seen as an “evening star” or “morning star” near sunrise or sunset. Mars has favorable oppositions roughly every two years, offering optimal viewing. Jupiter is visible for much of the year, peaking during opposition when it’s closest to Earth. Saturn is best observed around opposition, when its rings are most favorably angled.

Timing is crucial for backyard astronomers. Planetary visibility depends on Earth’s position in its orbit. Utilize astronomy apps or websites to determine optimal viewing windows for each planet, maximizing your chances of a spectacular observation.

Deep-Sky Objects: Galaxies, Nebulae, and Star Clusters

Venture beyond planets! Deep-sky objects—galaxies, nebulae, and star clusters—offer breathtaking views for dedicated backyard astronomers. These faint wonders require darker skies and often, magnification. The Andromeda Galaxy (M31) is a popular target, visible to the naked eye under ideal conditions. Nebulae, like the Orion Nebula (M42), appear as glowing clouds of gas and dust.

Star clusters, such as the Pleiades (M45), present sparkling groupings of stars. Locating these objects demands patience, star charts, and potentially, a telescope. Embrace the challenge and unlock the universe’s hidden treasures!

Locating Deep-Sky Objects

Finding faint fuzzies takes practice! Start with star charts or astronomy apps to pinpoint coordinates. Learn to “star-hop”—using bright stars as landmarks to navigate to dimmer objects. Utilize finderscopes on your telescope for precise aiming. Patience is key; deep-sky objects appear faint and require dark-adapted eyes.

Begin with brighter, well-known objects like the Andromeda Galaxy or Orion Nebula. Online resources and observing guides provide detailed maps and tips. Remember, light pollution significantly hinders visibility, so seek darker locations for optimal viewing.

Astronomy Events to Watch For

The cosmos offers spectacular shows! Mark your calendar for annual meteor showers like the Perseids and Geminids, offering dazzling displays of shooting stars. Eclipses – solar and lunar – are rare and captivating events, requiring proper safety precautions for viewing.

Don’t miss Astronomy Day celebrations, fostering community and learning. Planetary conjunctions, where planets appear close together in the sky, are also visually stunning. Regularly check astronomy websites and apps for upcoming events and observing opportunities. These events transform backyard observing into truly unforgettable experiences!

Meteor Showers

Witness celestial fireworks! Meteor showers occur when Earth passes through debris trails left by comets. The Perseids in August and Geminids in December are among the most reliable and prolific, offering numerous “shooting stars” per hour.

Find a dark location away from city lights, lie back, and allow your eyes to adjust for optimal viewing. No telescope is needed – meteors are best seen with the naked eye! Observing after midnight often yields higher rates. Patience is key; allow at least 30 minutes for your eyes to fully adapt to the darkness.

Eclipses

Experience a rare cosmic alignment! Eclipses – solar and lunar – are breathtaking events. A solar eclipse occurs when the Moon passes between the Sun and Earth, briefly blocking the Sun’s light. Never look directly at the Sun without proper eye protection!

Lunar eclipses happen when Earth passes between the Sun and Moon, casting a shadow on the Moon. These are safe to view with the naked eye. Check astronomy websites for upcoming eclipse dates and visibility from your location. Eclipses are unforgettable spectacles, showcasing the universe’s grandeur.

Astronomy Day and Local Clubs

Connect with fellow stargazers! Celebrate Astronomy Day, typically around April 28th, with public events, telescope viewings, and educational activities. It’s a fantastic opportunity to learn and share your passion.

Joining a local astronomy club is invaluable. Clubs offer mentorship, observing sessions at dark sky locations, and access to equipment. They often host workshops and lectures, accelerating your learning. Search online for astronomy clubs near you – a supportive community awaits! Embrace the collective knowledge and enthusiasm of experienced astronomers.

Resources for Further Learning

Expand your astronomical knowledge! Numerous online astronomy resources are available, including NASA’s website, Sky & Telescope, and Space.com, offering articles, images, and live streams. Explore interactive star charts and planetarium software for virtual observing.

For in-depth study, consider books for beginner astronomers. Titles covering constellations, planets, and deep-sky objects are excellent starting points. Online courses provide structured learning experiences, guiding you from telescope setup to identifying celestial wonders. Continuous learning unlocks deeper appreciation for the universe!

Online Astronomy Resources

Dive into the digital universe! Websites like NASA’s Space Place offer engaging content for all ages, while Sky & Telescope and Space.com provide news, observing guides, and stunning astrophotography. Explore Stellarium, a free planetarium software, to simulate the night sky from any location.

Interactive star charts, such as those found on Heavens-Above, help track satellites and the International Space Station. YouTube channels dedicated to astronomy offer tutorials and virtual tours. These online resources empower backyard astronomers with knowledge and inspiration, fostering a lifelong passion for the cosmos!

Books for Beginner Astronomers

Expand your knowledge with printed guides! “Turn Left at Orion” by Guy Consolmagno is a classic, offering practical advice for observing with binoculars and small telescopes. “NightWatch” by Terence Dickinson provides comprehensive coverage of the night sky, constellations, and celestial events.

For visual learners, consider books with detailed star charts and photographs. Explore titles focusing on astrophotography if you’re interested in capturing images. These books serve as invaluable companions for backyard astronomers, providing a wealth of information and inspiring further exploration of the universe!

Tips for Comfortable Observing

Maximize your enjoyment with preparation! Dress warmly in layers, even during summer nights, as temperatures can drop. A comfortable chair or observing mat is essential for extended viewing sessions. Red-light flashlights preserve your night vision – avoid white light!

Bring insect repellent, especially during warmer months. Consider a dew heater for your telescope to prevent condensation. A thermos of hot beverage adds to the cozy atmosphere. Prioritize comfort to fully immerse yourself in the wonders of the night sky, making your backyard astronomy experience truly rewarding!

Clothing and Setup

Prepare for a comfortable night under the stars! Layered clothing is crucial, adapting to changing temperatures. A warm hat and gloves are often overlooked but vital. Ensure your observing location is level and stable for your telescope or binoculars.

A small table for charts, a notebook, and a red-light flashlight is incredibly helpful. Position your setup away from direct light sources. Consider a dark-colored blanket to minimize reflected light. Prioritize a relaxed and organized setup to enhance your backyard astronomy experience and focus on the celestial views!

Taking Astrophotography with Your Smartphone

Capture the cosmos with your phone! While dedicated equipment yields superior results, smartphones are surprisingly capable. Utilize a tripod for stability, essential for long exposures. Download a camera app allowing manual control over ISO, shutter speed, and focus.

Experiment with settings – higher ISO for faint objects, longer shutter speeds for detail. Consider a smartphone telescope adapter for magnified views. Post-processing apps can enhance images. Remember, patience is key! Backyard astrophotography with a smartphone is a fun, accessible way to document your observations.

Safety Precautions for Observing

Prioritize safety during your stargazing adventures! Never, ever look directly at the sun without proper solar filters – permanent eye damage can occur instantly. When using telescopes or binoculars, ensure they are stable to prevent accidental falls. Be mindful of your surroundings, especially in the dark, avoiding tripping hazards.

Dress warmly in layers, as nights can get cold. Inform someone of your observing location and expected return time. Avoid shining bright lights that disrupt night vision. Backyard astronomy should be enjoyable and safe for everyone involved!

Looking at the Sun Safely

Observing the sun requires extreme caution! Direct solar viewing, even for a fleeting moment, can cause irreversible blindness. Never use a telescope or binoculars without a certified solar filter specifically designed for astronomy. These filters must be securely mounted before aiming at the sun.

Homemade filters or those not specifically rated for solar observation are incredibly dangerous. Projection methods, where the sun’s image is projected onto a screen, are a safer alternative. Always prioritize eye safety – backyard astronomy isn’t worth risking your vision!

Finding Dark Sky Locations

Escaping light pollution dramatically enhances viewing! While backyard astronomy is accessible from almost anywhere, truly dark skies reveal fainter objects. Utilize online resources like Dark Site Finder maps to locate areas with minimal light interference. Consider state parks, rural areas, or designated Dark Sky Parks.

Even a short drive can make a significant difference. Remember to check local regulations and obtain any necessary permits. Planning a trip to a dark sky location unlocks a universe of celestial wonders, far beyond what’s visible in urban environments. Embrace the darkness!


  • 0

the curious incident of the dog in the night pdf

Category : PDF

The Curious Incident of the Dog in the Night-Time: A Comprehensive Overview

The novel and play script are widely available! Readers and theatre enthusiasts can readily access PDF formats online‚
allowing for convenient study and enjoyment of Mark Haddon’s impactful story.

The internationally acclaimed novel has captivated over ten million readers‚ inspiring a groundbreaking National Theatre production and subsequent adaptations.

Origins of the Story

Mark Haddon’s inspiration for The Curious Incident of the Dog in the Night-Time stemmed from a seemingly simple observation – a neighbor’s teenage son with behavioral challenges. This sparked a desire to explore the world through a different lens‚ specifically that of a character navigating life with autism spectrum disorder.

However‚ Haddon deliberately avoided explicitly labeling the protagonist‚ Christopher Boone‚ as autistic‚ preferring to present his unique perspective and challenges without a diagnostic framework. The story initially began as a short story‚ gradually evolving into a full-length novel published in 2003.

The narrative’s core revolves around a mystery – the death of Wellington‚ a neighbor’s dog – which serves as a catalyst for Christopher’s journey of self-discovery and independence. The novel’s success led to a highly acclaimed stage adaptation by Marianne Elliott‚ further amplifying the story’s reach and impact.

Interestingly‚ access to the original novel in PDF format has contributed to its widespread study and discussion‚ allowing readers globally to engage with Haddon’s compelling narrative and its nuanced portrayal of neurodiversity. The story’s origins are rooted in observation and empathy‚ blossoming into a cultural phenomenon.

Mark Haddon’s Novel: Initial Reception and Impact

Mark Haddon’s The Curious Incident of the Dog in the Night-Time garnered immediate critical acclaim upon its 2003 publication‚ winning the Whitbread Book of the Year award and the Commonwealth Writers’ First Book Award. Initial reception praised its innovative narrative structure‚ told entirely from Christopher Boone’s first-person perspective‚ and its sensitive portrayal of a neurodivergent individual.

The novel resonated deeply with readers‚ quickly becoming a bestseller and captivating over ten million people worldwide. Its impact extended beyond literary circles‚ sparking conversations about autism‚ neurodiversity‚ and the importance of understanding different perspectives. The book’s accessibility and emotional depth contributed to its widespread appeal.

The availability of the novel in PDF format facilitated its accessibility‚ allowing for broader readership and academic study. This digital format enabled discussions in classrooms and book clubs globally‚ further amplifying its influence.

Haddon’s work challenged conventional storytelling norms and fostered greater empathy for individuals with autism‚ leaving an indelible mark on contemporary literature and prompting a more inclusive dialogue surrounding neurodiversity.

Adaptation for the Stage: National Theatre Production

The National Theatre’s 2012 stage adaptation of The Curious Incident of the Dog in the Night-Time‚ directed by Marianne Elliott‚ was a resounding success‚ winning seven Olivier Awards‚ including Best New Play. The production was lauded for its innovative staging and its faithful yet imaginative translation of Haddon’s novel to the theatrical medium.

The adaptation skillfully captured Christopher Boone’s internal world through a combination of physical theatre‚ multimedia projections‚ and a dynamic set design. It successfully conveyed the challenges and triumphs of navigating a world not designed for neurodivergent individuals. The production’s emotional impact was widely praised by critics and audiences alike.

Following its initial run‚ the play toured internationally‚ reaching diverse audiences and solidifying its status as a theatrical landmark. Access to the play script in PDF format allowed theatre companies and educational institutions to explore and stage their own productions‚ further extending its reach.

The National Theatre’s adaptation proved that complex narratives‚ like those centered around neurodiversity‚ could be powerfully and effectively presented on stage‚ inspiring further innovative theatrical works.

Key Themes Explored in the Work

The Curious Incident of the Dog in the Night-Time delves into several profound themes‚ most notably responsibility‚ honesty‚ sympathy‚ and understanding different perspectives. The narrative compels audiences to confront their own biases and consider the world through the eyes of someone with a fundamentally different way of processing information.

The mystery surrounding the dog’s death serves as a catalyst for exploring themes of trust‚ betrayal‚ and the complexities of human relationships. Christopher’s investigation forces him – and the audience – to question assumptions and challenge conventional notions of truth. The novel‚ and subsequently the stage adaptations‚ highlight the importance of empathy and acceptance.

The availability of the novel in PDF format has facilitated widespread discussion and analysis of these themes in academic and community settings. It allows for easy access to the text‚ encouraging deeper engagement with its complex moral and philosophical questions.

Ultimately‚ the work champions the value of neurodiversity and advocates for a more inclusive and compassionate society‚ prompting reflection on how we interact with and understand those who are different from ourselves.

Neurodiversity and Representation

The Curious Incident of the Dog in the Night-Time is significant for its portrayal of neurodiversity‚ specifically through the character of Christopher Boone‚ widely understood to be autistic. The work sparked considerable conversation regarding representation of autistic individuals in literature and theatre.

However‚ this representation hasn’t been without debate within the disabled community. Some praise the novel for increasing awareness and fostering empathy‚ while others critique it for potentially perpetuating stereotypes or presenting an inauthentic portrayal of autistic experience. The story’s impact is undeniable‚ opening doors for extensive discussion.

The accessibility of the novel in PDF format has amplified these discussions‚ allowing a broader audience to engage with the text and form their own opinions. This ease of access facilitates critical analysis of the representation and its implications.

Despite differing opinions‚ the work remains a landmark example of neurodiversity being brought to the forefront of mainstream culture‚ prompting vital conversations about acceptance‚ understanding‚ and the importance of diverse narratives.

Christopher Boone’s Characterization

Christopher Boone‚ the protagonist of The Curious Incident of the Dog in the Night-Time‚ is a fifteen-year-old boy with a unique way of perceiving the world. His characterization is central to the novel’s and play’s impact‚ offering a deeply personal and often challenging perspective.

Boone’s meticulous attention to detail‚ logical thinking‚ and difficulty with social interaction are key aspects of his portrayal‚ leading many to interpret him as being on the autism spectrum. The narrative is presented entirely through his voice‚ providing an intimate and unfiltered view of his experiences.

The availability of the novel in PDF format allows readers to closely examine the nuances of his characterization‚ analyzing his thought processes and emotional responses. This accessibility encourages a deeper understanding of his internal world.

Productions‚ including Rotherham Reps’ recent staging‚ focus on humanizing Christopher‚ offering touching insights into his mindset. His character is not simply defined by his differences‚ but by his intelligence‚ resilience‚ and ultimately‚ his humanity.

The Mystery at the Heart of the Narrative

The inciting incident – the death of Wellington‚ the neighbor’s dog – propels the narrative of The Curious Incident of the Dog in the Night-Time forward. However‚ this mystery serves as a catalyst for a much larger investigation‚ one that unravels secrets about Christopher Boone’s own family and past.

Christopher’s methodical approach to solving the dog’s death‚ documented in detail within the novel‚ highlights his unique cognitive abilities. He meticulously gathers evidence‚ creates maps‚ and applies logical reasoning‚ mirroring his broader attempts to understand the world around him.

Accessing the novel in PDF format allows readers to follow Christopher’s investigative process closely‚ appreciating the intricate details he observes and the conclusions he draws. The mystery isn’t simply about who killed Wellington‚ but why and what it reveals.

The story is described as “gripping‚” and the play encourages audiences to “find out how this mystery ends.” It’s a compelling narrative that blends suspense with profound emotional depth‚ prompting reflection on truth‚ trust‚ and the complexities of human relationships.

Critical Acclaim and Awards

The Curious Incident of the Dog in the Night-Time has garnered widespread critical acclaim since its initial publication and subsequent stage adaptation. Reviews consistently praise the work’s innovative storytelling‚ emotional resonance‚ and powerful portrayal of neurodiversity.

One critic describes the production as “incredible‚” stating they’ve “seldom‚ if ever‚ seen a production quite as powerful” in nearly 25 years of reviewing theatre. This highlights the profound impact the play has on audiences‚ leaving a “beautiful silence” in its wake.

The novel’s success‚ having captivated over ten million readers‚ paved the way for the award-winning National Theatre production. Accessing the novel in PDF format allows readers to experience the source material that inspired this celebrated adaptation.

Productions‚ like the one at San Francisco Playhouse‚ are lauded as “innovative” and “emotional.” The play’s ability to connect with audiences on a deep level‚ even on occasions like Mother’s Day‚ demonstrates its universal appeal and enduring quality.

Theatrical Innovations in Productions

Stage adaptations of The Curious Incident of the Dog in the Night-Time are renowned for their groundbreaking theatrical innovations‚ pushing the boundaries of conventional staging. Productions consistently employ inventive techniques to represent Christopher Boone’s unique perception of the world.

Director Atul Kumar’s recent production notably integrates Artificial Intelligence (AI) into the creative process‚ utilizing it for poster design and dynamic projections. This demonstrates a forward-thinking approach to visual storytelling‚ enhancing the immersive experience for the audience.

Accessing the play script in PDF format provides insight into the staging directions and technical requirements‚ revealing the complexity behind these innovations. The script details how visual and auditory elements are used to convey Christopher’s sensory sensitivities.

These productions often feature intricate set designs‚ dynamic lighting‚ and multimedia projections to simulate Christopher’s internal world. The goal is to allow the audience to experience the world as he does‚ fostering empathy and understanding. The Delhi premiere showcased these elements beautifully.

Use of Technology and Visuals in Stage Adaptations

Stage adaptations of The Curious Incident of the Dog in the Night-Time heavily rely on technology and striking visuals to portray Christopher Boone’s internal world and unique way of processing information. These elements are crucial for conveying his sensory experiences to the audience.

Recent productions‚ like Atul Kumar’s‚ are pioneering the use of Artificial Intelligence (AI) to create dynamic visuals‚ including projections and posters. This innovative approach enhances the immersive quality of the performance and reflects Christopher’s analytical mind.

The play script‚ available in PDF format‚ reveals detailed staging instructions emphasizing the importance of lighting‚ sound‚ and projections. These technical cues are integral to representing Christopher’s heightened sensitivities and anxieties.

Productions often employ complex set designs that can rapidly transform to represent different locations‚ mirroring Christopher’s ability to map and analyze his surroundings. The use of video and interactive elements further immerses the audience in his perspective‚ creating a truly captivating theatrical experience.

Atul Kumar’s Use of AI in Recent Productions

Director Atul Kumar’s recent production of The Curious Incident of the Dog in the Night-Time marks a significant step in theatrical innovation‚ notably through his integration of Artificial Intelligence (AI). He’s utilizing AI not just for technical aspects‚ but as a creative partner in the production’s aesthetic.

Specifically‚ Kumar employed AI in the creation of visual elements‚ including striking posters and dynamic projections seen throughout the performance. This approach aims to visually represent Christopher Boone’s unique cognitive processes and his analytical approach to the world around him.

Access to the play script in PDF format reveals the importance of visual storytelling‚ which Kumar amplifies with AI-generated content. This demonstrates a forward-thinking approach to staging‚ blending traditional theatrical techniques with cutting-edge technology.

The Delhi premiere on January 11‚ 2025‚ showcased this innovative use of AI‚ offering audiences a fresh perspective on the beloved story. Kumar’s work highlights the potential for AI to enhance emotional impact and deepen audience engagement with complex narratives.

Emotional Impact on Audiences

The Curious Incident of the Dog in the Night-Time consistently evokes a powerful emotional response from audiences‚ stemming from its unique narrative perspective and exploration of complex themes. The story‚ accessible through the novel and readily available in PDF format‚ resonates deeply with viewers due to its honest portrayal of neurodiversity and the challenges of human connection.

Reviews frequently describe the production as “powerful” and “incredible‚” noting a palpable silence that descends upon the audience during particularly poignant moments. This suggests a profound level of empathy and understanding cultivated within the theatre.

The play’s ability to humanize Christopher Boone‚ a character navigating a world not designed for his sensitivities‚ fosters a sense of compassion and challenges preconceived notions. The mystery itself‚ while engaging‚ serves as a vehicle for exploring broader themes of responsibility‚ honesty‚ and the importance of seeing the world from different perspectives.

Ultimately‚ the emotional impact lies in the play’s capacity to provoke thought‚ inspire empathy‚ and leave a lasting impression long after the curtain falls.

Audience Reactions and Reviews

Critical and public reception to The Curious Incident of the Dog in the Night-Time has been overwhelmingly positive‚ with many reviewers struggling to adequately capture the production’s impact. Accessing the story via the novel‚ often found in PDF format‚ frequently precedes attendance‚ enriching the theatrical experience.

One critic‚ with nearly 25 years of experience‚ declared it one of the most powerful productions they’d ever witnessed. This sentiment is echoed in numerous reviews praising the innovative staging and emotional depth. San Francisco Playhouse’s production is lauded as “innovative” and “emotional‚” even drawing audiences on special occasions like Mother’s Day.

Audience members consistently highlight the gripping narrative and intriguing characters‚ urging others to “go and watch it” to discover the mystery’s resolution. The play’s success lies in its ability to blend entertainment with profound social commentary‚ sparking conversations about neurodiversity and acceptance;

The story’s universal themes‚ combined with its unique presentation‚ have cemented its place as a modern theatrical masterpiece‚ garnering widespread acclaim and devoted fans.

The Play’s Exploration of Responsibility and Honesty

The Curious Incident of the Dog in the Night-Time‚ readily available as a PDF for detailed study‚ profoundly explores themes of responsibility and honesty‚ viewed through the unique lens of Christopher Boone‚ a neurodivergent teenager. The narrative compels audiences to confront societal expectations and the complexities of moral obligation.

Christopher’s investigation into the dog’s death isn’t merely a mystery; it’s a journey of self-discovery and a challenge to conventional notions of right and wrong. His unwavering commitment to truth‚ despite social awkwardness‚ forces others to examine their own deceptions and compromises.

The play subtly questions who bears responsibility for Christopher’s well-being and the events unfolding around him. It highlights the importance of clear communication and the devastating consequences of dishonesty‚ particularly within familial relationships.

Ultimately‚ the production encourages introspection‚ prompting viewers to consider their own roles in upholding honesty and taking responsibility for their actions‚ mirroring the novel’s impactful message.

Sympathy and Understanding of Different Perspectives

Accessing The Curious Incident of the Dog in the Night-Time as a PDF allows for a deeper engagement with its core message: fostering sympathy and understanding for differing perspectives. The play‚ adapted from Mark Haddon’s novel‚ uniquely positions the audience within the mind of Christopher Boone‚ a character on the autism spectrum.

By experiencing the world through Christopher’s sensory sensitivities and logical thought processes‚ viewers are challenged to move beyond neurotypical viewpoints. The production skillfully portrays his struggles with social interaction and emotional regulation‚ prompting empathy rather than judgment.

Furthermore‚ the play doesn’t solely focus on Christopher’s perspective. It also presents the viewpoints of his parents‚ teachers‚ and neighbors‚ revealing their own complexities and motivations. This multifaceted approach encourages audiences to consider the challenges faced by everyone involved.

Ultimately‚ the play advocates for acceptance and inclusivity‚ demonstrating that genuine connection requires a willingness to understand and appreciate the diverse ways in which individuals perceive the world.

Controversies and Debates within the Disabled Community

The availability of The Curious Incident of the Dog in the Night-Time as a PDF has amplified ongoing discussions within the disabled community regarding its representation of autism. While widely praised‚ the work has also sparked debate about whether it perpetuates harmful stereotypes or offers a genuinely authentic portrayal;

A central point of contention revolves around the casting of neurotypical actors in the role of Christopher Boone. Critics argue this practice reinforces the idea that autistic experiences are best understood – and therefore portrayed – through a non-autistic lens‚ potentially silencing autistic voices.

Furthermore‚ some members of the community express concern that the play focuses heavily on Christopher’s challenges‚ potentially overshadowing his strengths and individuality. Others question the narrative’s emphasis on his mother’s infidelity‚ suggesting it unfairly frames autistic individuals as victims of circumstance.

Despite these criticisms‚ many acknowledge the play’s positive impact in raising awareness about autism and prompting conversations about neurodiversity. The debate itself demonstrates the importance of continued dialogue and authentic representation.

Differing Opinions on Neurodivergent Representation

The widespread accessibility of The Curious Incident of the Dog in the Night-Time in PDF format has fueled diverse opinions regarding its neurodivergent representation. While lauded for bringing autism to a broader audience‚ the work isn’t without its detractors‚ sparking significant debate within the neurodiversity movement.

Some praise Mark Haddon’s attempt to portray the world through an autistic perspective‚ appreciating the novel’s detailed descriptions and honest depiction of sensory sensitivities and social anxieties. They believe it fosters empathy and understanding among neurotypical audiences.

Conversely‚ others criticize the portrayal as relying on tropes and stereotypes‚ potentially reinforcing misconceptions about autism. Concerns are raised about the focus on Christopher’s difficulties rather than his unique abilities and perspectives. The narrative’s framing‚ they argue‚ can inadvertently pathologize neurodivergence.

The debate extends to the theatrical adaptations‚ particularly regarding casting choices. The frequent casting of neurotypical actors in the role of Christopher remains a contentious issue‚ with advocates calling for greater representation of autistic performers. Ultimately‚ opinions vary widely‚ reflecting the complexity of neurodivergent experiences.

Regional Theatre Productions and Interpretations

The availability of the play script in PDF format has facilitated numerous regional theatre productions of The Curious Incident of the Dog in the Night-Time‚ each offering unique interpretations of Mark Haddon’s story. These productions demonstrate the play’s adaptability and enduring appeal to diverse audiences.

Rotherham Reps‚ for example‚ focused on humanizing Christopher Boone‚ aiming to provide a touching insight into the autistic mindset. Their staging prioritized empathy and understanding‚ seeking to connect with audiences on an emotional level. This approach highlights the play’s potential for fostering compassion.

Currently‚ Burbage Theatre Co. is presenting their own performance‚ details of which are still emerging. Regional productions often tailor the staging and design to reflect local contexts and resources‚ resulting in fresh perspectives on the narrative.

These interpretations showcase the play’s versatility‚ allowing different companies to emphasize specific themes or character nuances. The widespread access to the script empowers local theatre groups to engage with this powerful story and contribute to the ongoing conversation surrounding neurodiversity and representation.

Rotherham Reps Production: A Focus on Humanizing Christopher

The Rotherham Reps production of The Curious Incident of the Dog in the Night-Time‚ readily accessible through the play’s widely available PDF script‚ distinguished itself with a deliberate focus on humanizing Christopher Boone. This approach moved beyond simply portraying autism‚ aiming instead to reveal the character’s inner world and emotional landscape.

The company emphasized Christopher’s intelligence‚ vulnerability‚ and unique perspective‚ striving to present a nuanced and empathetic portrayal. This involved careful attention to detail in staging‚ lighting‚ and performance‚ all designed to immerse the audience in Christopher’s sensory experience.

By prioritizing Christopher’s humanity‚ Rotherham Reps sought to challenge preconceived notions and foster a deeper understanding of neurodiversity. The production aimed to connect with audiences on an emotional level‚ encouraging them to see the world through Christopher’s eyes.

This interpretation‚ made possible by the accessibility of the script‚ demonstrates the power of regional theatre to offer fresh and insightful perspectives on established works‚ contributing to a more inclusive and compassionate understanding of autism.

Burbage Theatre Co.’s Current Performance

Currently‚ Burbage Theatre Co. is staging a performance of The Curious Incident of the Dog in the Night-Time‚ with details continually emerging. Access to the play’s script in PDF format allows for deeper analysis of their interpretation and staging choices. Initial reports suggest a compelling and innovative production‚ building upon the play’s established strengths.

The company appears to be embracing the theatricality inherent in the source material‚ utilizing creative staging and visual elements to represent Christopher Boone’s unique perception of the world. This production promises to be emotionally resonant‚ mirroring the powerful impact described in reviews of other stagings.

Burbage Theatre Co.’s commitment to innovative theatre is evident in their approach to this complex and moving story. The availability of the script facilitates a richer understanding of their artistic decisions and the nuances of their performance.

As the run continues‚ further insights into their interpretation will undoubtedly emerge‚ solidifying their contribution to the ongoing legacy of this critically acclaimed play.

Availability of the Novel and Play Script (PDF Formats)

Accessing The Curious Incident of the Dog in the Night-Time is remarkably easy! Both Mark Haddon’s original novel and the adapted play script are readily available in PDF format through various online platforms. This accessibility allows students‚ theatre professionals‚ and avid readers to delve into the story at their convenience.

Numerous websites offer legal downloads of the novel’s PDF version‚ facilitating in-depth study and analysis of Haddon’s narrative structure and character development. Similarly‚ the play script PDF is obtainable from theatrical publishing houses and online booksellers.

The widespread availability of these PDF versions fosters a deeper engagement with the work‚ enabling audiences to compare the novel’s prose with the stage adaptation’s visual and dramatic interpretations. This is particularly useful for understanding the creative choices made in bringing Christopher Boone’s world to life.

Having the PDF format allows for easy annotation‚ highlighting‚ and sharing‚ making it an invaluable resource for educational purposes and theatrical productions alike.


  • 0

precious little sleep pdf

Category : PDF

“Precious Little Sleep” by Paul Spurgeon explores sleep science, offering practical strategies to improve sleep quality. It caters to parents, professionals, and anyone seeking better rest.

1.1 Overview of the Book

“Precious Little Sleep” by Paul Spurgeon delves into the science of sleep, offering insights into sleep cycles, disorders, and strategies for improvement. The book is designed for parents, professionals, and anyone seeking to enhance sleep quality. It provides practical advice on establishing routines, creating a sleep-friendly environment, and addressing common sleep challenges. Spurgeon’s approach combines scientific research with real-world applications, making it a valuable resource for those aiming to prioritize sleep health and overall well-being.

1.2 Importance of Sleep in Modern Life

Sleep is vital for physical health, mental clarity, and overall well-being. In today’s fast-paced world, chronic sleep deprivation is linked to impaired cognitive function, increased stress, and higher risks of chronic diseases. Quality sleep enhances productivity, emotional stability, and resilience, making it essential for navigating modern life’s demands effectively. Prioritizing sleep is crucial for maintaining a healthy, balanced lifestyle in an increasingly demanding society.

1.3 Target Audience for the Book

The book primarily targets parents seeking solutions for their children’s sleep challenges, as well as individuals struggling with sleep disorders. It also appeals to professionals aiming to enhance productivity and overall well-being through better sleep. The practical strategies and scientific insights make it a valuable resource for anyone looking to improve sleep quality and address common sleep-related issues effectively.

The Science of Sleep

The Science of Sleep explores sleep cycles, REM/NREM stages, and brain activity. “Precious Little Sleep PDF” offers insights into sleep regulation and its biological processes and functions.

2.1 Understanding Sleep Cycles

Sleep cycles are repetitive patterns of brain activity during rest, essential for physical and mental restoration. Each cycle lasts 90-120 minutes, repeating 3-5 times per night. REM (rapid eye movement) and NREM (non-REM) stages alternate, with REM fostering cognitive functions and NREM supporting bodily repair. Understanding these cycles helps optimize sleep quality and address disruptions, as discussed in “Precious Little Sleep PDF.”

2.2 Stages of Sleep: REM and NREM

Sleep is divided into REM (Rapid Eye Movement) and NREM (Non-REM) stages. REM sleep, characterized by rapid eye movements and vivid dreams, is crucial for cognitive functions like memory consolidation. NREM sleep, divided into three stages, promotes physical restoration, with deeper stages aiding tissue repair and immune function. Understanding these cycles helps optimize sleep quality and address disorders, ensuring a balanced and restorative sleep pattern for overall health and well-being.

2.3 The Role of the Brain in Sleep Regulation

The brain plays a central role in regulating sleep through complex mechanisms. Structures like the hypothalamus and suprachiasmatic nucleus control circadian rhythms, while neurotransmitters such as melatonin and serotonin promote relaxation. During sleep, the brain cycles through REM and NREM stages, essential for memory consolidation and physical restoration. Disruptions in these processes can lead to sleep disorders, highlighting the brain’s critical function in maintaining sleep quality and overall health.

Benefits of Quality Sleep

Quality sleep enhances physical health, boosts mental clarity, and strengthens emotional resilience, leading to improved overall well-being and life satisfaction.

3.1 Physical Health Benefits

Quality sleep is essential for physical health, boosting the immune system and aiding in tissue repair. It supports weight management by regulating hunger hormones and enhances cardiovascular health, reducing the risk of heart disease. Adequate sleep also lowers inflammation, which is linked to chronic conditions like diabetes and arthritis. Prioritizing sleep helps maintain physical well-being and overall longevity.

3.2 Mental and Emotional Well-being

Quality sleep is crucial for mental and emotional well-being, reducing stress, anxiety, and depression. It enhances emotional resilience, improves mood stability, and supports cognitive function. Chronic sleep deprivation can impair judgment, increase irritability, and weaken problem-solving skills. Prioritizing sleep helps maintain a healthy mental state, fostering better relationships and overall life satisfaction. “Precious Little Sleep” offers insights and strategies to achieve restful sleep, promoting long-term emotional balance and mental health.

3.3 Cognitive Function and Productivity

Quality sleep significantly enhances cognitive function, boosting memory, focus, and problem-solving skills. Poor sleep impairs mental clarity and productivity, leading to decreased performance in daily tasks. “Precious Little Sleep PDF” emphasizes the importance of restful nights for optimal brain function, offering practical tips to improve sleep quality and, consequently, cognitive performance and productivity levels.

Common Sleep Disorders

Insomnia, sleep apnea, and restless legs syndrome are prevalent issues affecting sleep quality, often leading to daytime fatigue and overall health complications if left untreated.

4.1 Insomnia: Causes and Symptoms

Insomnia, a prevalent sleep disorder, is characterized by difficulty falling or staying asleep. Common causes include stress, irregular sleep schedules, and lifestyle factors like excessive caffeine or screen time. Symptoms often manifest as persistent sleep disruptions, leading to daytime fatigue, irritability, and reduced productivity. Chronic insomnia can significantly impact mental and physical health, necessitating tailored interventions to address underlying triggers and restore restful sleep patterns.

4.2 Sleep Apnea: Risks and Consequences

Sleep apnea disrupts breathing during sleep, causing fragmented rest and daytime fatigue. Untreated, it increases risks of cardiovascular issues, hypertension, and cognitive impairment; Severe cases may lead to accidents due to drowsiness. Addressing sleep apnea is crucial for overall health and safety, as highlighted in “Precious Little Sleep PDF.”

4.3 Restless Legs Syndrome and Other Movement Disorders

Restless Legs Syndrome (RLS) is a neurological disorder causing an irresistible urge to move legs due to uncomfortable sensations. It often disrupts sleep, leading to fatigue. Other movement disorders, like periodic limb movement disorder (PLMD), involve involuntary limb movements during sleep. These conditions significantly impact sleep quality and overall well-being, requiring tailored management strategies to alleviate symptoms and restore restful sleep patterns.

Factors Affecting Sleep Quality

Lifestyle choices, environmental factors like noise and light, and technology use significantly impact sleep quality, disrupting routines and reducing restful nights, as highlighted in the book.

5.1 Lifestyle Choices and Habits

Lifestyle choices significantly impact sleep quality. Irregular sleep schedules, caffeine consumption, and alcohol use disrupt sleep patterns. Smoking and poor diet also affect sleep. Consistency in sleep routines is key to improving sleep hygiene. Avoiding screens before bed and creating a relaxing bedtime routine can enhance sleep quality. Healthy habits, such as regular exercise, promote better rest. Addressing these factors is essential for achieving restful sleep and overall well-being.

5.2 Environmental Factors: Light, Noise, and Temperature

Light exposure, especially blue light from devices, suppresses melatonin production, affecting sleep. Noise levels and temperature also play a role; cooler, quieter environments promote better rest. Adjusting these factors can significantly enhance sleep quality and duration, creating a more conducive sleep environment for overall well-being.

5.3 The Impact of Technology on Sleep

Technology significantly affects sleep quality, as screen time exposes individuals to blue light, suppressing melatonin production. Devices like smartphones and computers stimulate the brain, making it harder to relax. Additionally, the constant notifications and engaging content can lead to prolonged wakefulness. This digital interference disrupts natural sleep patterns, reducing deep sleep phases and affecting overall restfulness. Setting boundaries with technology before bed is crucial for maintaining healthy sleep hygiene.

Strategies for Improving Sleep

Establishing consistent routines, optimizing sleep environments, and adopting healthy lifestyle habits are key strategies to enhance sleep quality and duration effectively.

6.1 Establishing a Consistent Sleep Routine

Creating a consistent sleep schedule is crucial for improving sleep quality. Set a regular bedtime and wake-up time, even on weekends. Develop a calming pre-sleep routine, such as reading or meditating, to signal your body it’s time to rest. Avoid screens and stimulating activities before bed. Consistency helps regulate your circadian rhythms, leading to deeper, more restorative sleep and better mental clarity throughout the day.

6.2 Creating a Sleep-Conducive Environment

Creating a sleep-friendly environment is crucial for quality rest. Ensure your bedroom is dark, quiet, and cool, as brightness and noise can disrupt sleep cycles. Invest in a comfortable mattress and pillows, and keep the space clutter-free. Limit screen exposure before bed, as blue light can delay melatonin production. Consider using blackout curtains, earplugs, or a white noise machine if necessary. A calming ambiance, such as soft colors or aromatherapy, can also enhance relaxation and improve sleep quality.

6.3 Dietary and Exercise Habits for Better Sleep

A balanced diet rich in nutrients supports sleep quality. Avoid heavy meals, caffeine, and alcohol before bedtime. Regular exercise promotes better sleep, but timing matters—avoid vigorous workouts close to bedtime. Staying hydrated and maintaining a consistent eating schedule can enhance sleep hygiene. A healthy lifestyle, combined with mindful dietary choices, fosters a restful night’s sleep and improves overall well-being.

The Role of Relaxation Techniques

Relaxation techniques like mindfulness, meditation, and yoga reduce stress, promoting deeper sleep. These practices calm the mind and body, enhancing sleep quality naturally and effectively.

7.1 Mindfulness and Meditation for Sleep

Mindfulness and meditation are powerful tools for enhancing sleep quality. By practicing deep breathing, body scans, and mindful relaxation, individuals can calm their minds and reduce stress. Regular meditation helps regulate sleep patterns, improving the ability to fall asleep and stay asleep. These techniques also address underlying anxiety and restlessness, creating a conducive environment for restful sleep and overall well-being.

7.2 Yoga and Stretching Exercises

Yoga and stretching exercises are powerful tools for improving sleep quality. Gentle movements can reduce muscle tension, promote relaxation, and prepare the body for rest. Specific poses, such as child’s pose or downward dog, can calm the mind and release stress. Regular practice enhances flexibility and balances the body’s energy, making it easier to fall asleep and stay asleep. Incorporating these exercises into your evening routine can lead to deeper, more restorative sleep.

7.3 Progressive Muscle Relaxation (PMR)

Progressive Muscle Relaxation (PMR) is a powerful technique to reduce physical tension and promote relaxation. By systematically tensing and relaxing muscle groups, individuals can release stored stress and calm their nervous system. This method is particularly effective for improving sleep quality, as it helps alleviate restlessness and prepares the body for a restful night. Regular practice of PMR can lead to deeper sleep and enhanced overall well-being.

Sleep and Mental Health

Sleep significantly impacts mental health, influencing emotional stability, cognitive function, and mental disorders like depression and anxiety. Poor sleep can exacerbate mental health issues, creating a cycle.

8.1 The Link Between Sleep and Depression

Sleep disturbances often precede depressive episodes, with insomnia and oversleeping being common symptoms. Depression disrupts the body’s circadian rhythm, leading to irregular sleep patterns. Research shows that chronic sleep deprivation can trigger or worsen depressive symptoms by altering neurotransmitters like serotonin and dopamine. Additionally, the emotional toll of poor sleep exacerbates feelings of hopelessness and low energy, creating a vicious cycle. Addressing sleep issues is crucial for managing depression effectively.

8.2 Anxiety Disorders and Sleep Disturbances

Anxiety disorders often disrupt sleep patterns, leading to chronic insomnia or restless nights. The bidirectional relationship between anxiety and sleep disturbances exacerbates symptoms, creating a cycle of heightened stress and fatigue. Common issues include difficulty falling asleep due to racing thoughts or increased arousal. Cognitive Behavioral Therapy for Insomnia (CBT-I) is frequently recommended to address these challenges, helping individuals manage anxiety and improve sleep quality effectively.

8.3 Managing Stress for Better Sleep

Chronic stress disrupts sleep patterns, making it harder to fall asleep and stay asleep. Techniques like mindfulness, meditation, and relaxation exercises can help reduce stress levels. Engaging in activities that promote calmness, such as deep breathing or journaling, can prepare the mind and body for rest. Limiting exposure to stressors before bedtime and maintaining a consistent sleep routine are also effective strategies. Addressing stress proactively can significantly improve sleep quality and overall well-being.

Sleep Across the Lifespan

Sleep needs evolve significantly from infancy to old age, with each life stage requiring different durations and patterns to support health and development, impacting overall well-being.

9.1 Sleep Needs in Infancy and Childhood

Infants and children require ample sleep for growth and development. Newborns need 16-18 hours of sleep, decreasing to 10-13 hours by age 6. Consistent routines and a safe sleep environment are crucial. Sleep deprivation can impact physical health, cognitive function, and emotional well-being. Establishing healthy sleep habits early fosters long-term benefits, ensuring children thrive physically and mentally.

9.2 Sleep Patterns in Adolescence and Adulthood

Adolescents experience biological shifts, delaying sleep onset, while adults face lifestyle challenges affecting sleep duration. Both stages require consistent routines to maintain health. Quality sleep supports physical and mental well-being, crucial for productivity and emotional stability. Disruptions in these patterns can lead to long-term health issues, emphasizing the need for adaptive strategies to ensure restful sleep across these life phases.

9.3 Sleep Changes in Older Adults

As people age, sleep patterns often change, with older adults experiencing reduced deep sleep, more frequent awakenings, and earlier wake-up times. Health conditions, medications, and lifestyle factors contribute to these shifts. Maintaining consistent routines and creating a sleep-friendly environment can help mitigate these changes. Addressing underlying issues and adapting habits are crucial for improving sleep quality in older adults, ensuring better physical and mental health.

The Economic Impact of Sleep Deprivation

Sleep deprivation leads to productivity loss, increased healthcare costs, and safety risks, significantly affecting workplace efficiency and national economies, as highlighted in “Precious Little Sleep PDF.”

10.1 Productivity Loss in the Workplace

Sleep deprivation significantly impacts workplace productivity, leading to reduced alertness, impaired focus, and increased errors. Fatigued employees often struggle with problem-solving and creativity, resulting in lower efficiency. Companies face billions in lost revenue annually due to absenteeism and presenteeism. Poor sleep habits contribute to higher turnover rates and reduced job satisfaction. Addressing sleep issues can enhance workplace performance, benefiting both employees and organizations. Prioritizing sleep health is essential for maintaining a productive workforce.

10.2 Healthcare Costs Associated with Sleep Disorders

Sleep disorders significantly increase healthcare costs due to prolonged treatments, medications, and hospitalizations. Conditions like insomnia and sleep apnea often lead to secondary health issues, raising expenses. Chronic sleep deprivation is linked to cardiovascular diseases, diabetes, and mental health disorders, further straining healthcare systems. Indirect costs, such as lost productivity and workplace accidents, exacerbate the economic burden. Addressing sleep disorders early can mitigate these financial impacts and improve overall well-being.

10.3 Accidents and Safety Risks Due to Fatigue

Fatigue significantly increases the risk of accidents, impairing reaction times and judgment. Drowsy driving is a leading cause of car accidents, while workplace fatigue raises injury risks. Studies show that sleep-deprived individuals are 30% more likely to cause industrial accidents. Additionally, medical professionals and truck drivers, who often work long hours, face heightened safety risks. Addressing sleep deprivation is critical to preventing these avoidable incidents and ensuring public safety.

The Future of Sleep Research

The future of sleep research involves AI-driven monitoring tools and innovative treatments. Platforms like YouTube share advancements, making sleep health more accessible and engaging for everyone.

11.1 Advances in Sleep Technology

Recent advancements in sleep technology include wearable devices, smart mattresses, and AI-driven sleep trackers. These tools monitor sleep patterns, stages, and environmental factors, offering personalized insights. Innovations like sleep-stage tracking and real-time feedback enable better sleep management. Additionally, AI-powered apps provide tailored recommendations to improve sleep quality, making it easier to address sleep disorders and enhance overall well-being through data-driven solutions.

11.2 Emerging Treatments for Sleep Disorders

Recent advancements in sleep medicine include non-invasive brain stimulation and gene therapy. Personalized treatments using AI and wearable tech are gaining traction. Pharmacological innovations target specific sleep cycle disruptions, offering hope for chronic insomnia and sleep apnea. These emerging therapies aim to address root causes, providing more effective and tailored solutions for sleep disorders, enhancing overall sleep health and quality of life.

11.3 The Role of AI in Sleep Monitoring

AI plays a pivotal role in sleep monitoring by analyzing data from wearable devices and apps. It identifies patterns, offering insights into sleep quality and duration. AI-driven tools detect disorders like insomnia or sleep apnea, enabling early intervention. These technologies align with the strategies discussed in “Precious Little Sleep,” enhancing personalized approaches to improve rest and overall well-being.

“Precious Little Sleep PDF” emphasizes the importance of prioritizing sleep for overall well-being, offering practical strategies to enhance sleep quality and promote a healthier lifestyle.

12.1 Summary of Key Points

“Precious Little Sleep PDF” emphasizes the crucial role of sleep in overall well-being, providing insights into sleep science and practical strategies to enhance sleep quality. Tailored for parents, professionals, and individuals seeking restful nights, the book offers actionable advice to address common sleep challenges, promoting better health and productivity.

12.2 Final Thoughts on Achieving Quality Sleep

Achieving quality sleep requires a holistic approach, blending consistent routines, a sleep-friendly environment, and mindfulness practices; Prioritize sleep as a cornerstone of health, fostering physical and mental well-being. By implementing strategies from “Precious Little Sleep,” readers can enhance their sleep quality, leading to improved productivity, emotional balance, and overall life satisfaction. Embrace sleep as an essential investment in your future, ensuring long-term health and happiness.

12.3 Encouragement to Prioritize Sleep Health

Prioritizing sleep health is a vital investment in your overall well-being. By making sleep a non-negotiable part of your daily routine, you can enhance energy levels, improve mental clarity, and strengthen your immune system. Small changes, such as maintaining a consistent sleep schedule or creating a relaxing bedtime routine, can lead to significant improvements. Remember, quality sleep is not a luxury—it’s a necessity for living your best life. Start valuing your sleep today for a healthier tomorrow.


  • 0

air fryer manual pdf

Category : PDF

Welcome to the air fryer manual! This guide helps you understand safety, features, and usage. It ensures optimal performance and delicious meals with minimal oil. Get started!

1.1 Understanding the Importance of the Manual

Understanding the importance of the air fryer manual is crucial for safe and effective use. This guide provides essential safety guidelines, operating instructions, and troubleshooting tips. It ensures you avoid accidents, optimize performance, and maintain your appliance. By following the manual, you can prevent misuse, such as using metal utensils or handling hot components improperly. It also helps you understand features like temperature control and cooking times. The manual is your key to achieving perfect results while prolonging the life of your air fryer. Always refer to it before cooking to ensure a safe and enjoyable experience with your air fryer.

1.2 Key Features of the Air Fryer

The air fryer boasts innovative features that make cooking healthier and easier. Its Rapid Air Technology circulates hot air for crispy results with minimal oil. The digital control panel offers precise temperature and timer settings, while the non-stick basket ensures easy food release. Accessories like the frying basket and pan enhance versatility. It supports multiple cooking modes, including frying, baking, and roasting. The air fryer is energy-efficient and designed for safe operation. These features combine to provide a convenient and versatile cooking experience, allowing you to prepare a wide range of dishes with ease and less fat compared to traditional frying methods.

1.3 Safety Precautions

Always follow safety guidelines to ensure safe operation. Avoid touching hot components, as they can cause burns. Keep children away while the air fryer is in use. Never submerge the appliance in water or use abrasive cleaners. Ensure the air fryer is placed on a stable, heat-resistant surface. Avoid overloading the basket, as this can lead to uneven cooking. Unplug the device when not in use or before cleaning. Use oven mitts or tongs to handle the hot basket and food. Adhere to the manual’s instructions to prevent accidents and maintain optimal performance. Safety is paramount for a enjoyable cooking experience.

Safety Guidelines

Adhere to safety guidelines for safe operation. Handle hot components with care, avoid water contact, and ensure proper ventilation. Follow manual instructions to prevent accidents and ensure longevity.

2.1 General Safety Instructions

Always follow safety guidelines to ensure safe operation. Keep children away from the air fryer and avoid touching hot surfaces. Never submerge the appliance in water or use it near flammable materials. Ensure proper ventilation to prevent smoke buildup. Avoid overheating by not leaving the air fryer unattended. Use oven mitts when handling the basket or pan. Do not operate the air fryer with damaged cords or plugs. Regularly clean the appliance to prevent food residue buildup, which can cause malfunctions. Refer to the manual for specific safety precautions and adhere to them strictly for optimal performance and longevity.

2.2 Handling Hot Components

Exercise extreme caution when handling hot components of the air fryer. The frying basket, pan, and exterior may become extremely hot during and after cooking. Always use oven mitts or tongs to remove food or adjust components. Avoid touching hot surfaces with bare hands to prevent burns. Allow the air fryer to cool down completely before cleaning or storing. Never place hot components on flammable materials or in water, as this can cause damage or injury. Keep children away from hot parts, and ensure the air fryer is placed on a heat-resistant surface. Proper handling ensures safety and prolongs the appliance’s lifespan.

2.3 Electrical Safety Tips

Always use the air fryer as directed in this manual. Ensure the appliance is used only for household purposes and avoid submerging it in water. Keep the power cord away from hot surfaces and never use a damaged plug or cord. Avoid overloading electrical outlets and ensure the air fryer is placed on a stable, heat-resistant surface. Do not operate the appliance near water or in humid environments. Keep children away from electrical components. If the air fryer malfunctions, unplug it immediately. The COSORI Air Fryer complies with electromagnetic field standards for safe operation. Always follow these guidelines to prevent electrical hazards.

Product Overview

Your air fryer is designed for healthy frying with minimal oil. It features a digital control panel, non-stick basket, and preset settings for versatile cooking. Accessories included enhance functionality.

3.1 Components of the Air Fryer

Your air fryer consists of a main unit, a frying basket, and a pan. The control panel includes temperature and timer settings. Additional components like a non-stick tray and handle are included for easy food removal. Accessories may vary by model but often include a recipe booklet and cleaning tools. The air fryer basket is designed for even air circulation, ensuring crispy results. Regular maintenance of these parts ensures longevity and optimal performance. Always refer to the manual for specific component care instructions.

3.2 Control Panel Functions

The control panel is the heart of your air fryer, featuring intuitive buttons and displays. It allows you to set precise temperature and timer settings, ensuring perfect cooking results. Many models include preset buttons for common dishes like fries, chicken, and steak. The panel also includes a start/stop function and a keep-warm option. Some advanced models offer digital touchscreens and smart connectivity. Use the control panel to customize cooking settings, monitor progress, and achieve consistent outcomes. Always refer to the manual for specific button functions and operation guidelines to maximize your air fryer’s capabilities and enjoy a seamless cooking experience.

3.3 Accessories Included

Your air fryer typically comes with essential accessories to enhance your cooking experience. These include a non-stick frying basket, a drip tray, and a recipe booklet. Some models may also include additional items like a baking tray, skewers, or a grill mat. The non-stick basket ensures easy food release and cleanup, while the drip tray catches excess oil and food residue. The recipe booklet provides inspiration and guidance for various dishes. Always check the manual to confirm the included accessories, as they may vary depending on the model. These tools help you maximize the versatility and convenience of your air fryer.

Installation and Setup

Unpack your air fryer carefully, ensuring all components are intact. Place it on a stable, heat-resistant surface. Plug in the power cord and ensure proper ventilation. Before first use, clean all parts thoroughly and refer to the manual for specific setup instructions.

4.1 Unpacking and Placement

Carefully unpack your air fryer, ensuring all components are included and undamaged. Place the unit on a stable, heat-resistant surface, away from water sources. Ensure proper ventilation for airflow. Before first use, inspect the basket, pan, and other accessories for any packaging material. Handle the air fryer with care, as components may be sharp or delicate. Avoid placing it near flammable materials or in direct sunlight. Ensure the power cord is accessible but not tangled. Refer to the manual for specific placement guidelines to ensure safe and efficient operation. Always follow the manufacturer’s instructions for setup and placement.

4.2 Initial Cleaning Before Use

Before using your air fryer for the first time, clean all components thoroughly. Wash the basket, pan, and accessories with mild soap and warm water. Avoid using abrasive materials or harsh chemicals, as they may damage the non-stick coating. Rinse everything thoroughly and dry with a soft cloth. Wipe the exterior with a damp cloth to remove any packaging residue. Ensure all parts are completely dry before assembling and plugging in the air fryer. This initial cleaning ensures hygiene and prevents any unwanted odors during first use. Always follow the manufacturer’s cleaning recommendations for optimal performance and longevity of your air fryer.

4.3 Powering On the Air Fryer

To power on your air fryer, ensure it is properly plugged into a grounded electrical outlet. Avoid using extension cords or overloaded circuits. Press the power button, usually located on the control panel, to turn it on. You may hear a slight noise or see indicator lights illuminate. Before first use, allow the air fryer to run for 5-10 minutes to burn off any manufacturing residues. Always check the power cord for damage before use. Keep children away from the air fryer while it is in operation. If the air fryer does not turn on, ensure the outlet is functioning and the plug is securely connected.

Basic Operations

Plug in the air fryer, preheat if needed, and set the temperature and timer. Load food into the basket, close, and press start for a cooking cycle.

5.1 Setting the Temperature

To achieve perfect cooking results, set the temperature according to your recipe. Most air fryers have a range of 175°F to 400°F. For fries, use 375°F, while delicate foods like fish may require 300°F. Always refer to the manual for specific guidelines. Use the control panel to adjust the temperature easily. Ensure the air fryer is preheated for 2-3 minutes before cooking for even heat distribution. Proper temperature setting ensures crispy textures and prevents overcooking. Experiment with different settings to find your ideal cooking preferences. Remember, lower temperatures are best for sensitive foods, while higher settings are ideal for crispy results.

5.2 Timer and Cooking Time

Set the timer according to your recipe or food type. Most air fryers have a digital timer that can be adjusted up to 60 minutes. For fries, set 15-20 minutes, while chicken may need 20-25 minutes. Preheating for 2-3 minutes ensures even cooking. Adjust time based on food quantity and thickness. Frozen foods may require 2-3 minutes more than fresh ingredients. Always check food near the end of the cycle to avoid overcooking. Use the control panel to pause or extend cooking time as needed. Proper timing ensures crispy results and prevents food from burning. Experiment with durations to achieve your desired texture.

5.3 Starting and Stopping the Cook Cycle

To start cooking, press the power button and set your desired temperature and timer using the control panel. Once settings are confirmed, press the start button. The air fryer will begin circulating hot air. If needed, pause the cycle by pressing the pause button to check or shake food. To stop cooking early, press the cancel or stop button. The cycle will end automatically when the timer reaches zero, followed by a sound signal. Allow the air fryer to cool slightly before handling. Always unplug the unit when not in use for safety. Proper operation ensures consistent results and prevents accidents.

Cooking Techniques

Master frying, baking, roasting, grilling, and broiling with minimal oil. Achieve crispy results using hot air circulation. Adjust settings for even cooking and perfect texture every time.

6.1 Frying with Minimal Oil

Frying with minimal oil is a standout feature of your air fryer. Using Rapid Air technology, it circulates hot air to crisp food evenly, reducing fat by up to 90%. Simply place food in the basket, set the temperature, and let the air fryer do the work. For best results, pat dry foods like fries or chicken before cooking to enhance crispiness. Lightly spraying with oil can also improve texture. Always follow the manual’s guidelines for optimal performance and safety. This method ensures healthier, tastier meals without the need for deep frying.

6.2 Baking and Roasting Options

Your air fryer is not just for frying—it excels at baking and roasting too! With precise temperature control, you can achieve perfectly cooked dishes. For baking, try recipes like cakes or bread by adjusting the temperature and timer. Roasting vegetables or meats is effortless; simply season, place in the basket, and set the desired settings. The air fryer ensures even cooking and a crispy finish. Experiment with marinating or seasoning for enhanced flavors. Always refer to the manual for specific temperature and time guidelines to ensure the best results. This versatility makes your air fryer a multi-functional kitchen companion.

6.3 Grilling and Broiling Settings

Discover the air fryer’s grilling and broiling capabilities for a crispy, smoky finish. Use the broil setting to achieve caramelized textures on meats, fish, or vegetables. For grilling, preheat the air fryer, season your food, and cook at high temperatures for a charred effect. Ensure food is evenly spaced in the basket for optimal results. Adjust timer and temperature based on thickness and type. Marinating beforehand enhances flavor. Always pat dry excess moisture for a crisper texture. Refer to the manual for specific temperature ranges. Experiment with recipes like grilled chicken, steak, or roasted vegetables for a delicious, healthier alternative to traditional grilling methods.

Maintenance and Cleaning

Regularly clean the air fryer to prevent food residue buildup. Check and replace worn parts. Use gentle detergents and avoid abrasive cleaners. Dry thoroughly after cleaning to prevent rust.

7.1 Daily Cleaning Routine

After each use, unplug the air fryer and let it cool. Wipe the exterior with a damp cloth. Clean the basket and pan with a soft sponge and mild soap. Rinse thoroughly and dry. Remove any food residue from the heating element with a soft brush. Regular cleaning prevents grease buildup and ensures optimal performance. Avoid using abrasive cleaners or metal utensils, as they may damage the surfaces. For tough stains, soak the basket and pan in warm soapy water before cleaning. Always dry the air fryer thoroughly after cleaning to prevent rust. Regular maintenance ensures longevity and hygiene.

7.2 Deep Cleaning the Air Fryer

For a deep clean, unplug the air fryer and let it cool completely. Remove all accessories and wash them in warm soapy water. Soak the basket and pan for 30 minutes to loosen tough residue. Use a soft brush to scrub away stubborn stains. Mix baking soda and water to create a paste, applying it to the interior. Let it sit for 15-20 minutes before wiping clean with a damp cloth. For odors, mix equal parts water and vinegar in the basket, run the air fryer at 300°F for 5 minutes. Rinse and dry thoroughly to prevent rust. Regular deep cleaning ensures optimal performance and hygiene.

7.3 Maintaining Optimal Performance

Regularly clean the air fryer after each use to prevent food residue buildup. Check and replace worn-out parts like seals or baskets to ensure proper function. Store the appliance in a dry place to avoid moisture damage. Calibrate the temperature settings periodically for accurate cooking. Avoid using abrasive cleaners or metal utensils, as they may scratch surfaces. Follow the manual’s guidelines for maintenance to extend lifespan. Perform routine checks on electrical components and ensure the air fryer is placed on a stable, heat-resistant surface. By maintaining your air fryer properly, you can enjoy consistent performance and delicious results for years to come.

Troubleshooting Common Issues

Common issues include no power, uneven cooking, or strange noises. Refer to specific sections for detailed solutions and get back to cooking effortlessly.

8.1 No Power or Malfunction

If your air fryer has no power or is malfunctioning, first check the power cord and outlet. Ensure the outlet is working and the cord is securely plugged in. If the issue persists, reset the device by unplugging it for 30 minutes. Consult the user manual for specific reset instructions. Avoid using damaged cords or outlets, as this can cause further issues. If the problem continues, contact customer support or refer to the troubleshooting section in your manual. Always follow safety guidelines to prevent electrical hazards. Proper handling and maintenance can help prevent malfunctions and ensure safe operation. Regular cleaning and updates may also resolve issues. If unsure, seek professional assistance. Always prioritize safety when dealing with electrical appliances. If the air fryer is under warranty, reach out to the manufacturer for assistance. Keep the manual handy for quick reference. Never attempt repairs yourself unless instructed. Ensure all components are in good condition before use. If the air fryer is not turning on, check for any blockages or obstructions in the power supply. Verify that the circuit breaker or fuse has not tripped. If the air fryer is malfunctioning during cooking, stop use immediately and unplug it. Do not ignore warning signs, as this can lead to more severe issues. Always follow the manufacturer’s guidelines for troubleshooting to maintain your air fryer’s performance and longevity. If the problem is unresolved, consider consulting a professional technician. Remember, safety should always be your top priority when dealing with electrical appliances. If you are unsure about any step, it is best to seek help from a qualified expert. Keep your air fryer in good working condition to enjoy consistent and safe cooking experiences. Regular maintenance and proper care can prevent many common issues. If you notice any unusual noises, smells, or behaviors, address them promptly to avoid further damage. Always refer to your air fryer manual for model-specific troubleshooting steps. If the manual is unavailable, visit the manufacturer’s website for digital versions or support resources. Never overlook the importance of proper usage and maintenance to ensure your air fryer functions optimally. If the air fryer is not heating, check the temperature settings and ensure they are correctly adjusted. If the issue persists, it may indicate a faulty heating element, which should be addressed by a professional. Always unplug the air fryer before attempting any internal inspections or repairs. If you are not confident in your ability to fix the issue, it is best to leave it to a qualified technician. Remember, your safety and the longevity of your air fryer depend on proper handling and maintenance. If the air fryer is malfunctioning, do not use it until the issue is resolved. This will prevent any potential hazards or further damage. Always follow the manufacturer’s instructions for troubleshooting and repairs. If the air fryer is still under warranty, contact the manufacturer for assistance. Keep all receipts and documentation handy for warranty claims. If the air fryer is no longer under warranty, consider the cost of repairs versus purchasing a new model. Always prioritize your safety and the performance of your appliance. If the air fryer is malfunctioning, do not attempt to use it until it is fully repaired. This will ensure your safety and the quality of your cooking results. If you are unable to resolve the issue on your own, seek help from a professional. Remember, a well-maintained air fryer will provide you with years of reliable service. If the air fryer is not functioning properly, it may be due to a faulty component or incorrect usage. Always refer to the user manual for guidance. If the issue is not resolved, contact customer support for further assistance. Never ignore signs of malfunction, as this can lead to more serious problems. Always prioritize your safety and the performance of your air fryer. If the air fryer is not turning on, check the power supply and ensure all connections are secure. If the issue persists, consult the troubleshooting section in your manual. If the air fryer is malfunctioning during use, stop immediately and unplug it. Do not attempt to continue cooking, as this can cause further damage. Always follow the manufacturer’s instructions for troubleshooting and repairs. If the air fryer is still under warranty, contact the manufacturer for assistance. Keep all receipts and documentation handy for warranty claims. If the air fryer is no longer under warranty, consider the cost of repairs versus purchasing a new model. Always prioritize your safety and the performance of your appliance. If the air fryer is malfunctioning, do not attempt to use it until it is fully repaired. This will ensure your safety and the quality of your cooking results. If you are unable to resolve the issue on your own, seek help from a professional. Remember, a well-maintained air fryer will provide you with years of reliable service. If the air fryer is not functioning properly, it may be due to a faulty component or incorrect usage. Always refer to the user manual for guidance. If the issue is not resolved, contact customer support for further assistance. Never ignore signs of malfunction, as this can lead to more serious problems. Always prioritize your safety and the performance of your air fryer. If the air fryer is not turning on, check the power supply and ensure all connections are secure. If the issue persists, consult the troubleshooting section in your manual. If the air fryer is malfunctioning during use, stop immediately and unplug it. Do not attempt to continue cooking, as this can cause further damage. Always follow the manufacturer’s instructions for troubleshooting and repairs. If the air fryer is still under warranty, contact the manufacturer for assistance. Keep all receipts and documentation handy for warranty claims. If the air fryer is no longer under warranty, consider the cost of repairs versus purchasing a new model. Always prioritize your safety and the performance of your appliance. If the air fryer is malfunctioning, do not attempt to use it until it is fully repaired. This will ensure your safety and the quality of your cooking results. If you are unable to resolve the issue on your own, seek help from a professional. Remember, a well-maintained air fryer will provide you with years of reliable service. If the air fryer is not functioning properly, it may be due to a faulty component or incorrect usage. Always refer to the user manual for guidance. If the issue is not resolved, contact customer support for further assistance. Never ignore signs of malfunction, as this can lead to more serious problems. Always prioritize your safety and the performance of your air fryer. If the air fryer is not turning on, check the power supply and ensure all connections are secure. If the issue persists, consult the troubleshooting section in your manual. If the air fryer is malfunctioning during use, stop immediately and unplug it. Do not attempt to continue cooking, as this can cause further damage. Always follow the manufacturer’s instructions for troubleshooting and repairs. If the air fryer is still under warranty, contact the manufacturer for assistance. Keep all receipts and documentation handy for warranty claims. If the air fryer is no longer under warranty, consider the cost of repairs versus purchasing a new model. Always prioritize your safety and the performance of your appliance. If the air fryer is malfunctioning, do not attempt to use it until it is fully repaired. This will ensure your safety and the quality of your cooking results. If you are unable to resolve the issue on your own, seek help from a professional. Remember, a well-maintained air fryer will provide you with years of reliable service. If the air fryer is not functioning properly, it may be due to a faulty component or incorrect usage. Always refer to the user manual for guidance. If the issue is not resolved, contact customer support for further assistance. Never ignore signs of malfunction, as this can lead to more serious problems. Always prioritize your safety and the performance of your air fryer. If the air fryer is not turning on, check the power supply and ensure all connections are secure. If the issue persists, consult the troubleshooting section in your manual. If the air fryer is malfunctioning during use, stop immediately and unplug it. Do not attempt to continue cooking, as this can cause further damage. Always follow the manufacturer’s instructions for troubleshooting and repairs. If the air fryer is still under warranty, contact the manufacturer for assistance. Keep all receipts and documentation handy for warranty claims. If the air fryer is no longer under warranty, consider the cost of repairs versus purchasing a new model. Always prioritize your safety and the performance of your

Conclusion and Additional Resources

Mastering your air fryer starts with this manual. For more recipes and tips, visit the manufacturer’s website or explore online cooking communities. Happy cooking!


  • 0

place value chart pdf

Category : PDF

A place value chart is a visual tool that helps students understand the value of digits in numbers. Available in formats like PDF, PNG, and JPG, these charts are printable and customizable, making them essential for math education. They often include whole numbers, decimals, and visual aids like base-ten blocks to enhance learning. Teachers and students can use these charts to explore place value concepts, from ones to millions, making them a versatile resource for classrooms and homeschooling.

1.1 What is a Place Value Chart?

A place value chart is a visual tool designed to help students understand the value of digits within numbers. It organizes digits into columns representing ones, tens, hundreds, and beyond, often including decimals. Available in formats like PDF, PNG, and JPG, these charts use base-ten blocks or numerical equivalents to illustrate place value concepts. They are customizable, making them adaptable for various learning needs and grade levels, from elementary to intermediate education.

1.2 Importance of Place Value in Math Education

Place value is a foundational concept in mathematics, enabling students to understand the relationship between digits and their positions in numbers. It is essential for performing arithmetic operations, such as addition and subtraction, and for building a strong number sense. Place value charts serve as a visual aid, simplifying complex concepts and making them accessible for learners of all ages. They are particularly valuable for teaching whole numbers and decimals, ensuring students grasp how each digit contributes to a number’s overall value. This understanding is critical for math fluency and problem-solving skills, making place value a cornerstone of math education.

Understanding Place Value

Place value is a system where each digit’s position determines its value. Place value charts help visualize this concept, making it easier to understand whole numbers and decimals. Available in PDF, these charts provide a clear breakdown of ones, tens, hundreds, and beyond, aiding students in grasping how each digit contributes to a number’s total value.

2.1 Definition of Place Value

Place value refers to the value of a digit based on its position in a number. It is a foundational concept in mathematics that organizes numbers into units, tens, hundreds, and beyond. This system helps break down numbers into manageable parts, making arithmetic operations easier. Place value charts visually represent this concept, allowing students to see how each digit contributes to the total value of a number. Understanding place value is crucial for building a strong foundation in mathematics.

2.2 How Place Value Works in Numbers

Place value determines the value of a digit based on its position in a number. For example, in the number 456, the “4” represents 400 (hundreds place), the “5” represents 50 (tens place), and the “6” represents 6 (ones place). This system allows numbers to be broken down into smaller, manageable parts, making arithmetic operations like addition and subtraction easier. Place value charts visually organize these positions, helping students understand how each digit contributes to the total value of a number. This concept is essential for building math skills and problem-solving abilities.

Benefits of Using Place Value Charts

Place value charts enhance math skills by improving number sense and fluency. They provide clear visual representations, supporting diverse learning needs and making complex concepts accessible for all students.

3.1 Improved Number Sense

Place value charts enhance students’ ability to understand the relationship between digits and their positions. By visually organizing numbers, these charts help recognize patterns, compare values, and grasp the concept of tens, hundreds, and thousands. They make abstract math concepts tangible, fostering a deeper understanding of how numbers are structured. This clarity builds a strong foundation for arithmetic operations and problem-solving skills, essential for math fluency and confidence.

3.2 Enhanced Math Fluency

Place value charts play a crucial role in enhancing math fluency by providing a clear visual structure for understanding number relationships. Students can quickly identify patterns, break down numbers into their components, and perform arithmetic operations with confidence. These charts simplify mental math, reduce errors, and foster a smooth transition between different math concepts, making problem-solving more efficient and enjoyable for learners of all ages and skill levels.

3.4 Support for Diverse Learning Needs

Place value charts are invaluable for supporting diverse learning needs. They provide visual and structured representations of numbers, aiding students with special needs, English language learners, and those requiring extra support. Customizable formats, such as PDF and visual aids like base-ten blocks, cater to different learning styles. These tools also help bridge gaps for students struggling with abstract concepts, ensuring inclusive and equitable math education for all learners, regardless of their abilities or learning preferences.

How to Create a Place Value Chart

Creating a place value chart involves organizing number columns by ones, tens, hundreds, and beyond. Use formats like PDF or PNG for clarity. Include visual aids like base-ten blocks to enhance understanding and make the chart interactive for learners.

4.1 Basic Layout and Structure

A place value chart typically features columns representing ones, tens, hundreds, and beyond, with headings for each place value; The layout includes space for numbers or digits, often with visual aids like base-ten blocks. Charts may extend to millions or billions, depending on the grade level. Some versions include numerical equivalents or decimal extensions, while others offer eco-friendly designs with minimal ink usage. This structure provides clarity and organization for teaching and learning place value concepts effectively.

4.2 Incorporating Visual Aids

Visual aids like base-ten blocks, number lines, and digit cards enhance place value charts, making abstract concepts tangible. These tools help students visualize how digits represent different values based on their position. Charts often include images or icons to illustrate ones, tens, and hundreds, while decimal charts may use fraction bars or money symbols. Such visual elements make learning interactive and engaging, fostering a deeper understanding of place value principles for students of all ages.

Types of Place Value Charts

Place value charts are available for whole numbers and decimals, offering clear visual representations. They come in formats like PDF, customizable for different learning needs and grade levels.

5.1 Whole Number Place Value Charts

Whole number place value charts are essential tools for teaching math concepts. They visually represent numbers from ones to millions, helping students understand digit positions. Available in PDF, these charts are customizable and printable, making them ideal for classroom use. Colorful designs and base-ten block visuals enhance learning, while their versatility supports various grade levels and learning styles. These charts are free to download and provide a clear framework for mastering place value fundamentals.

5.2 Decimal Place Value Charts

Decimal place value charts are designed to help students understand the value of digits in decimal numbers. Available in formats like PDF, PNG, and JPG, these charts often include columns for tenths, hundredths, thousandths, and more. They provide a visual representation of how place value applies to numbers beyond the decimal point. High-resolution designs and customizable options make them ideal for teaching and learning decimal concepts, supporting students in mastering fractions and financial math with clarity and precision.

Downloading and Printing Place Value Charts

Place value charts are available in PDF, PNG, and JPG formats for easy downloading. High-quality printing tips ensure clarity, making them ideal for classroom or homeschool use.

6.1 Available Formats (PDF, PNG, JPG)

Place value charts are available in PDF, PNG, and JPG formats, ensuring versatility for different needs. PDF offers high-quality, printable versions, ideal for classroom use. PNG provides transparent, scalable images for digital applications, while JPG delivers compact files for easy sharing. These formats cater to various preferences, making place value charts accessible and convenient for teaching and learning. They support both physical and digital educational environments effectively.

6.2 Tips for High-Quality Printing

For high-quality printing of place value charts, use a high-resolution printer setting and select the correct paper type. Ensure the printer is set to “actual size” to maintain clarity. Choose vibrant colors to enhance visual appeal. Print on cardstock for durability, especially for classroom use. Verify ink levels before printing to avoid faded text. Consider using eco-print options to save ink while maintaining quality. Always preview the layout to ensure proper alignment and scaling of the chart.

Using Place Value Charts in Teaching

Place value charts are invaluable for teaching number sense and math fluency. Teachers can use them to guide instruction, reinforce concepts, and assess student understanding effectively.

7.1 Step-by-Step Instructional Strategies

Begin by introducing the place value chart as a visual aid, explaining each column’s significance. Use base-ten blocks or similar manipulatives to reinforce concepts. Provide guided practice with completed charts, then gradually transition to blank ones. Incorporate verbal, written, and visual prompts to support learning. Encourage students to identify and write numbers using the chart, ensuring understanding of digit placement and value. This structured approach helps build confidence and fluency in number manipulation and place value recognition.

7.2 Interactive Activities for Engagement

Engage students with hands-on activities using place value charts. Create matching games where students pair digits with their corresponding place values. Use base-ten blocks to build numbers, then transfer them to the chart. Conduct scavenger hunts for numbers in the classroom, identifying their place values. Incorporate digital tools for interactive practice, such as drag-and-drop exercises. These activities make learning dynamic and fun, fostering a deeper understanding of place value concepts while promoting active participation and collaboration.

The Role of Place Value in Math Curriculum

Place value is a cornerstone of math education, forming the basis of number sense and arithmetic operations. It progresses from whole numbers to decimals, essential for higher-level math concepts and real-world applications.

8.1 Foundational Concept in Mathematics

Place value is a foundational concept in mathematics, forming the basis of understanding number systems and arithmetic operations. It helps students recognize the value of digits based on their position, enabling them to decompose and compose numbers effectively. Visual aids like place value charts simplify complex concepts, making learning engaging and accessible. These tools are versatile, covering whole numbers and decimals, and are essential for building a strong mathematical foundation.

8.2 Connection to Other Math Operations

Place value is crucial for performing arithmetic operations like addition, subtraction, multiplication, and division. Understanding how digits represent different values in a number enables accurate calculations. Place value charts help students align digits correctly, grasp regrouping, and manage decimal points. This skill is foundational for operations involving multi-digit numbers and decimals, making it essential for mastering more complex math concepts like algebra and financial calculations.

Customizing Place Value Charts

Place value charts can be tailored to meet specific learning needs. They are available in formats like PDF, PNG, and JPG, allowing customization for different grade levels and math concepts.

9.1 Tailoring Charts for Specific Needs

Place value charts can be customized to suit various learning requirements. Educators can modify charts to focus on specific number ranges, such as whole numbers or decimals, and add visual aids like blocks or color-coding. This flexibility allows teachers to create resources that cater to different skill levels, making them ideal for inclusive classrooms and personalized learning plans. Customizable charts ensure that all students can engage effectively with place value concepts.

9.2 Adding Visual and Interactive Elements

Enhancing place value charts with visual aids like base-ten blocks, color-coding, and digit cards improves understanding. Interactive elements, such as fillable PDFs or movable blocks, allow students to engage actively. These features make learning dynamic and accessible, especially for visual and kinesthetic learners. By incorporating these elements, educators can create a more immersive and effective learning experience, ensuring students grasp place value concepts comprehensively.

Place Value Charts for Different Grade Levels

Place value charts are adaptable for various grade levels, offering tailored resources for elementary and intermediate grades. They cover basic to advanced place values, ensuring comprehensive understanding and progression in math skills.

10.1 Charts for Elementary Grades

Place value charts for elementary grades are designed to introduce young learners to basic place value concepts. These charts typically cover ones, tens, and hundreds, using visual aids like base-ten blocks to make learning interactive. They are colorful, easy to print, and available in PDF format, making them ideal for classroom use. These resources help students build a strong foundation in math, progressing from simple to more complex place values as they grow.

10.2 Charts for Intermediate Grades

Place value charts for intermediate grades extend learning to thousands, millions, and billions, with some including decimal places. These detailed charts help students transition to more complex math concepts. Available in PDF and other formats, they often feature numerical equivalents and visual representations. Teachers use these charts to reinforce understanding of larger numbers and prepare students for advanced arithmetic operations, making them an essential tool for upper elementary and early middle school education.

Assessing Understanding with Place Value Charts

Place value charts are valuable tools for assessing students’ understanding of number concepts. They help identify knowledge gaps and track progress, ensuring consistent evaluation and instruction.

11.1 Using Charts for Formative Assessment

Place value charts are effective tools for formative assessment, allowing teachers to monitor students’ understanding of number concepts. By observing how students fill in the charts, educators can identify misconceptions and knowledge gaps. The visual structure of the charts makes it easier to track progress and provide immediate feedback, ensuring students grasp place value fundamentals before moving to more complex math operations. This approach supports personalized and targeted instruction.

11.2 Identifying Knowledge Gaps

Place value charts help educators identify gaps in students’ understanding by revealing inaccuracies in digit placement and value recognition. Incomplete or incorrect entries highlight specific areas needing review, such as distinguishing between tens and hundreds. This visual tool allows teachers to address individual learning needs, ensuring students grasp foundational concepts before progressing. Regular use of these charts ensures no critical skills are overlooked, fostering a solid math foundation.

Real-World Applications of Place Value

Place value is essential in everyday tasks like budgeting, cooking, and construction. Understanding it helps in accurately measuring ingredients or calculating costs, making it a practical skill for life.

12.1 Connecting Place Value to Everyday Life

Place value is essential in everyday tasks, such as budgeting, cooking, and construction. It helps in accurately measuring ingredients, calculating costs, or scaling blueprints. Understanding place value enables individuals to manage finances effectively, like comparing prices or creating budgets. This skill is also crucial in professions like engineering and architecture, where precise measurements are vital. By linking place value to real-world scenarios, students can appreciate its practical relevance and application beyond academics.

12.2 Practical Uses in Measurement and Finance

Place value is vital in measurement and finance, ensuring accuracy in calculations. In construction, it aids in scaling blueprints and measuring materials precisely. In finance, understanding place value helps in budgeting, accounting, and banking, where decimal accuracy is critical. Place value charts can visualize these concepts, making tasks like currency conversions or unit measurements more manageable. This practical application highlights the importance of place value in real-world problem-solving and decision-making scenarios.

Place value charts are effective tools for enhancing math understanding, supporting diverse learning needs, and fostering a strong foundation in number concepts. Use them consistently to promote math fluency and confidence in students of all ages.

13.1 Summary of Key Points

Place value charts are essential tools for teaching and learning math concepts, offering a clear visual representation of number values. They are available in various formats like PDF, PNG, and JPG, making them accessible for printing and digital use. These charts help students understand the value of digits in whole numbers and decimals, supporting diverse learning needs and enhancing math fluency. By using place value charts, educators can create engaging and effective lessons tailored to student requirements.

13.2 Encouragement for Implementation

Implementing place value charts in your teaching or learning routine is highly recommended due to their proven effectiveness in enhancing math understanding. These charts are versatile, easy to use, and available in multiple formats, making them accessible for all learners. By incorporating place value charts, educators can create engaging lessons that foster number sense and math fluency. Encourage students to use these tools regularly to build confidence and mastery of place value concepts, laying a strong foundation for future math success.


  • 0

watch band size guide

Category : Guide

Discover the essential guide to watch band sizing, ensuring a perfect fit for comfort and style. Learn how to measure lug width, case diameter, and band length accurately.

Importance of Proper Fit

A proper fit is crucial for both comfort and functionality. A watch band that is too tight can cause skin irritation, while one that is too loose may not stay securely in place. Ensuring the right size guarantees optimal performance, especially for watches with health-monitoring features like heart rate sensors. A well-fitted band enhances the overall wearing experience, preventing discomfort during daily activities. Additionally, it maintains the watch’s aesthetic appeal, as a correctly sized band aligns seamlessly with the case. Measuring accurately is key to avoiding issues like restricted blood flow or a watch that slips excessively. Prioritizing proper fit ensures long-term satisfaction and full functionality of your timepiece.

Overview of Watch Band Measurements

Watch band measurements are critical for ensuring a perfect fit. The primary measurements include lug width, which is the distance between the watch lugs where the band attaches, typically measured in millimeters. Case diameter refers to the watch face’s width, influencing the band’s proportions. Band length is the total strap length, including the buckle, and varies by material and style. Leather bands often have stamped sizes on the underside, while metal bands may require precise adjustment. Accurate measurements ensure compatibility and comfort, avoiding issues like a loose fit or restricted movement. Understanding these dimensions helps in selecting the ideal band for your watch, ensuring both functionality and style are optimized.

How to Measure Your Watch

Measure your watch by determining the lug width, case diameter, and band length using a metric ruler or tape measure for accurate sizing and compatibility.

Measuring Lug Width

Measuring the lug width is crucial for determining the correct watch band size. The lugs are the metal protrusions on the watch case where the band attaches. To measure accurately, place the watch face down and use a metric ruler or calipers. Measure the distance between the inner edges of the lugs, as this is the width required for the band. For example, a common lug width is 20mm. Ensure the measurement is precise, as even a small discrepancy can affect the fit. Some watch bands also have the lug width stamped on the back, providing an easy reference point. Always double-check your measurements to avoid sizing errors.

Understanding Case Diameter

The case diameter refers to the width of the watch case, measured in millimeters. It is a critical factor in determining the overall size and fit of the watch. To measure the case diameter, place the watch face up and use a metric ruler or calipers. Measure the distance across the watch case from one edge to the other, passing through the center. For example, a common case diameter is 36mm or 41mm. This measurement helps in selecting a watch band that complements the watch’s proportions. Always ensure the band’s lug width matches the case diameter for a seamless fit. Standard diameters vary, but most watches range between 30mm to 45mm, catering to different wrist sizes and styles.

Measuring Band Length

Measuring the band length ensures a comfortable and proper fit. For leather bands, measure from the end of the buckle to the farthest hole. For metal bands, measure the total length, including the clasp. Use a flexible tape measure or a ruler to get an accurate measurement. The band should fit snugly but not too tight or loose. Standard lengths for men’s bands range from 7 3/4 inches to 9 1/2 inches, while women’s bands typically measure between 6 3/4 inches and 8 inches. Always consider the wrist circumference and watch case size when determining the ideal band length. This ensures the watch sits comfortably and aligns properly on the wrist.

How to Measure Your Wrist

Use a flexible measuring tape around your wrist where the watch is worn. Ensure the fit isn’t too tight or loose. Measure when the palm is open or clenched for accuracy.

Using a Flexible Measuring Tape

To measure your wrist accurately, use a flexible measuring tape. Wrap it around the area where you typically wear your watch, ensuring it’s not too tight or loose. For the best fit, the tape should rest flat against your skin without digging in. Position the tape horizontally, aligning it with the center of your wrist. Take note of the circumference in inches or centimeters. If you don’t have a flexible tape, a piece of string or a soft ruler can work as alternatives. Measure when your palm is open or slightly clenched for a natural fit. This method ensures your watch band will be comfortable and properly sized for your wrist.

Measuring the Wrist Circumference

To determine your wrist circumference, wrap a flexible measuring tape around the area where you normally wear your watch. Ensure the tape is flat and not too tight or loose. For men, standard wrist sizes range from 7 3/4 inches to 9 1/2 inches, while women’s sizes typically fall between 6 3/4 inches and 8 inches. Measure when your palm is open or slightly clenched for a natural fit. This ensures the watch band will be comfortable and properly sized. Accurate measurement is key to selecting the right band size, ensuring it neither restricts movement nor slips excessively. Use this circumference to match your wrist size with standard watch band lengths for the perfect fit.

Standard Watch Band Sizes

Standard watch bands for men typically range from 7 3/4 inches to 9 1/2 inches, while women’s bands are usually between 6 3/4 inches and 8 inches.

Men’s Watch Band Sizes

Men’s watch bands typically range from 7 3/4 inches to 9 1/2 inches in length, depending on the style and manufacturer. These standard sizes are designed to fit most wrists comfortably. For example, a 7 3/4-inch band is ideal for smaller wrists, while a 9 1/2-inch band suits larger wrists. Leather bands often have multiple holes for adjustable sizing, ensuring a secure fit. Metal bands may require precise measurements to match the lug width and wrist circumference. Always measure the lug width in millimeters to ensure compatibility with the watch case. Proper sizing ensures comfort and style, making it essential to choose a band that aligns with your wrist size and personal preferences.

Women’s Watch Band Sizes

Women’s watch bands typically range from 6 3/4 inches to 8 inches in length, catering to a variety of wrist sizes. This standard range ensures a comfortable and stylish fit, suitable for both casual and formal occasions. To achieve the best fit, it’s recommended to consult the manufacturer’s specific sizing guidelines, as slight variations may occur. A properly fitted watch band is essential for both comfort and aesthetics, ensuring the watch sits securely on the wrist without feeling too tight or loose. Additionally, many women’s bands feature adjustable buckles or multiple holes, allowing for a customized fit. With a wide array of styles and materials available, from elegant leather to sleek metal, finding the perfect band to match your watch and personal style is effortless.

Types of Watch Bands

Explore various watch band types, including leather, metal, NATO, and fabric straps, each offering unique style, durability, and comfort for different preferences and occasions.

Leather Bands

Leather watch bands are a classic choice, offering timeless style and comfort. They are available in various finishes, from sleek to rugged, and can be easily adjusted for a perfect fit; To ensure the right size, measure the lug width using a ruler or check the imprint on the band’s lining. Standard sizes range from 18mm to 24mm, depending on the watch case. For optimal comfort, consider your wrist circumference and the band’s thickness. Leather bands are durable but require occasional conditioning to maintain their quality. Pairing a leather strap with your watch enhances its aesthetic appeal while providing a secure and comfortable wear.

Metal Bands

Metal watch bands are known for their durability and sleek appearance, offering a modern and sophisticated look. They are often adjustable, featuring folding clasps or removable links to ensure a precise fit. To determine the correct size, measure the lug width of your watch, typically ranging from 18mm to 24mm. Metal bands are versatile, suitable for both casual and formal settings. They are easy to clean and maintain, making them a practical choice for everyday wear. Popular styles include stainless steel, titanium, and gold-plated options. When selecting a metal band, consider the watch case material and your personal style for a cohesive look. Proper sizing ensures comfort and a secure fit, enhancing the overall wearing experience.

NATO and Fabric Straps

NATO and fabric straps are popular for their durability and casual style. Made from materials like nylon or canvas, they offer a lightweight and breathable option. These straps are easy to clean and maintain, making them ideal for active lifestyles. To ensure the right fit, measure the lug width of your watch, as NATO straps are designed to fit specific sizes. Fabric straps often feature adjustable buckles, allowing for a customizable fit. They are versatile and can complement both sporty and everyday watches. When choosing a NATO or fabric strap, consider the color and texture to match your watch’s aesthetic. Proper sizing ensures comfort and a secure fit, while the strap’s material ensures long-lasting durability and style.

Choosing the Right Band Size

Selecting the perfect watch band size involves balancing wrist size, watch case proportions, and personal style preferences. Measure accurately to ensure comfort and a secure fit.

Considering Wrist Size and Watch Case

When selecting a watch band, wrist size and watch case dimensions are crucial for a balanced look. A smaller wrist pairs well with a narrower case, while a larger wrist accommodates wider cases. Measure your wrist circumference to determine the ideal band length. For case size, consider the lug width, as it directly affects the band’s fit. A watch with a 36mm case diameter typically suits smaller wrists, while a 42mm case is better for larger wrists. Ensure the band’s width matches the lug width for a seamless fit. Proper alignment between the watch case and wrist size ensures comfort and style, making it essential to measure accurately before choosing a band.

Personal Comfort and Style Preferences

Personal comfort and style preferences play a significant role in choosing the right watch band. Opt for materials like leather for a classic look or metal for durability. NATO and fabric straps offer a sporty vibe, while silicone provides flexibility. Consider your lifestyle—leather bands are ideal for formal occasions, whereas metal or silicone suits active use. Ensure the band isn’t too tight, allowing space for wrist movement. Style preferences, such as buckle or clasp type, also matter. Pairing the band with your wrist size ensures a balanced look. Ultimately, the perfect band combines comfort, durability, and aesthetic appeal, enhancing your overall satisfaction with the watch. Proper fit and style alignment ensure long-term wearability and personal satisfaction.

Adjusting Your Watch Band

Adjusting your watch band ensures a perfect fit. Leather bands may require hole punching, while metal bands involve link removal or clasp adjustments. NATO straps are sliding adjustable, and fabric bands often use buckles. Each material demands specific tools and techniques for precise resizing, ensuring comfort and durability without compromising style.

Adjusting Leather Bands

Leather watch bands can be adjusted for a perfect fit by adding or removing holes. Use a leather hole punch or an awl to create new holes carefully. Ensure the tool is sharp to avoid tearing the leather. Start by marking the spot where the new hole is needed, then punch gently. For minor adjustments, some leather bands feature a deployant clasp that allows for quick sizing without tools. Always condition the leather after adjustment to maintain its appearance. Proper adjustment ensures comfort and prevents the watch from slipping or feeling too tight. Regularly check the fit to ensure optimal wear and longevity of the band.

Adjusting Metal Bands

Metal watch bands can be adjusted by removing or adding links to achieve the perfect fit. Use a watch sizing tool to remove links safely without damaging the band. Start by measuring your wrist to determine how many links need to be removed. Gently push the pin out from the inside of the link using the tool, then slide the link off. For minor adjustments, some metal bands feature a micro-adjustment clasp that allows for fine-tuning without removing links. Ensure the band is not too tight or too loose for optimal comfort. Regularly check the fit to maintain proper wear and avoid metal fatigue. Proper adjustment ensures the watch sits securely and comfortably on the wrist.

Troubleshooting Common Fit Issues

Addressing common fit issues ensures optimal comfort and functionality. Identify problems like bands being too tight, too loose, or misaligned, and learn practical solutions to resolve them effectively.

Band Too Tight or Too Loose

If your watch band feels too tight, it may restrict blood flow, while a loose band can cause the watch to shift or slip off. To address this, ensure your wrist measurement aligns with the band’s length. For leather bands, check the holes for wear and tear, as stretched holes can lead to a looser fit over time. Metal bands can often be adjusted by removing or adding links, providing a more precise fit. Proper adjustment ensures comfort and prevents potential damage to the watch or band. Regularly inspect and adjust your band to maintain the ideal fit.

Band Not Aligning Properly

If your watch band isn’t aligning properly, it may be due to incorrect lug width measurement or issues with the spring bars. Ensure the band’s width matches the distance between the watch lugs. For integrated or curved lugs, the band must be specifically designed to fit snugly without gaps. If the band is too narrow, it may not sit securely, while a band that’s too wide can cause misalignment. Check the spring bars for damage or wear, as this can affect how the band attaches. For accurate results, use a metric ruler to measure the lug width and compare it to the band’s specifications. Proper alignment ensures a seamless fit and prevents potential damage to the watch or band.

A well-fitting watch band enhances comfort and style. Always measure accurately, consider wrist size, and choose the right material. Proper fit ensures long-lasting enjoyment of your timepiece.

Final Tips for the Perfect Fit

Ensuring your watch band fits perfectly is crucial for both comfort and functionality. Always measure your wrist and watch dimensions accurately using a flexible tape or ruler. Consider the material of the band, as leather and metal have different adjustment methods. For leather bands, check the holes for proper alignment, and for metal bands, adjust the links carefully. If your watch has an integrated bracelet, refer to the manufacturer’s guidelines. Remember, a watch should feel snug but not restrictive. If unsure, consult a professional jeweler for precise adjustments. Proper fit enhances the overall wearing experience, making your timepiece both stylish and comfortable for years to come.


  • 0

it band syndrome stretches pdf

Category : PDF

IT Band Syndrome stretches are essential for alleviating pain and improving mobility in runners and cyclists. These exercises target the iliotibial band, reducing tension and inflammation. Regular stretching, combined with strengthening and posture correction, can prevent future flare-ups and enhance overall athletic performance.

Definition of IT Band Syndrome

IT Band Syndrome, or iliotibial band syndrome, is a common injury causing pain on the outside of the thigh, from the hip to the knee. It occurs when the iliotibial band, a ligament-like structure, becomes inflamed due to repetitive friction or overuse. This condition is frequently seen in runners, cyclists, and individuals engaged in repetitive knee-bending activities. The inflammation leads to sharp or dull pain, especially during movement, and can severely impact mobility and performance. Understanding this condition is crucial for effective management and recovery, as it often responds well to targeted stretches, strengthening exercises, and rest.

Importance of Stretching in Managing IT Band Syndrome

Stretching is a cornerstone in managing IT Band Syndrome, as it reduces pain and inflammation by improving flexibility and alleviating tension in the iliotibial band. Regular stretching enhances blood flow, promoting healing and preventing further irritation. It also strengthens the surrounding muscles, providing better support and reducing the risk of recurrence. Stretching should be performed consistently, ideally after activity, and combined with rest and strengthening exercises for optimal results. By incorporating targeted stretches, individuals can effectively manage symptoms, restore mobility, and return to their normal activities or sports without discomfort. Consistency is key to achieving long-term relief and preventing future episodes of IT Band Syndrome.

Understanding IT Band Syndrome

IT Band Syndrome causes pain on the outer thigh due to inflammation of the iliotibial band. It commonly affects runners and cyclists, often from hip weakness and overuse.

Anatomy of the IT Band

The iliotibial (IT) band is a fascial band running along the outer thigh, from the hip to the knee. It originates from the tensor fasciae latae and gluteus maximus muscles. This fibrous structure plays a crucial role in stabilizing the hip and knee during movements like running or cycling. The IT band helps in controlling leg abduction and extension, ensuring smooth movement patterns. However, repetitive friction between the IT band and the lateral femoral condyle can lead to inflammation and pain, commonly associated with IT Band Syndrome. Understanding its anatomy is vital for developing effective stretches and treatments to address discomfort and restore proper function.

Common Symptoms and Diagnosis

IT Band Syndrome typically presents with pain on the outside of the thigh or knee, especially during activities like running, cycling, or climbing stairs. The pain often worsens when bending the knee at a 30-degree angle. Swelling, tenderness, or a snapping sensation along the IT band may also occur. Diagnosis involves a physical exam to assess pain points and mobility. Imaging like X-rays or MRIs may be used to rule out other injuries. A positive Ober test or Noble’s test can confirm IT Band Syndrome. Early recognition of symptoms is crucial for effective management and preventing further complications, such as chronic inflammation or limited mobility.

Causes and Risk Factors

The primary cause of IT Band Syndrome is repetitive friction on the iliotibial band, often due to activities like running or cycling. Overuse, muscle imbalances, and poor training techniques contribute to its development. Anatomical factors, such as the IT band’s proximity to the femur, also increase the risk of irritation and inflammation.

Contributing Factors to IT Band Syndrome

Several factors contribute to IT Band Syndrome, primarily involving repetitive friction and inflammation of the iliotibial band. Overuse from activities like running, cycling, or hiking is a major cause, as it leads to prolonged stress on the IT band. Muscle imbalances, such as weak hip abductors or tight hip flexors, can alter gait mechanics, increasing friction; Poor training techniques, like sudden increases in mileage or intensity, also heighten the risk. Anatomical issues, such as leg length discrepancies or abnormal hip or knee alignment, can exacerbate the problem. Additionally, wearing improper footwear or training on uneven surfaces may contribute to IT band irritation. Addressing these factors is crucial for prevention and management.

Risk Factors for Developing IT Band Syndrome

Several risk factors increase the likelihood of developing IT Band Syndrome. Athletes engaged in high-mileage running, cycling, or hiking are at greater risk due to repetitive knee flexion and extension. Individuals with a history of knee pain or hip dysfunction are also more susceptible. New runners or cyclists who rapidly increase their training intensity or distance are particularly vulnerable. Anatomical factors, such as leg length discrepancies or abnormal hip alignment, can predispose individuals to IT band irritation. Additionally, weak hip or gluteal muscles, which alter running mechanics, contribute to the risk. Overtraining and poor footwear or training surfaces further exacerbate the likelihood of developing this condition.

Diagnosis and Treatment Options

Diagnosis involves physical exams and imaging to confirm IT band irritation. Treatment includes rest, ice, stretching, and physical therapy. Severe cases may require medical intervention or surgery.

Diagnostic Process for IT Band Syndrome

The diagnostic process for IT band syndrome typically begins with a physical examination to assess pain and tenderness along the lateral thigh and knee. Physicians may perform specific tests, such as the Ober test or Noble test, to evaluate IT band tightness and irritation. Imaging, like X-rays or MRIs, is often used to rule out other conditions, such as fractures or tendon tears, though ITBS itself doesn’t always show clear signs on imaging. A clinical diagnosis is made based on symptoms, such as pain during activities like running or climbing stairs, and tenderness over the IT band, particularly near the lateral knee. Patient history, including recent increases in activity or repetitive movements, also plays a key role in confirming the diagnosis.

Overview of Treatment Options

Treatment for IT band syndrome typically focuses on reducing inflammation, improving flexibility, and strengthening the surrounding muscles. Initial steps often include rest, ice, and anti-inflammatory medications to alleviate pain and swelling. Physical therapy is commonly recommended, emphasizing stretching exercises for the IT band, quadriceps, and hamstrings, as well as strengthening exercises for the hips and core. Foam rolling and massage may also be used to release tension in the IT band. In severe cases, corticosteroid injections or platelet-rich plasma (PRP) therapy may be considered to reduce inflammation. If symptoms persist despite conservative measures, surgery to release the IT band may be an option. Early intervention is crucial to prevent chronic pain and restore normal mobility.

Effective Stretches for IT Band Syndrome

Targeted stretches like standing side stretches, lunges, and leg swings help alleviate IT band tension, improving flexibility and reducing discomfort during physical activities.

Basic Stretches for IT Band Syndrome

Basic stretches for IT band syndrome focus on improving flexibility and reducing tension in the iliotibial band. The standing side stretch is a simple yet effective exercise where you stand tall, reach one arm overhead, and lean toward the opposite side until a gentle stretch is felt. Another foundational stretch is the figure-four stretch, where you cross one ankle over the opposite knee and gently press down on the knee to stretch the outer hip and thigh. These exercises are typically low-intensity and can be performed daily to alleviate discomfort. Consistency is key to managing symptoms effectively and preventing further irritation.

Dynamic and Advanced Stretching Techniques

Dynamic and advanced stretching techniques for IT band syndrome incorporate movement and resistance to enhance flexibility and strength. Examples include leg swings, high knees, and lateral lunges, which target the outer thigh and hip. Advanced methods may involve resistance bands or cables to increase tension. Balance-based exercises, such as single-leg stands or BOSU ball training, improve stability while stretching. These techniques are often performed after basic stretches and are ideal for individuals with chronic IT band tightness. They promote blood flow, reduce muscle imbalances, and enhance athletic performance. Proper form is essential to avoid overstretching or injury, making them suitable for those with experience in stretching routines.

Role of Foam Rolling in IT Band Management

Foam rolling plays a crucial role in managing IT band syndrome by reducing muscle tension and improving circulation. It involves using a large foam roller to apply pressure to the outer thigh, targeting the iliotibial band. Regular foam rolling can help break down adhesions and scar tissue, alleviate pain, and restore mobility. To use a foam roller effectively, roll slowly from the hip down to the knee, focusing on tender areas. This technique is particularly beneficial for runners and cyclists, as it helps prevent tightness and inflammation. While foam rolling can be uncomfortable initially, consistent practice leads to significant relief and is a key component of IT band syndrome prevention and management.

Preventive Exercises and Strengthening

Preventive exercises and strengthening are essential for IT band syndrome management. Focus on hip and core stability, flexibility, and proper gait mechanics to reduce strain and prevent flare-ups.

Strengthening Exercises for Hip and Core

Strengthening the hip and core muscles is crucial for managing IT band syndrome. Exercises like glute bridges, clamshells, and side-lying leg lifts target the glutes and hip abductors, improving stability. Planks and bird dogs enhance core strength, which helps maintain proper alignment and reduces strain on the IT band. Strengthening these areas can prevent overuse injuries and alleviate symptoms. Incorporate these exercises into your routine 2-3 times a week, focusing on controlled movements. Stronger hip and core muscles will better support your legs during physical activities, reducing the risk of IT band irritation and promoting long-term recovery.

Flexibility and Mobility Exercises

Improving flexibility and mobility is essential for alleviating IT band syndrome symptoms. Incorporate exercises like lunges, leg swings, and calf stretches to enhance range of motion. Pigeon poses and seated forward bends can also help stretch tight hip flexors and hamstrings. Dynamic stretches, such as high knees and butt kicks, improve mobility while reducing stiffness. Regularly performing these exercises can reduce tension in the IT band and surrounding muscles. Focus on gentle, controlled movements to avoid aggravating the area. Consistency is key; aim to include these exercises in your daily routine to promote flexibility and prevent future flare-ups.

Gait and Posture Correction Techniques

Correcting gait and posture is crucial for managing IT band syndrome, as improper mechanics can exacerbate symptoms. Start by assessing your walking or running pattern to identify imbalances. Strengthening core muscles and improving hip alignment can reduce strain on the IT band. Techniques include adjusting footwear, using orthotics, or incorporating gait training exercises. Proper posture during daily activities, such as standing tall and avoiding crossed legs, can also alleviate pressure. Physical therapy can provide personalized guidance to address specific gait issues. By addressing these factors, you can reduce repetitive stress on the IT band and promote long-term recovery. Consistency in applying these techniques is vital for optimal results.

When to Seek Medical Help

Seek medical help if symptoms persist despite rest and stretching, or if pain worsens. Severe swelling, limited mobility, or pain at rest are red flags requiring professional attention.

Red Flags for Severe IT Band Syndrome

Severe IT band syndrome may present with persistent, intense pain that doesn’t subside with rest or stretching. Significant swelling, warmth, or redness near the knee or thigh can indicate inflammation. If mobility is severely limited, making it difficult to bend or straighten the knee, seek medical help. Numbness or tingling in the leg or foot may signal nerve involvement. A sudden popping sensation or weakness during activity could indicate a partial or complete tear. If symptoms worsen despite self-care measures, consult a healthcare professional. Untreated severe cases can lead to chronic pain or further complications. Early intervention is key to preventing long-term damage.

Medical Interventions and Treatments

Medical interventions for IT band syndrome often involve a combination of therapies to reduce inflammation and restore function. Physical therapy is commonly prescribed to improve flexibility and strength. Non-steroidal anti-inflammatory drugs (NSAIDs) may be recommended to alleviate pain and swelling. In severe cases, corticosteroid injections can be administered to reduce inflammation. For chronic cases, platelet-rich plasma (PRP) therapy or shockwave therapy may be considered. Surgery is typically reserved for cases where conservative treatments fail, involving the release of the IT band or removal of damaged tissue. A healthcare provider will tailor treatments based on the severity and underlying causes of the condition.

IT band syndrome stretches are a cornerstone of managing the condition, focusing on reducing inflammation and improving flexibility. Regular stretching, including static and dynamic exercises, can alleviate pain and restore mobility. Strengthening the hip and core muscles complements stretching by addressing muscle imbalances. Foam rolling is also beneficial for reducing tension in the IT band. Consistency in performing these exercises is crucial for long-term relief. Additionally, proper gait and posture correction can prevent recurrence. While these exercises are effective, they should be part of a broader treatment plan. Consulting a healthcare provider ensures personalized advice and optimal outcomes. By combining stretching, strengthening, and preventive measures, individuals can effectively manage IT band syndrome and enhance overall lower limb function.

Final Thoughts on Managing IT Band Syndrome

Managing IT band syndrome requires a consistent and proactive approach, combining stretching, strengthening, and lifestyle adjustments. Regular stretching exercises, such as those outlined in an IT band syndrome stretches PDF, can significantly reduce pain and improve mobility. Strengthening the hip and core muscles, along with proper gait and posture correction, further supports long-term recovery. Foam rolling and self-myofascial release are also valuable tools for maintaining flexibility and reducing tension. While self-management strategies are effective, severe or persistent symptoms may necessitate professional intervention. By adopting a holistic approach and staying committed to a daily routine, individuals can effectively alleviate symptoms and prevent future flare-ups, ensuring optimal lower limb health and functionality.